Tactical Positions · 4 approved

Tactical position on WhiteRockCastle
Map overviewclick to expand

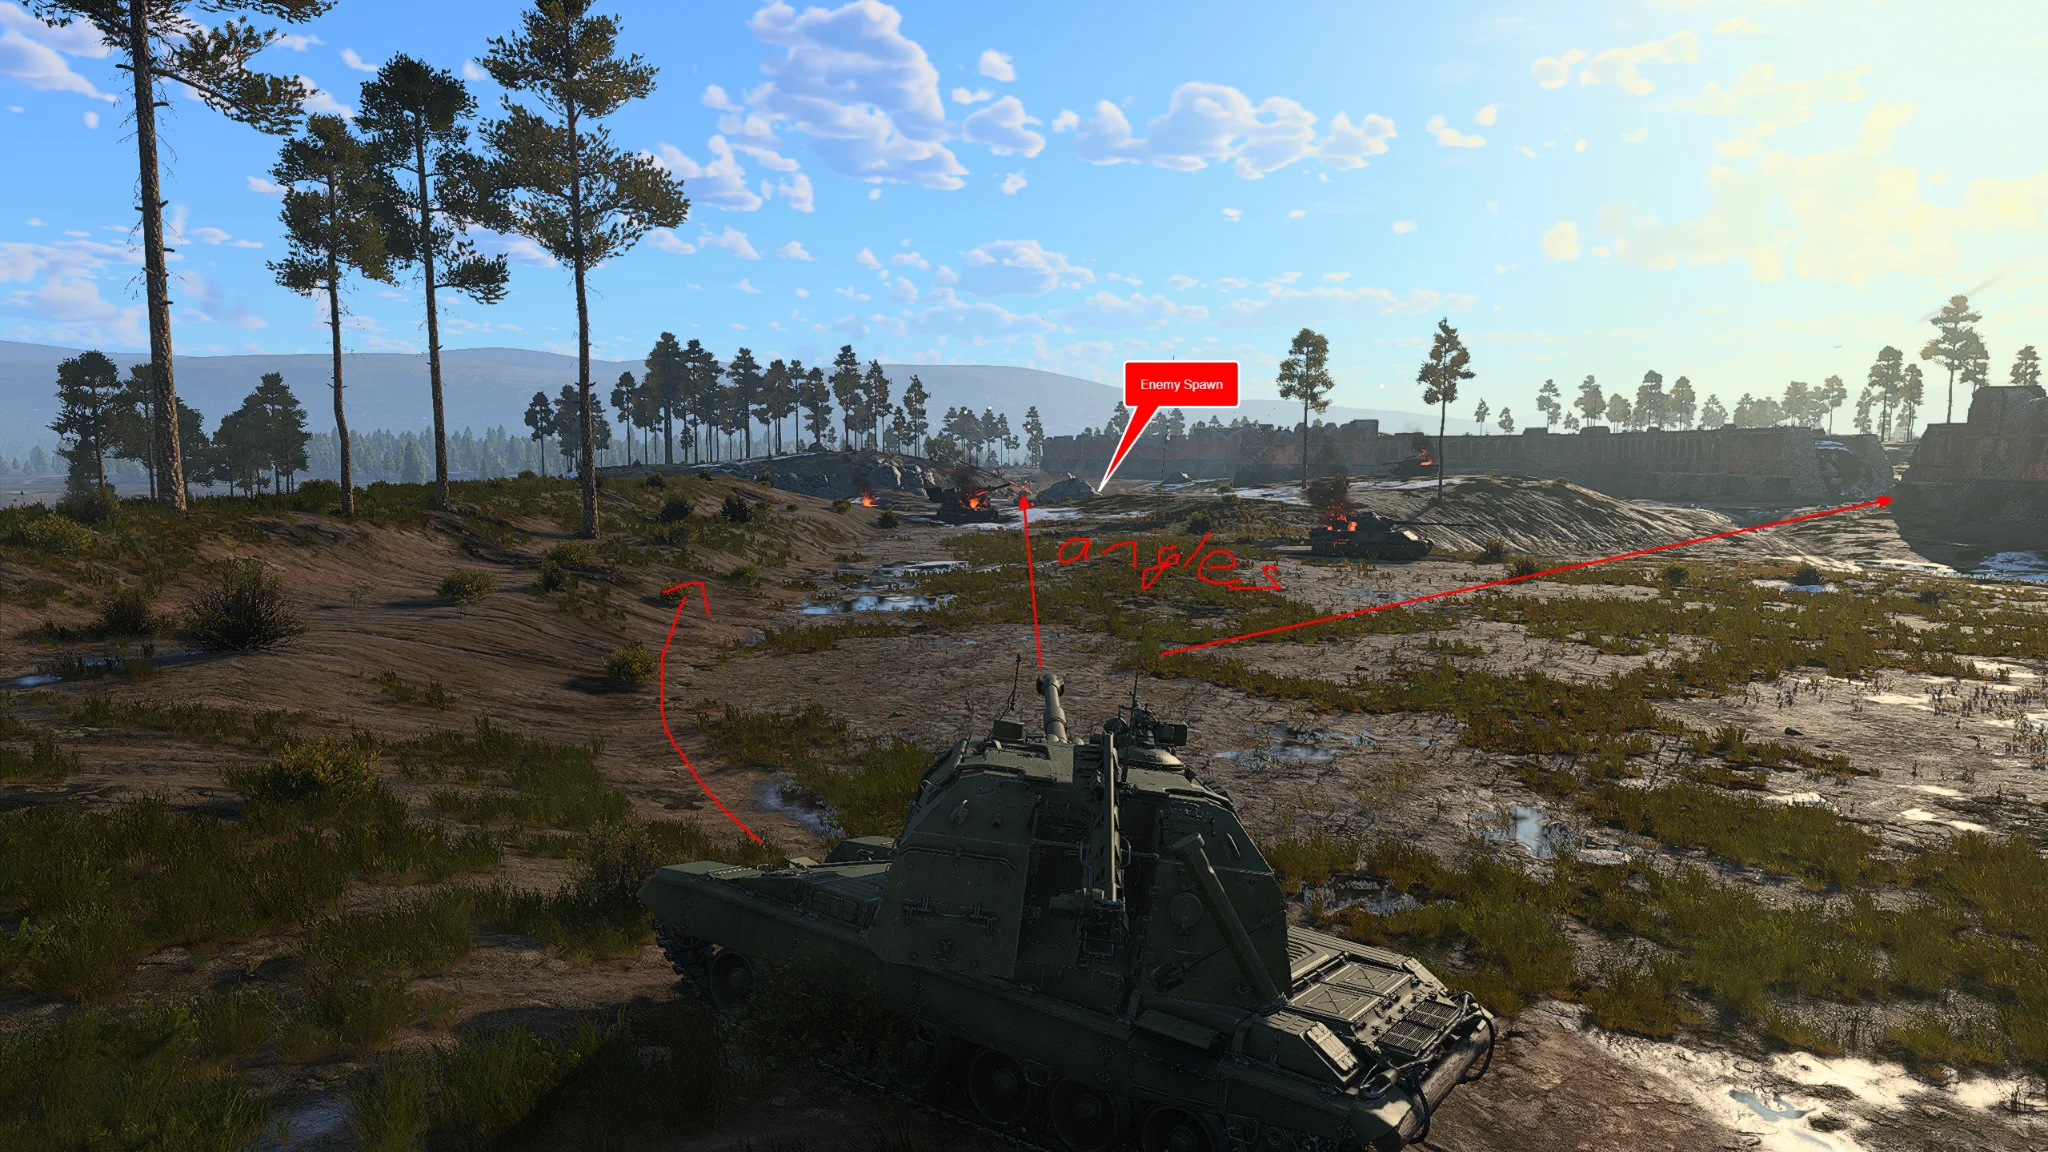
A spawn-camping spot in a rough position — the honest label for a trade every camper should understand before taking it. The angle onto the enemy spawn is real, and the targets it offers are the usual fresh-deployment kind: predictable, bunched, and briefly blind. The roughness is the position itself — the cover is imperfect, the exposure is real, and holding it under attention is not a plan. So play it as a raid rather than a residence: arrive, take the shots the spawn traffic offers, and leave while the leaving is free. The spot pays visitors and punishes tenants — treat the danger tag as the lease terms.

Spawn PeakSpawn CampDanger Zone
Tactical position on WhiteRockCastle
Map overviewclick to expand

A good spot for camping their right spawn — not very hidden, as the original scout admits, but very effective against oblivious enemies. The position trades concealment for angle: your view onto the right spawn's exits is clean, and against teams that do not scan — which is many teams — the kills queue up regardless of your visibility. Against attentive opponents the spot's lifespan shortens dramatically, so read the lobby: premium-heavy, low-awareness matches are the green light. Set up, farm the exits while the obliviousness lasts, and be honest with yourself about the moment it stops lasting.

Spawn CampDanger Zone
Tactical position on WhiteRockCastle
Map overviewclick to expand

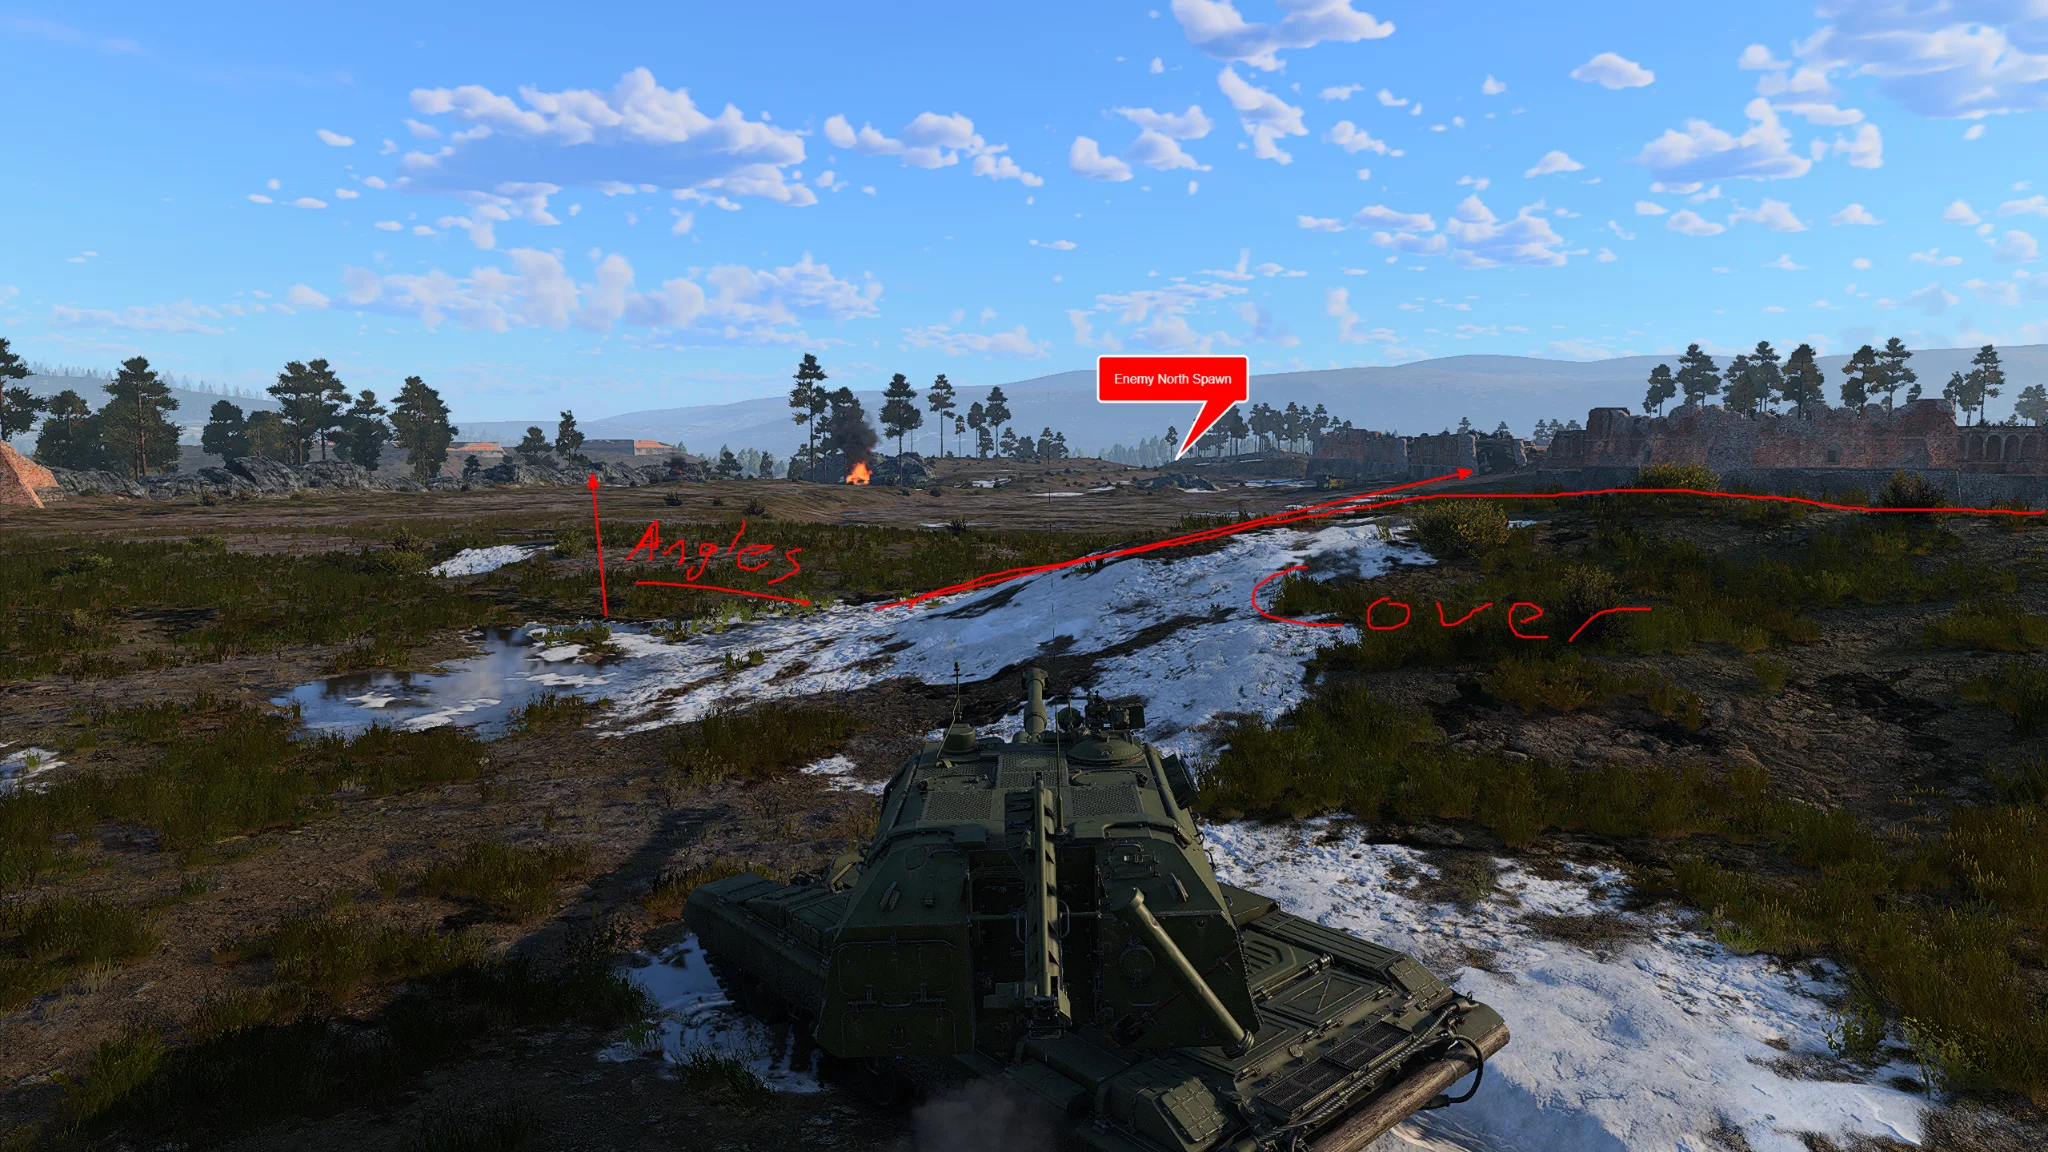
A decent position covering the western paths out of the enemy's northern spawn. The spot sits across the lanes that north-spawning vehicles use when they commit west, letting you tax that entire direction from one gun. Coverage positions like this shape matches quietly: the enemy's western option becomes expensive, their traffic bends eastward into your team's prepared ground, and the map's flow tilts without a single dramatic play. Set up with the paths in your field of fire, engage the committed movers, and hold the assignment — the position's value is in the lane staying closed, not in any single kill.

Tactical position on WhiteRockCastle
Map overviewclick to expand

A relatively exposed spawn-camping position, reached by advancing from the Cover Position — the second station of a two-step play. From the covered spot, you push forward when the ground permits, and this is where you emerge: closer, more exposed, but with a better view of the enemy spawn and the shots that view implies. The exposure is the fee for the improved angle, so make the advance a decision rather than a drift — move up when the enemy's attention is spent elsewhere, take the enhanced harvest, and fall back to cover when the attention returns. The two positions work as a pair; use them as one.

Spawn CampPush

Strategic Routes · 5 approved

Map overviewclick to expand
Wide Flank

Go onto the bridge — from up there you get a good view of the cap and of the flanking tanks trying to work around it. The bridge's elevation is the asset: the point sits inside your sightline, and the wide approaches that flankers favor pass below your angle where their cover stops working. One position, two jobs — interrupt the circle, intercept the sweep. Bridges are conspicuous ground, so expect to be noticed eventually; work the span's cover, vary your firing spots along it, and drop off the structure when the attention concentrates. While it holds, the view pays for everything.

Map overviewclick to expand
Wide Flank

You can go on top of the bridge to catch the tanks heading to the cap — the elevated span puts their commute inside your firing lane, and cap-bound traffic is as committed and predictable as targets get. You may also see a few tanks flanking wide, which the bridge's height catches where ground-level positions cannot. It is the same span as the other bridge position with a different emphasis: this one leans interception, punishing the point's supply line rather than the circle itself. Climb up early, zero the commuter lane, and let the cap's gravity keep feeding you. Dismount when the bridge starts drawing fire.

Map overviewclick to expand
Wide Flank

Hide — the route's single instruction, and the entire doctrine of the position it leads to. The line carries you to ground where concealment is the weapon: you tuck in, go still, and let the enemy's movement wash past a spot they never audit. This is ambush patience in its purest form — no peeking rhythm, no overwatch rotation, just the discipline of remaining unremarkable until the shot is undeniable. Fire only when the target is committed and the kill is certain, because each shot spends some of the hiding. Played properly, the spot turns invisibility into a scoreline; played restlessly, it is just a parking spot.

Map overviewclick to expand
Protected CorridorWide Flank

The first-spawn mid flank — its assignment: cover the western paths out of the enemy's north spawn from the match's opening moments. The route blends protected ground with a flanking arc, carrying you to the coverage position while the enemy's first wave is still choosing its lanes. Arriving on first spawn matters because the western paths are busiest early; a gun established before that traffic commits collects the whole opening rotation. Drive it at match start, settle onto the paths, and make west a word the enemy's north spawn stops using. The position holds its value as long as their deployments keep flowing.

Map overviewclick to expand
Direct Assault

The late-game path — a direct line from the Cover Position to the enemy's northern spawn, for when the match has thinned and the ending needs administering. Early, this drive would be suicide across contested ground; late, with the enemy's map presence broken, it is the shortest distance between your established position and the place their remaining vehicles must appear. The route converts your patient Cover Position work into endgame pressure: push it when the lanes go quiet, arrive at the northern spawn, and close the match at its source. Timing is the entire skill — this path has exactly one right moment, and it is not early.

See it on the map

Open WhiteRockCastle in the RATLINE tool to view pins, draw routes, and contribute your own intel.

Open RATLINE → All Guides