Tactical Positions · 3 approved

Tactical position on Tunisia
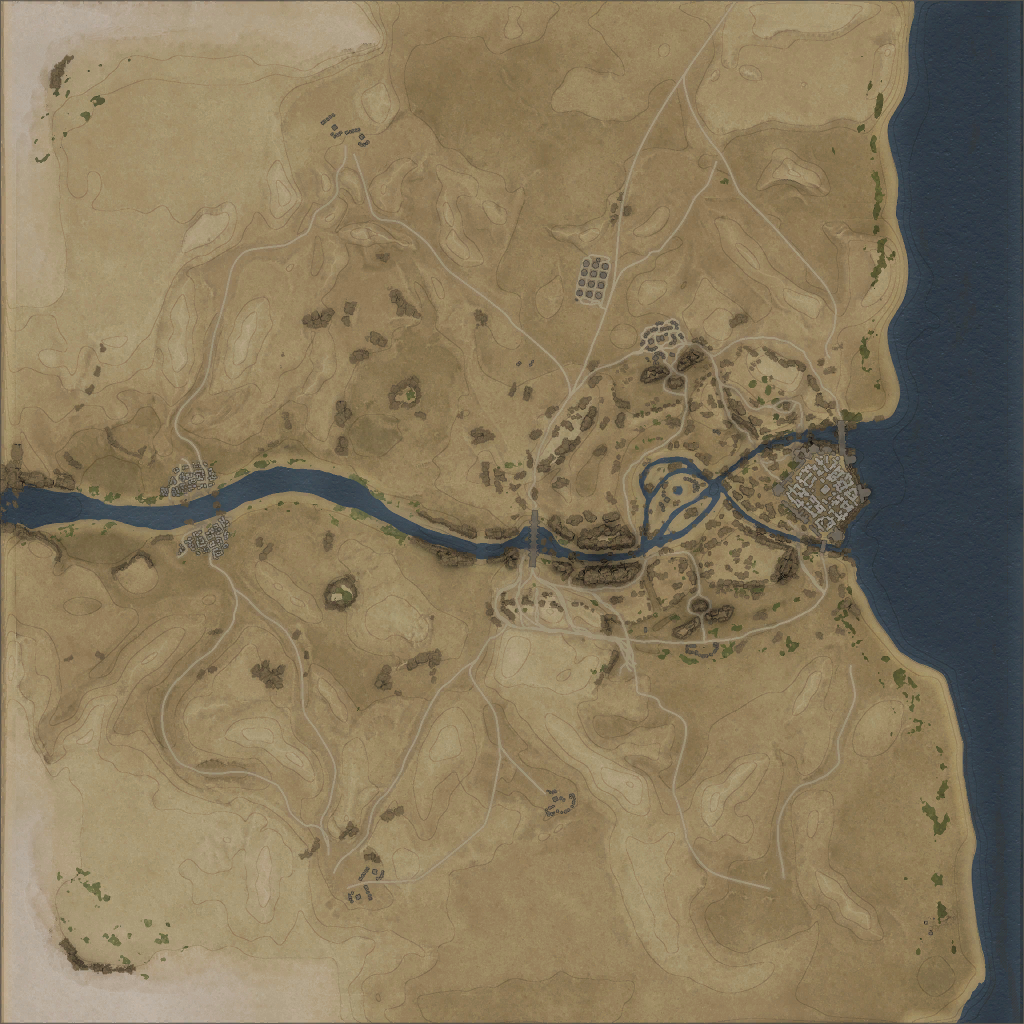
Map overviewclick to expand

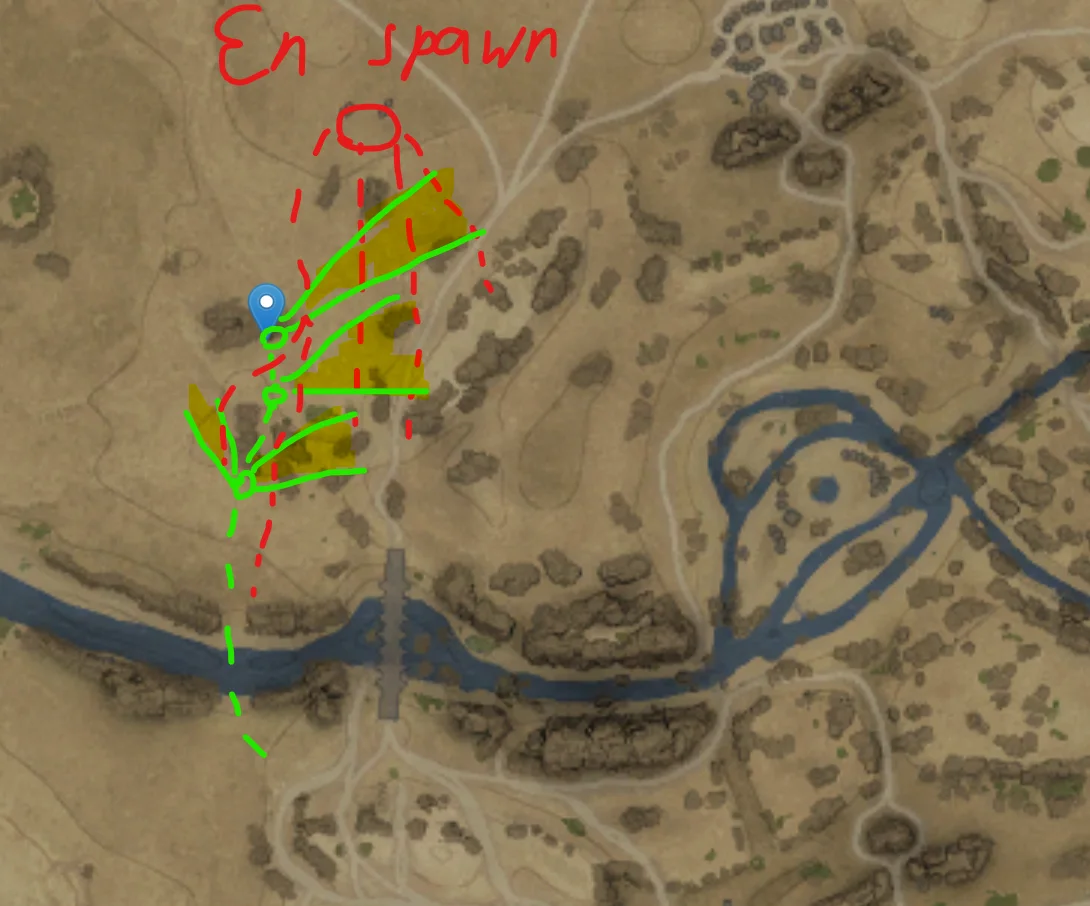
A risky position with genuine nuke potential. The play is to rush it immediately on your first spawn: if you commit hard and get here fast, you will find a large number of enemies focused on the A point with their sides fully turned to you, completely unaware of your angle. That opening volley can be worth several kills before anyone even works out where the fire is coming from. Be under no illusions — this is a spawn-adjacent, high-risk spot, and once the enemy knows you are there it gets dangerous quickly. Punch out your kills fast and be ready to fall back or relocate.
FlankDanger ZoneSpawn CampSpawn Peak
Tactical position on Tunisia
Map overviewclick to expand

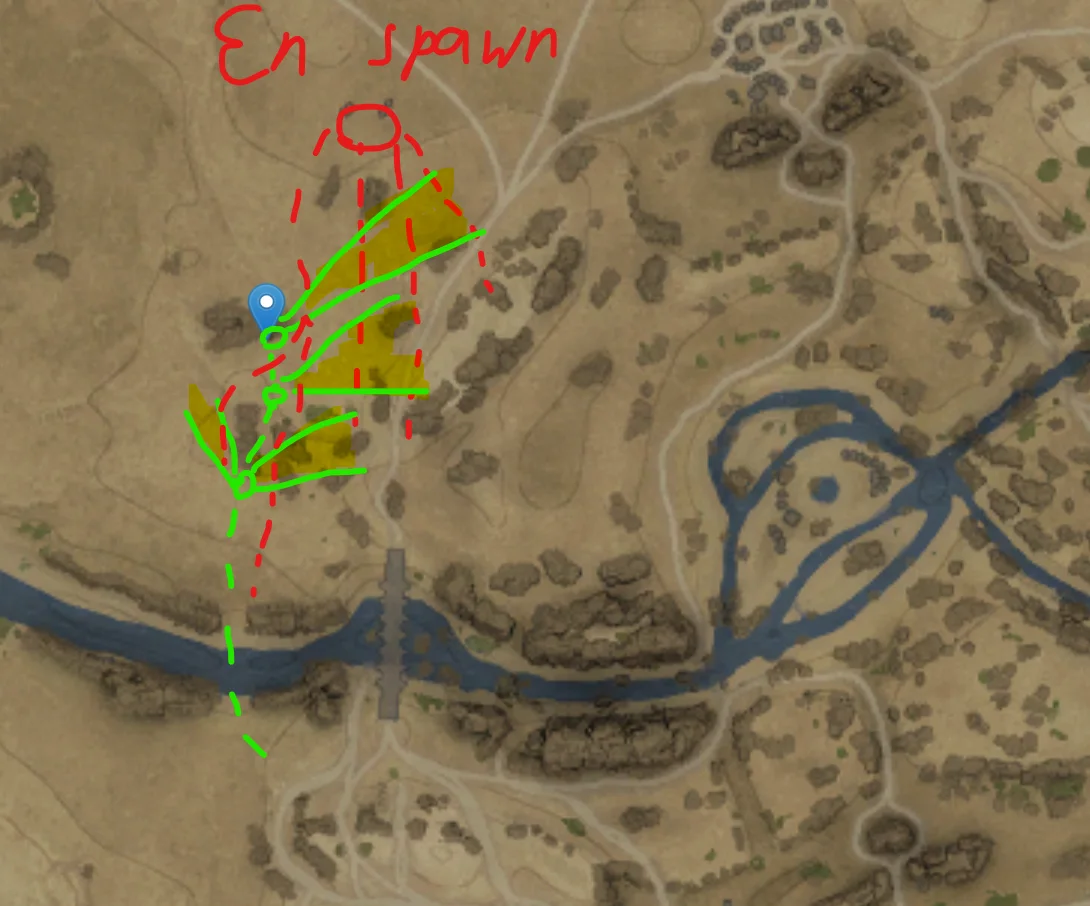
A spawn-camping position that can very easily snowball into a nuke. From this spot you overlook the enemy spawn area with a good sniping angle, catching vehicles as they roll out before they can reach cover. It works as a defensive sniping perch too, since you are set back with decent protection. The kills come quickly here if the enemy team keeps feeding — just remember that spawn campers become priority targets the moment they are spotted, and CAS or a revenge spawn will come for you. Stay disciplined, keep your hull down, and shift position once the shots stop being free.

Spawn CampDefensiveSniperSpawn Peak
Tactical position on Tunisia
Map overviewclick to expand

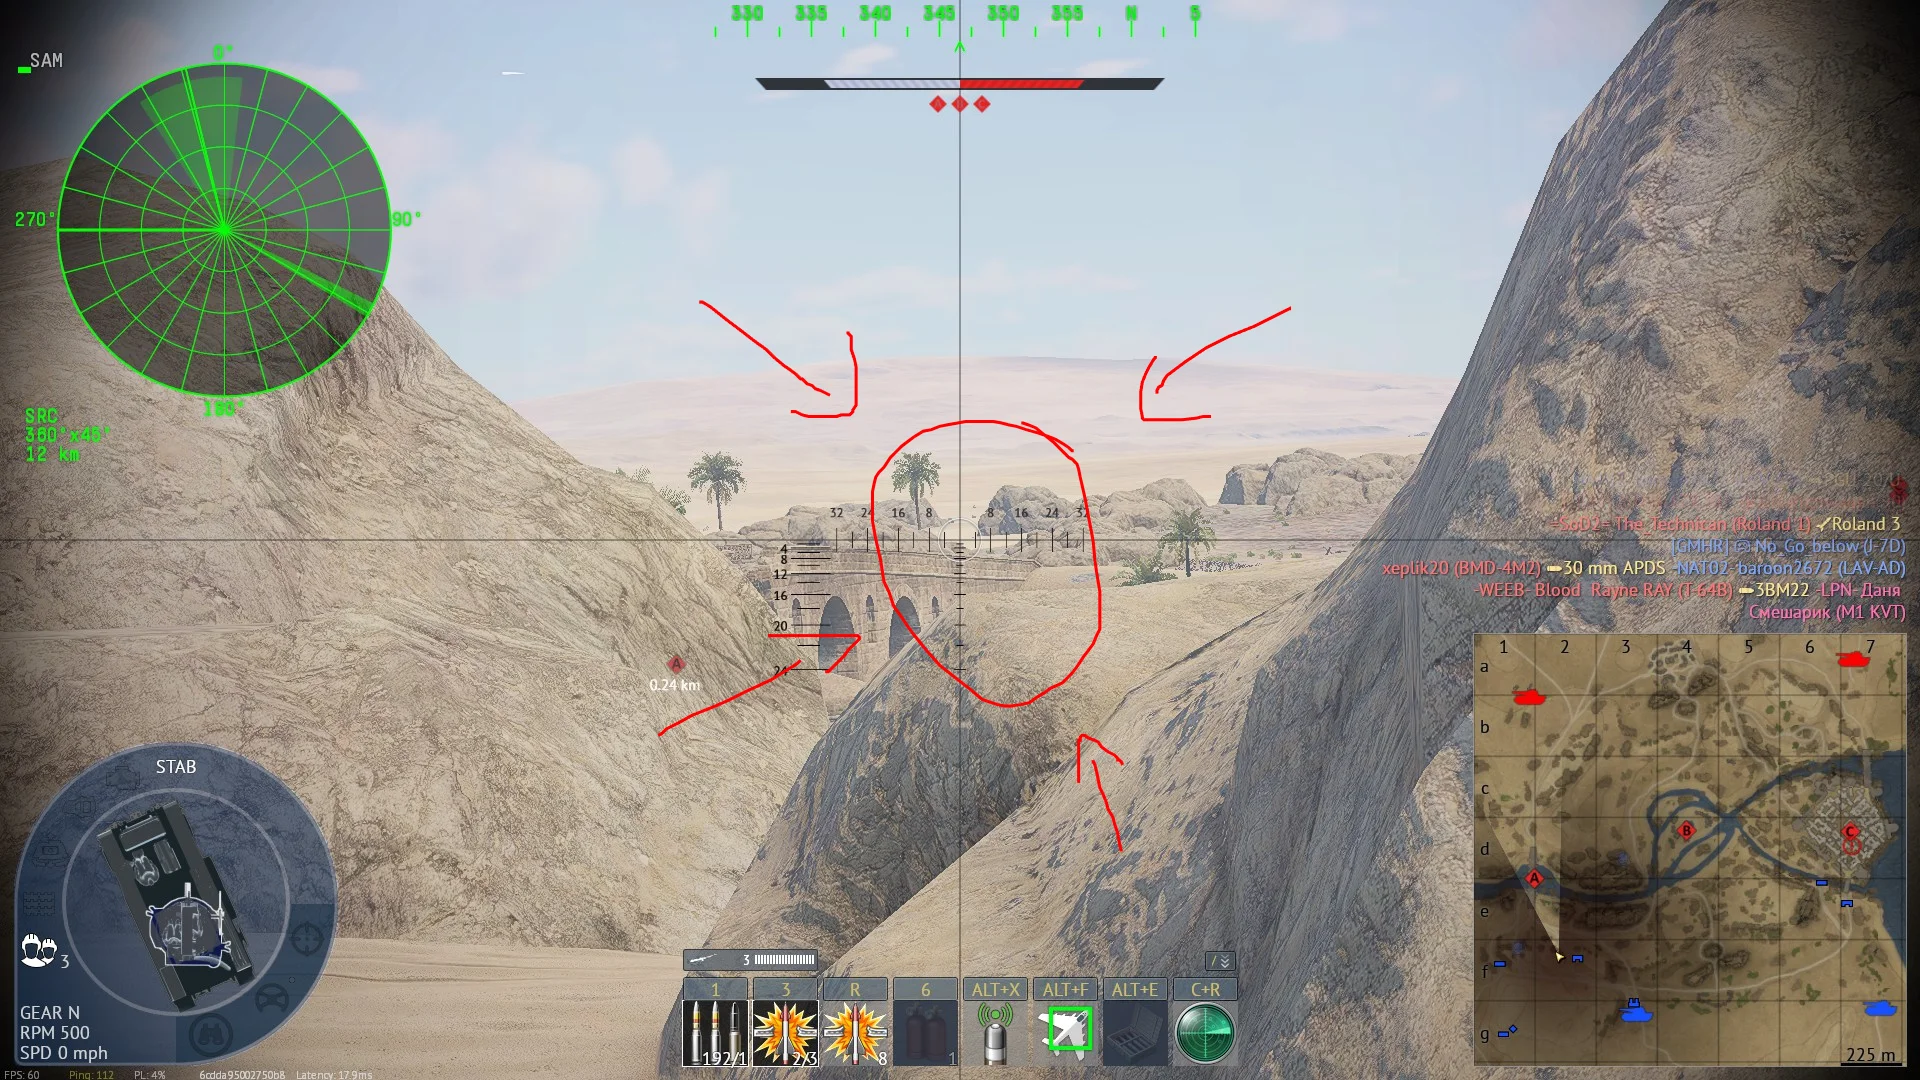
An elevated position from which you can see the exit of the enemy spawn, with half-decent cover — how well protected you are depends a lot on the height of your tank, so lower-profile vehicles get much more out of this spot. From here you can engage enemies the moment they leave spawn, before they disperse into the map. It is a high-value but dangerous angle: you are visible to anyone who deliberately checks it, so treat it as a place to take a few strong early shots rather than somewhere to sit all game. Land your hits, then pull off the line before the counter-fire is dialed in.

High GroundSniperSpawn PeakCoverDanger Zone

Strategic Routes · 7 approved

Map overviewclick to expand
Wide FlankDirect Assault

This route works on the small map configuration, when the A point is under the bridge. It mixes a flank with a direct push: you cut across the river toward the objective, and you may well run into enemies mid-crossing, so keep your gun ready rather than driving on autopilot. The payoff is the ending — if you rush this from spawn at full speed, you arrive on the enemy side before they are set, and the position you end up in has genuine nuke potential. Fast, aggressive vehicles get the most out of it; hesitate halfway and the crossing becomes a trap instead.

Map overviewclick to expand
Wide FlankDirect Assault

A first-spawn nuke route. The entire idea is speed: you commit to this path immediately as the match starts, cutting around the enemy team while they are still rolling toward the objectives, and you end up with shots into targets that have no idea the angle exists. Done right, on one respawn, this run can farm enough score to put a nuke within reach. It is an aggressive, all-in play — bring something fast, do not stop to trade on the way, and start dealing damage the moment you arrive.

Map overviewclick to expand
Wide Flank

A nuke-potential flanking route that also takes the A cap on the way — the slower but more productive version of the aggressive run. Instead of skipping the objective entirely, you sweep wide, secure A for the capture score, and then continue the flank into the enemy's side of the map. The cap points plus the flanking kills add up fast toward a nuke, at the cost of arriving slightly later than a pure rush. Take this option when your team is not contesting A, or when you want the safer, steadier route to a big game.

Map overviewclick to expand
Protected CorridorDirect Assault

An aggressive early push along a protected line. Get under the bridge as fast as possible and cap the point — the bridge covers you while you take it. From there, climb out on the other side to the left of the bridge and tuck in behind the rocks, using them as hard cover while the enemy team is still figuring out the cap flipped. Hold there until it is safe, then work forward to the second and third sets of rocks; from the last one you have shots directly into the enemy spawn. Pace the push — each rock is a checkpoint, and moving up too early is what gets you killed on this line.

Map overviewclick to expand
Protected CorridorWide Flank

A protected flanking route best driven in a fast, well-armoured tank — something that can hold 50–100 km/h while still surviving a surprise hit. Timing matters more than anything: use this route when the A cap is already in your allies' hands, so the enemy attention is fixed on retaking the point while you swing around the side. The path keeps you reasonably covered on the way in, and you arrive on an angle where distracted enemies are showing you their flanks. Roll through, take the free side shots, and keep your speed up between covers.

Map overviewclick to expand
Protected Corridor

A protected route that reliably ends in a free kill. The path keeps you behind cover the whole way, and it delivers you onto an angle that enemies simply do not watch — whoever is sitting there is usually focused elsewhere with their side exposed. There is no special trick to it: drive the line, stay quiet, and take the shot when it appears. Because the approach is covered, even slower vehicles can run this safely, and you can repeat it across respawns as long as the enemy keeps ignoring the angle.

Map overviewclick to expand
Protected Corridor

See it on the map

Open Tunisia in the RATLINE tool to view pins, draw routes, and contribute your own intel.

Open RATLINE → All Guides