Tactical Positions · 4 approved

Tactical position on SandsOfSinai
Map overviewclick to expand

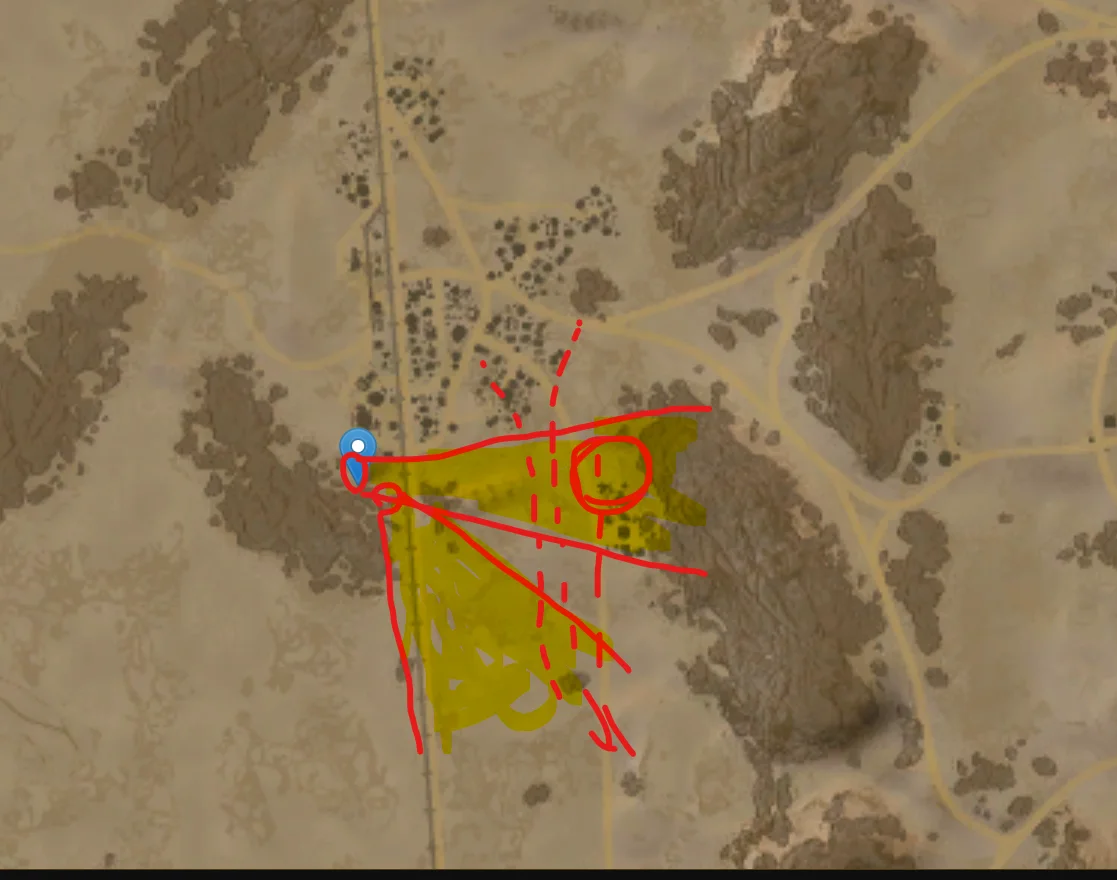
If you rush this position straight from the match start, you will find four or five enemies already settled on the sniper ledge I marked with the circle — looking through their scopes, sides turned fully toward you, with no idea you are there. Eat through them one by one before they can react. After that, the position keeps giving: you can fish the enemy spawn using the rocks as cover, catching vehicles as they roll out. The discipline matters though — do not push too far forward. Keep your hull behind the rocks at all times and take only the shots the cover allows, and this single position can carry your whole match.
CoverSniperSpawn PeakSpawn CampFlank
Tactical position on SandsOfSinai
Map overviewclick to expand

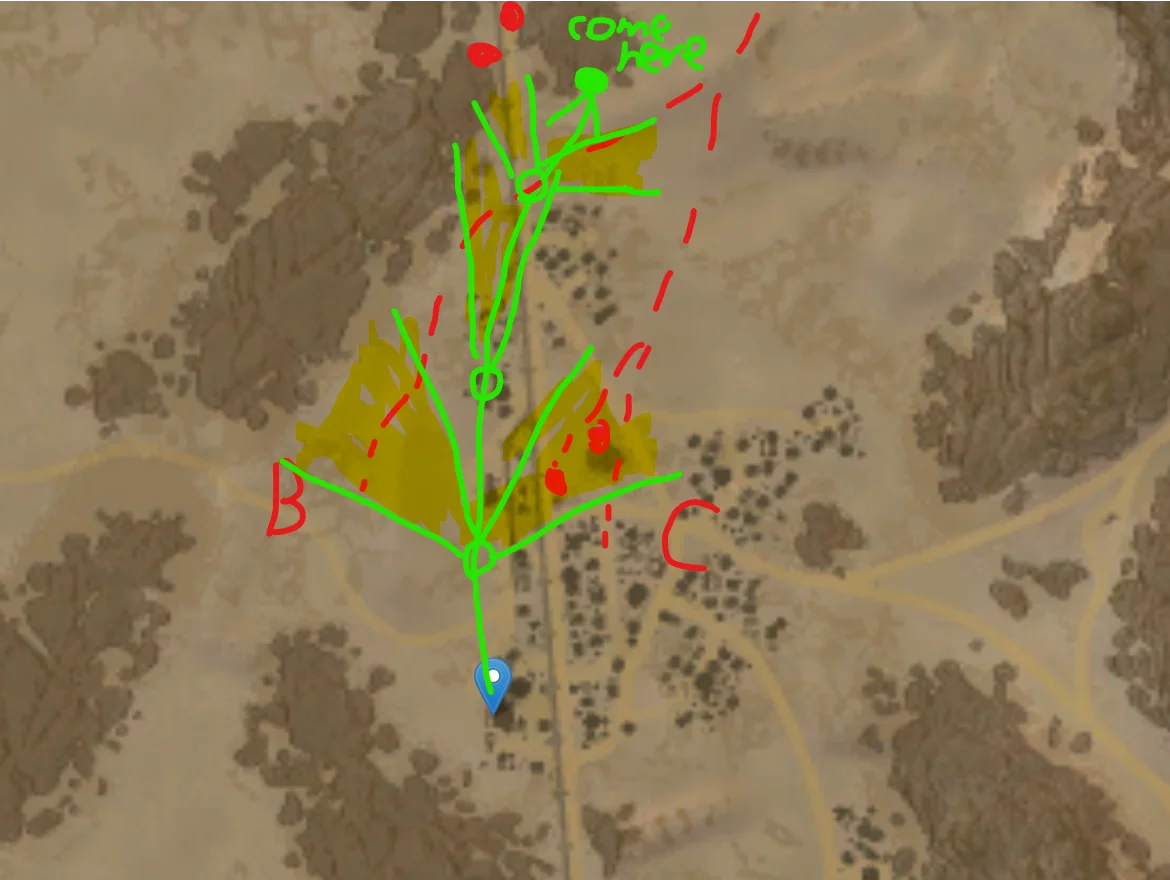
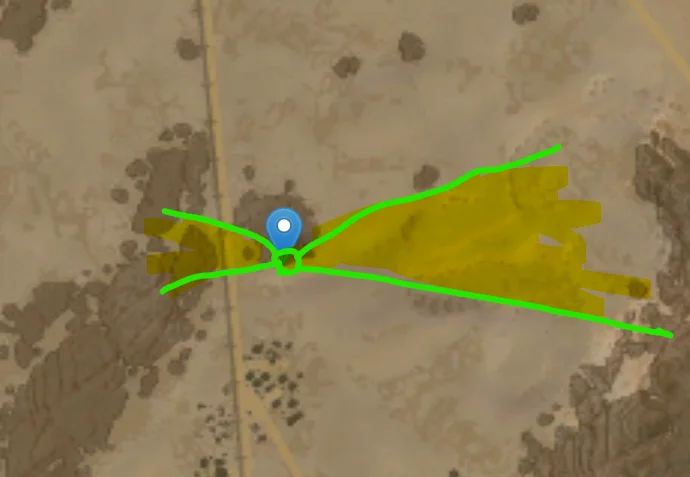
Follow the green line for this push — and pay attention to the areas I marked, because that is where enemies are most likely to be waiting. The marked zones are the known ambush spots along this advance: treat each one as occupied until proven otherwise, pre-aim as you approach, and use your cover between them. This is a danger-zone advance rather than a safe corridor, so move with intent: bound from cover to cover, clear the marked angles, and do not let the push stall in the open where the ambushers get free shots.

Danger ZonePush
Tactical position on SandsOfSinai
Map overviewclick to expand

Just hold this rock — that is the whole play, and it works. Sitting here blocks the lane out of the enemy's right respawn: nothing can push through that side without coming across your gun first. The key is restraint. Do not push forward, do not chase kills; stay low behind the rock and let the enemies come to you. They arrive in ones and twos, exposed, while you shoot from prepared cover. It is an unglamorous defensive job, but a single tank holding this rock shuts down an entire side of the map for as long as you stay disciplined.

DefensiveCoverSpawn Camp
Tactical position on SandsOfSinai
Map overviewclick to expand

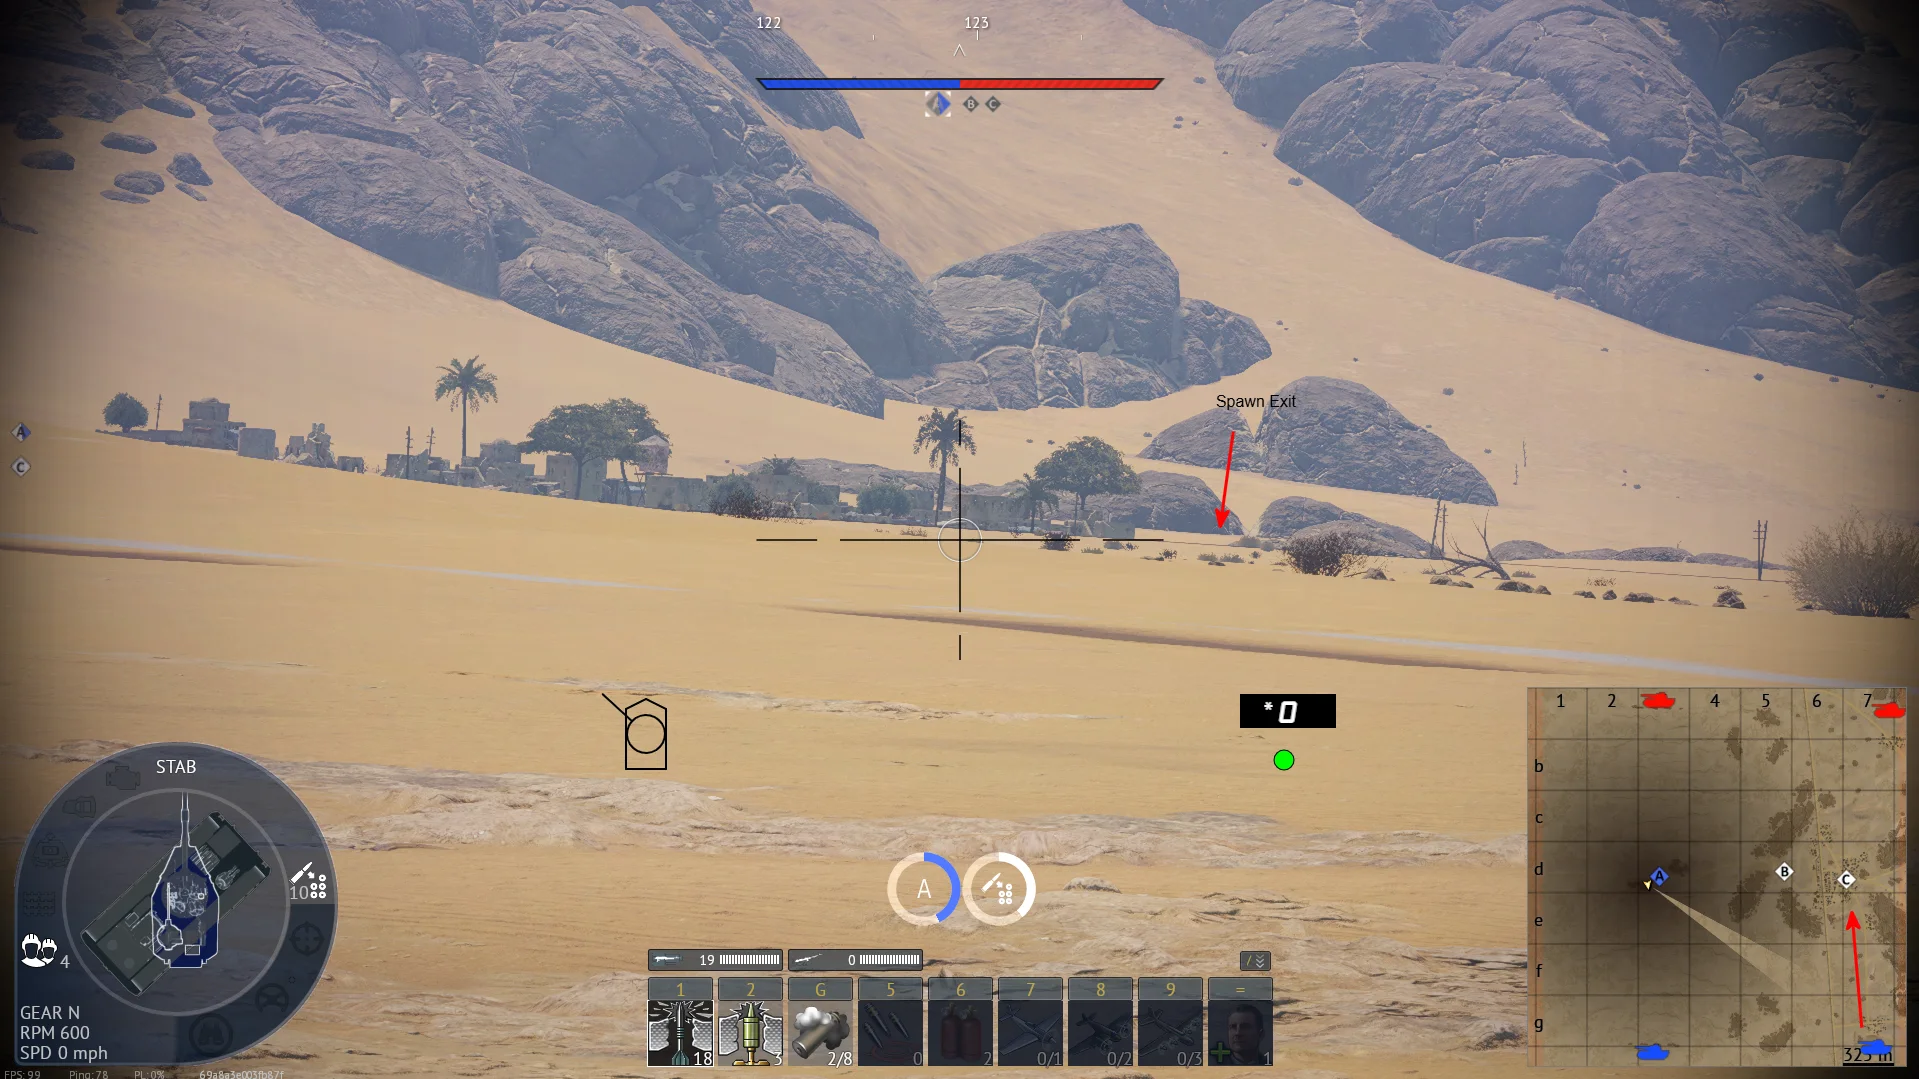
A multi-purpose sniping position: from here you can shoot directly into the South side's spawn exit, cut off players trying to rotate toward C, and defend the A point — all from the same spot. That triple coverage is what makes it special; you are relevant to three different fights without moving. Spawn-exit shots come in windows, so pre-aim the exit and take snapshots as vehicles cross. The C-rotation traffic is steadier and usually side-on to you. And if the enemy makes a play for A, you are already in position to contest it. Expect attention once the enemy works out one tank is doing all of this.

SniperSpawn CampObjective

Strategic Routes · 6 approved

Map overviewclick to expand
Wide Flank

A flanking route that sets up a strong angle against enemies trying to cap C. Rather than contesting the point face-to-face, this path positions you off its shoulder, where vehicles sitting in the cap circle or approaching it are exposed to you side-on. Cappers are ideal targets — they are stationary, committed, and watching the obvious approaches. Arrive as the point is being contested, take the free shots on the capping vehicles, and reset the angle between waves. In faster vehicles you can run this repeatedly and keep C permanently unsafe for the enemy.

Map overviewclick to expand
Wide Flank

A scouting path with a designated observation point at the end — built for light tanks. The route keeps you out of the main firefights while you move, and the end position gives you a view over enemy movements worth relaying to your whole team. Scout the targets, ping them for your teammates and any CAS overhead, and collect the assist score while staying alive. Light vehicles with good speed and low profiles get the most from this line; the job is eyes first, gun second, so avoid unnecessary duels while you hold the observation point.

Map overviewclick to expand
Wide Flank

Rush this position holding W the whole way — and critically, DO NOT cap B on the way through. Stopping on the point kills your momentum and telegraphs the play; the value is in reaching the final position while the enemy still thinks the flank is empty. It is a risky, all-in run, but the payoff is real: from the end position you get a sequence of shots on unaware targets that has genuine nuke potential. Bring speed, skip every temptation along the route, and start the harvest the moment you arrive — hesitation anywhere along this line is what gets you killed.

Map overviewclick to expand
Wide FlankDirect Assault

Honest warning: this side is rough, and you will encounter enemies along this line — one hundred percent, every match. Treat it accordingly. The route mixes a direct approach with a flank, but there is no sneaking here; it is a contested lane where the fight comes to you whether you like it or not. During the red-line section especially, do not rush: play it slow, move cover to cover, and let the enemy make the first mistake. Take this route when you want the fight and have the vehicle to win trades, not when you are trying to arrive somewhere quietly.

Map overviewclick to expand
Wide Flank

A flanking route that ends in a position holding a view over all three capture points at once. That panorama is the prize: from the final spot you can watch A, B, and C simultaneously, meaning you always have a target somewhere and your team always has information about where the enemy is committing. The route itself keeps you clear of the early brawls on the way up. Bring a vehicle that can exploit long sightlines, settle into the position properly, and play the overwatch role — your gun and your callouts both matter from up here.

Map overviewclick to expand
Wide Flank

This flanking path leads to a position that watches all three capture points and doubles as a chokehold with great cover. It is the complete package: panoramic vision over A, B, and C, hard cover to fight from, and a natural funnel in front of you that enemies must squeeze through if they want to remove you. Vehicles crossing between points show themselves to this angle constantly, so the targets never dry up. Set up behind the cover, control the choke with deliberate shots, and you become the anchor around which the rest of the match bends.

See it on the map

Open SandsOfSinai in the RATLINE tool to view pins, draw routes, and contribute your own intel.

Open RATLINE → All Guides