 click to expand
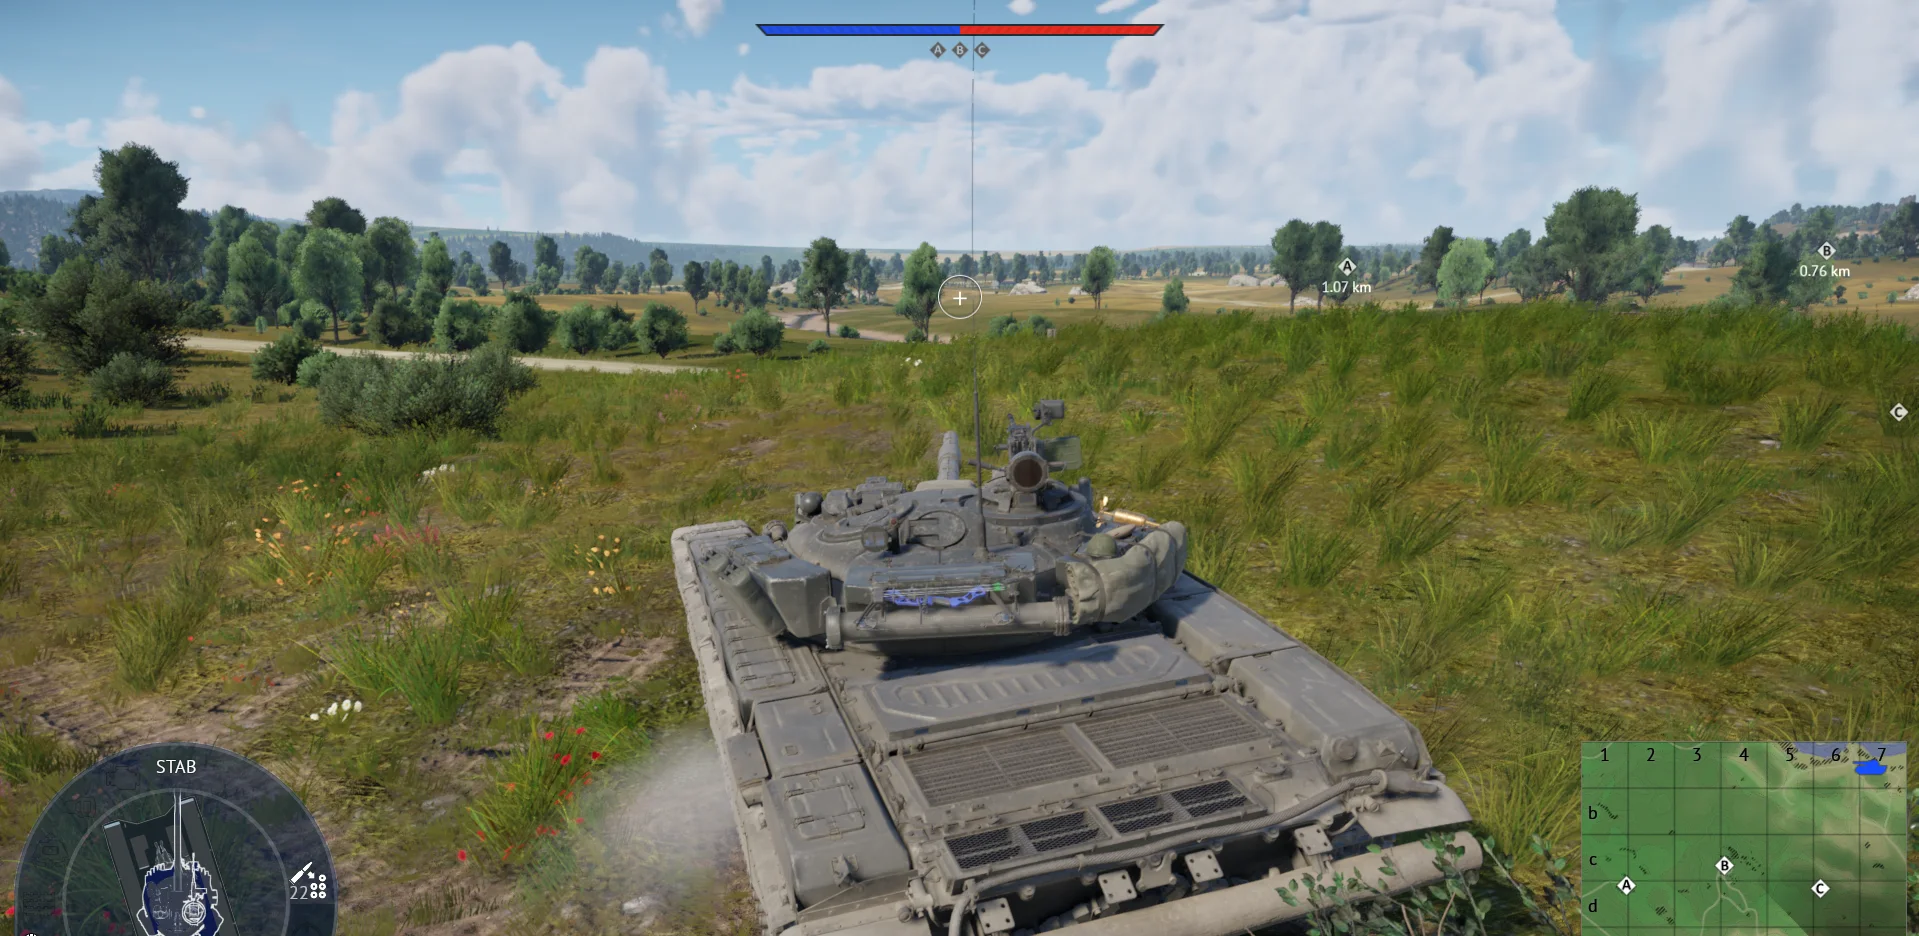
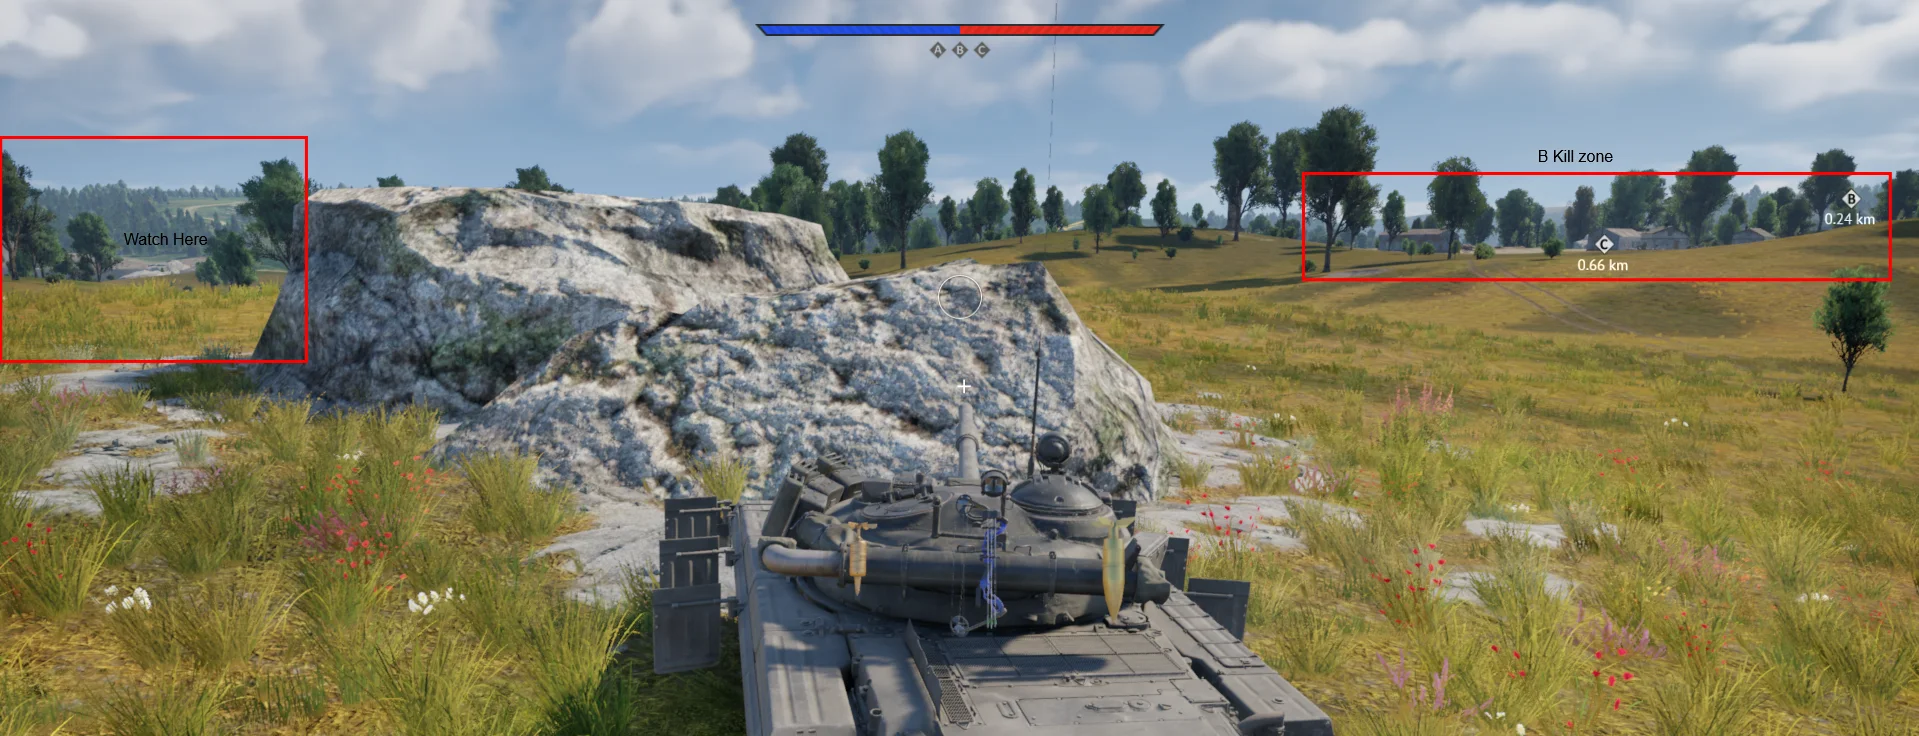
One of many positions you can take along this road. Hide behind the hill to snipe any enemies heading to B. Can even be used to kill any moving past A.
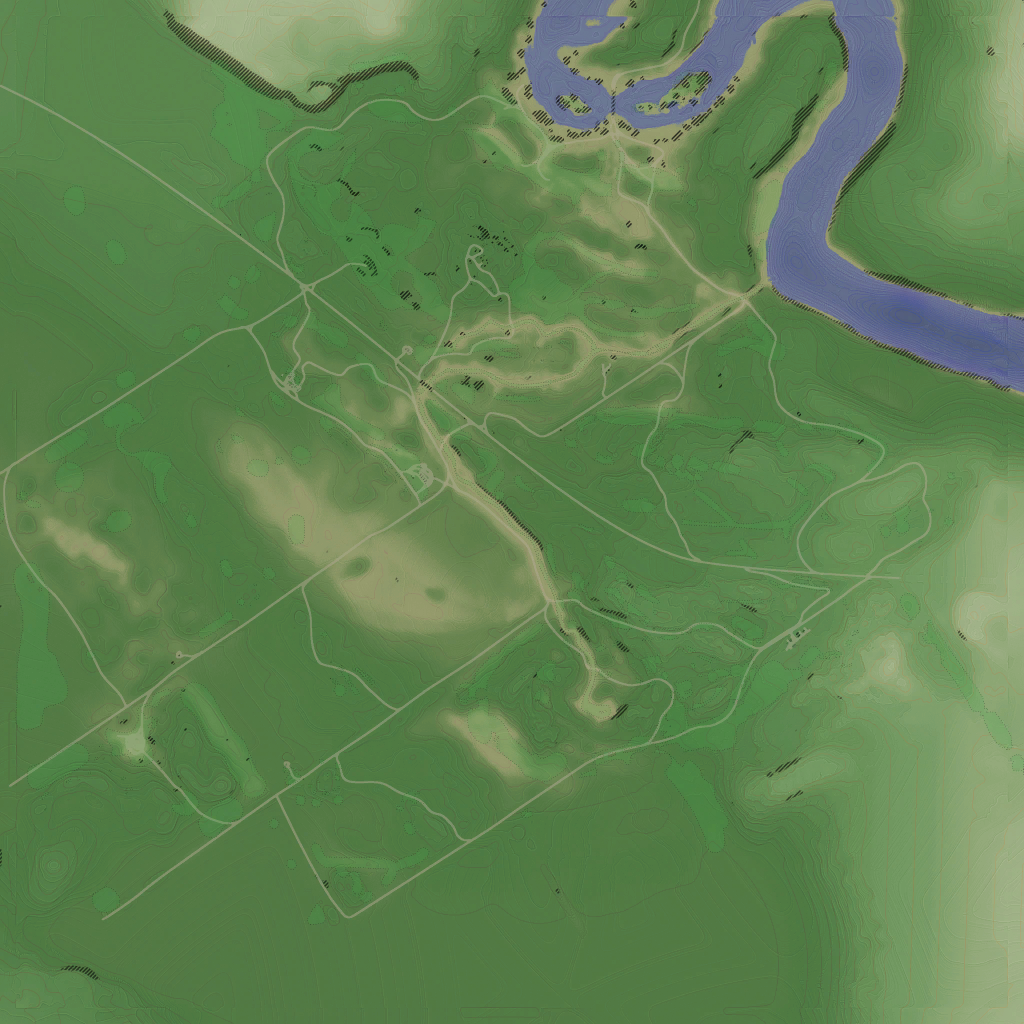
Community-sourced tactical intelligence for mozdok. All positions and routes have been reviewed and approved before publication.
Tactical Positions · 5 approved
×
click to expandOne of many positions you can take along this road. Hide behind the hill to snipe any enemies heading to B. Can even be used to kill any moving past A.
× click to expand
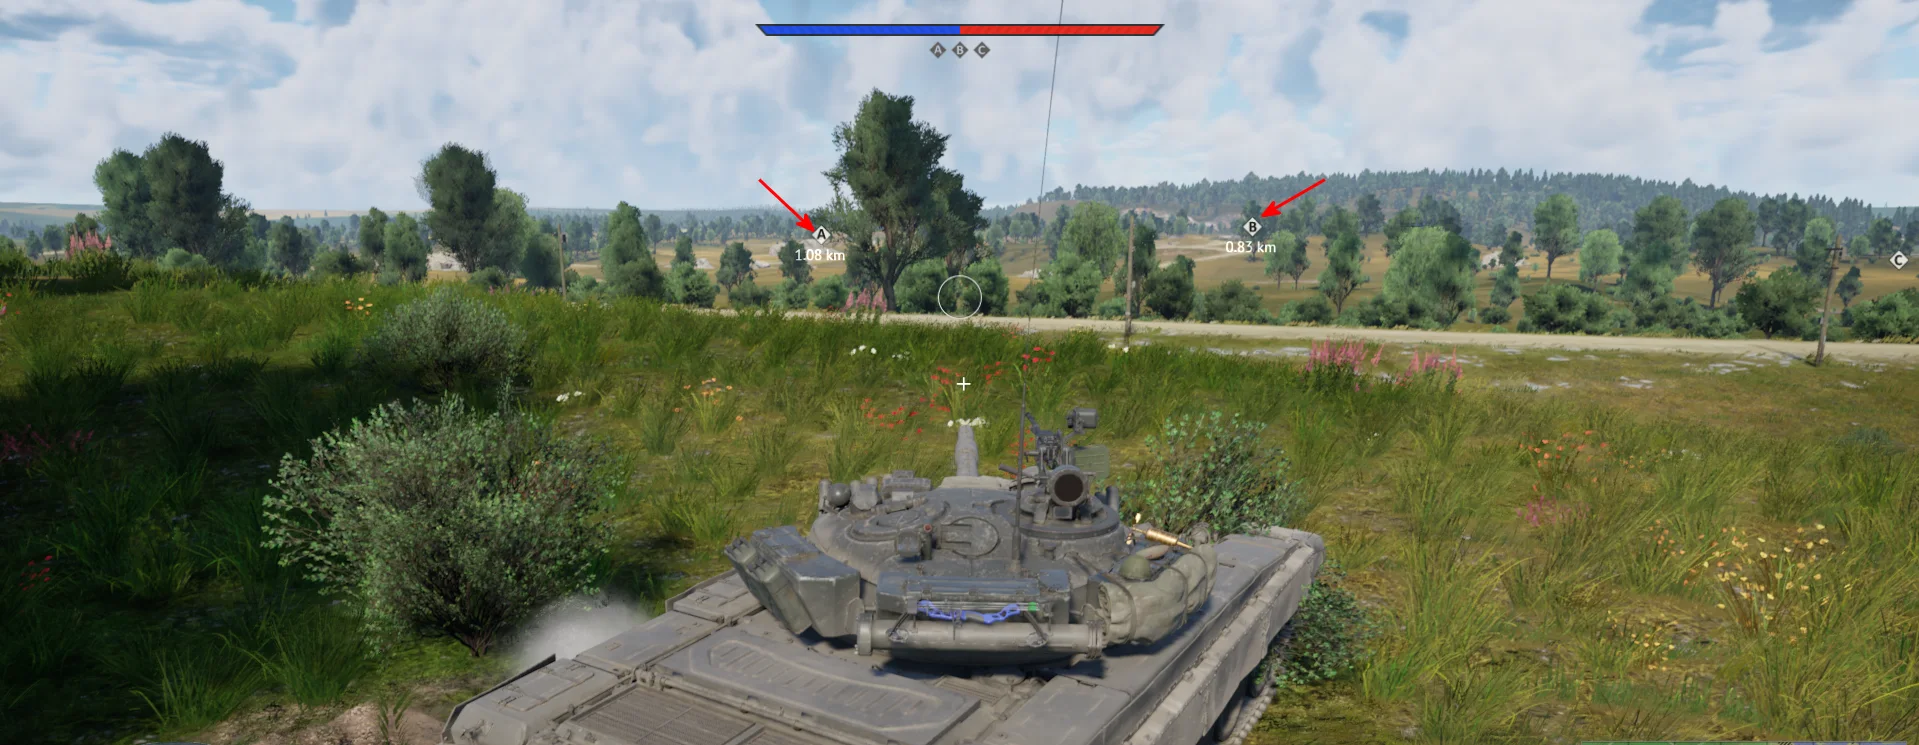
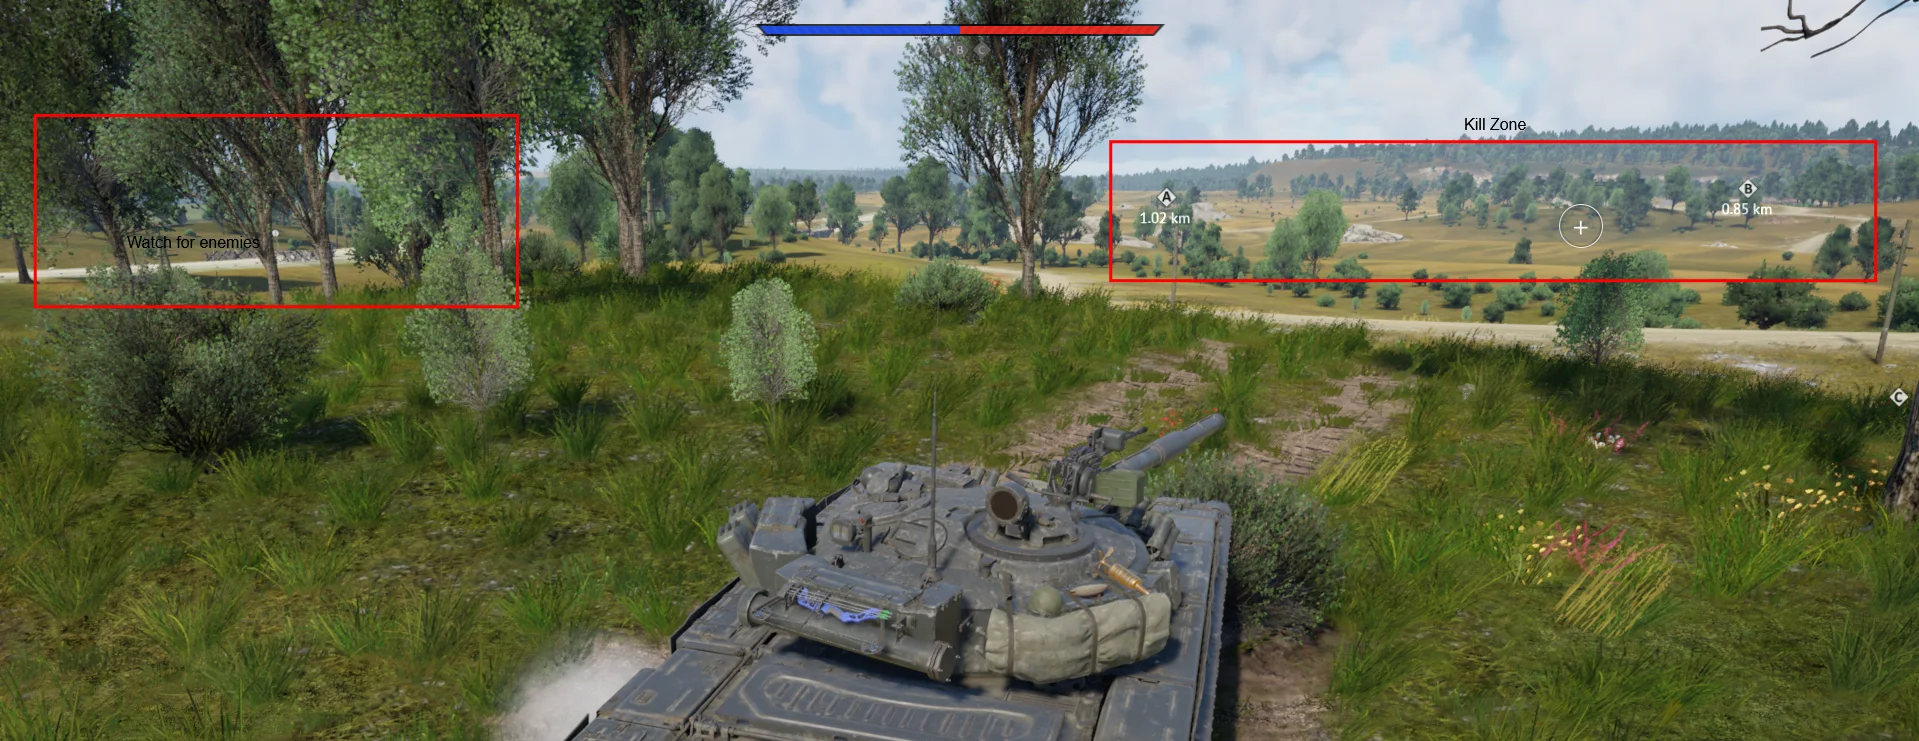
An even more disgusting position. Can observe the field in front of A and even peek B. High risk, once they spot you, all hell will come your way. Hide behind the hill to stay safe.
× click to expand
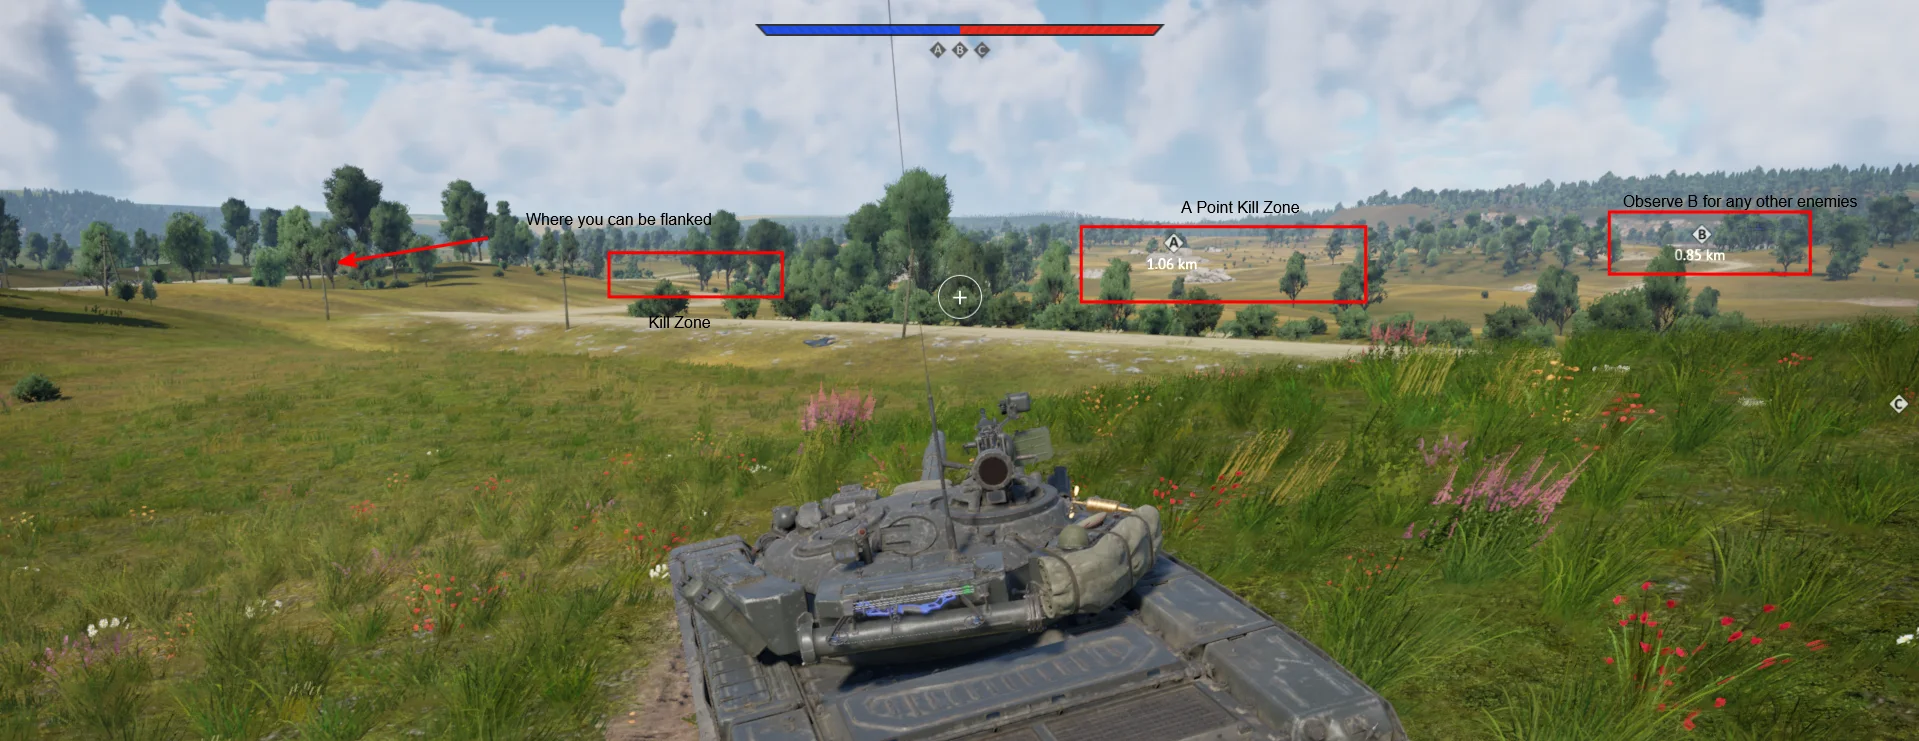
The riskiest position yet. Can see where enemies will leave spawn and makes the route to A and B dangerous for the enemy. It is the most exposed however, and can be flanked by a common enemy position to the left. Be cautious.
× click to expand
The spot with the most exposure to B. Need I say more?
× click to expand
A strong position to hold down the enemy team from capping B. Can be flanked or overwhelmed.
Strategic Routes · 3 approved
×click to expandUse this for the road! (Might not be accurate)
×click to expandAn extremely dangerous route to pass, and nigh impossible in high tier to pass. Go for culling at B.
×click to expandGo through the river then it will take you next to C while being behind a hill and you can see people going up or sniping from the base of B
See it on the map
Open mozdok in the RATLINE tool to view pins, draw routes, and contribute your own intel.
Open RATLINE → All Guides