Tactical Positions · 5 approved

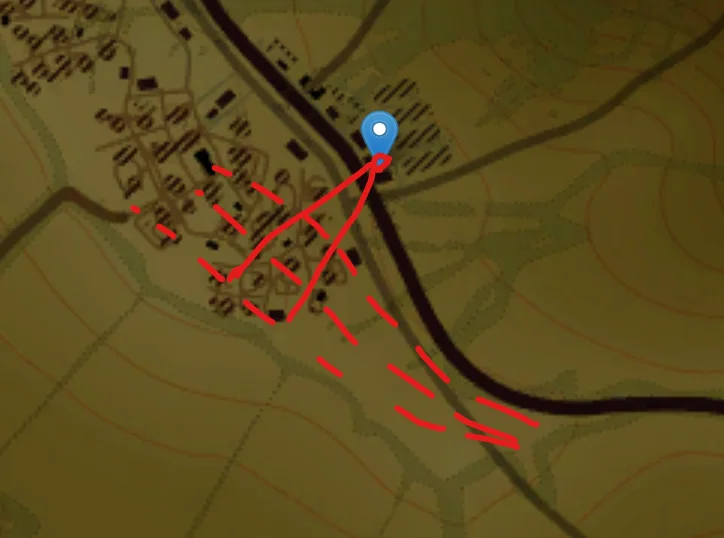
Tactical position on FireArc
Map overviewclick to expand

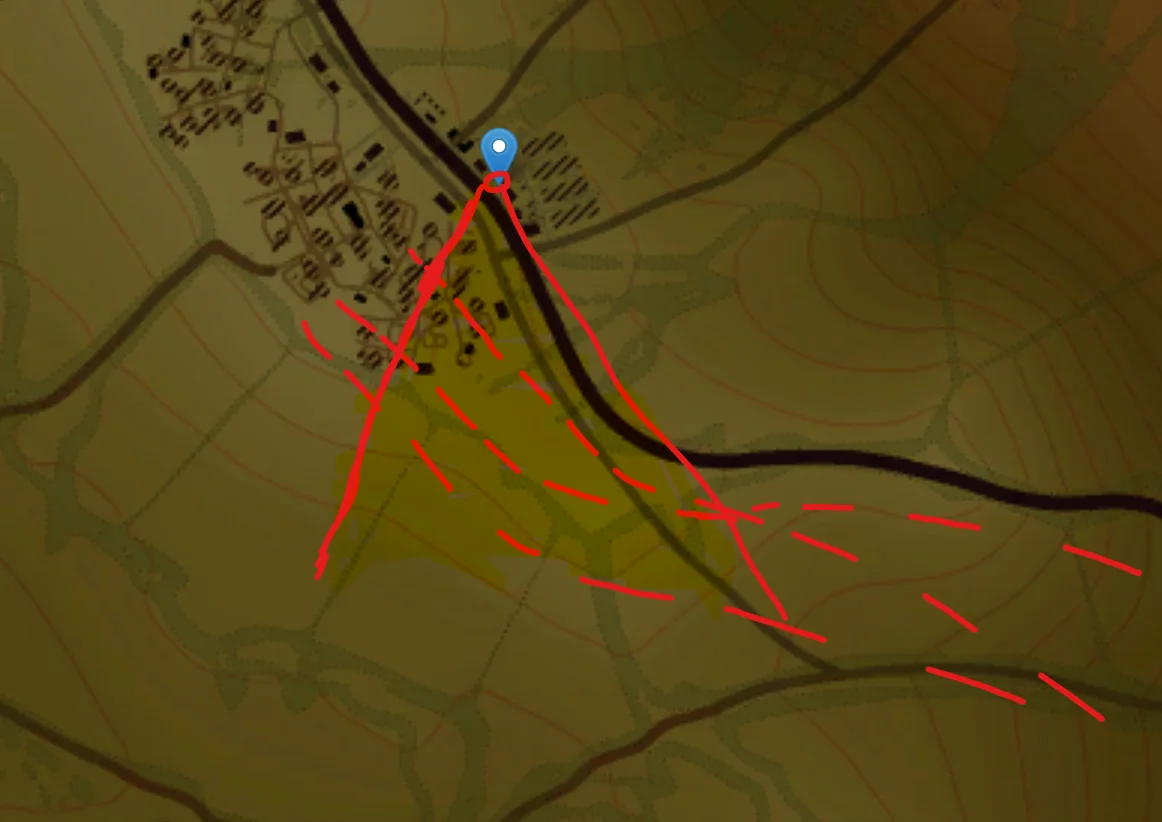
Just drive forward, take the shot, and back up — the position is exactly that simple, and that is its strength. The geometry gives you a firing window that opens when you roll forward a few meters and closes completely when you reverse, so your exposure lasts only as long as the shot itself. Play it as a rhythm: creep forward, fire on whatever the window offers, reverse into full cover while you reload, repeat. Vehicles with decent reverse speed get the most out of the cycle. Enemies facing this spot see a tank that exists for two seconds at a time, which is a miserable thing to fight.
Tactical position on FireArc
Map overviewclick to expand

A hull-down position is where you want to be on this map, and this is one of the good ones — covering ground with only your turret showing while your hull sits safe behind the terrain. The honest caveat: patience is key here, because many players do not choose this point, and the traffic can be slow between waves. When targets do come, they come to you on favorable terms. It leans spawn-camp late in the match as the enemy's options narrow. Bring a vehicle with good gun depression, settle into the crest, and let the position's safety pay for the waiting.

Spawn CampSniperHull Down
Tactical position on FireArc
Map overviewclick to expand

A risky position — you are open to enemies from your three-to-four o'clock, and you should know that going in. What you get in exchange is a wide angle on the enemies rushing B, the most popular point on this map: the whole rush crosses your sightline, and five easy kills from a single setup is a normal outcome. The math works as long as you respect the exposure. Keep checking that open right side between shots, take the B-rush targets in priority order, and when you get spotted — not if — reposition immediately to the next point instead of trying to out-trade a flanker with your side showing.

SniperDanger Zone
Tactical position on FireArc
Map overviewclick to expand

Safe kills — the building does the work. Stay behind it and shoot the enemies heading to B from their side: the structure hides your entire silhouette while the B-bound traffic crosses your firing lane one vehicle at a time, side-on and focused on the point ahead. Because the cover is total between shots, this position forgives mistakes that would kill you anywhere else, and the steady stream of side armor makes it a genuine nuke position — the score accumulates quietly and fast. Hold your discipline: stay tight to the building, take the clean side shots, and let the B traffic keep feeding you all match.

CoverSniper
Tactical position on FireArc
Map overviewclick to expand

You see the enemy spawn routes — and they see you. That is the deal this position offers, with no fine print: the sightline onto their deployment lanes is real and productive, but it runs both directions, making this a very risky posting. Play it accordingly. Arrive with your shot already planned, engage the spawn-route traffic in short exposures, and never sit on the line admiring your work — someone over there is always ranging you. It suits accurate, disciplined vehicles that can make one shot count and displace. Farm it in visits, not in residence, and it pays; overstay once and it collects.

Danger ZoneSniper

Strategic Routes · 2 approved

Map overviewclick to expand
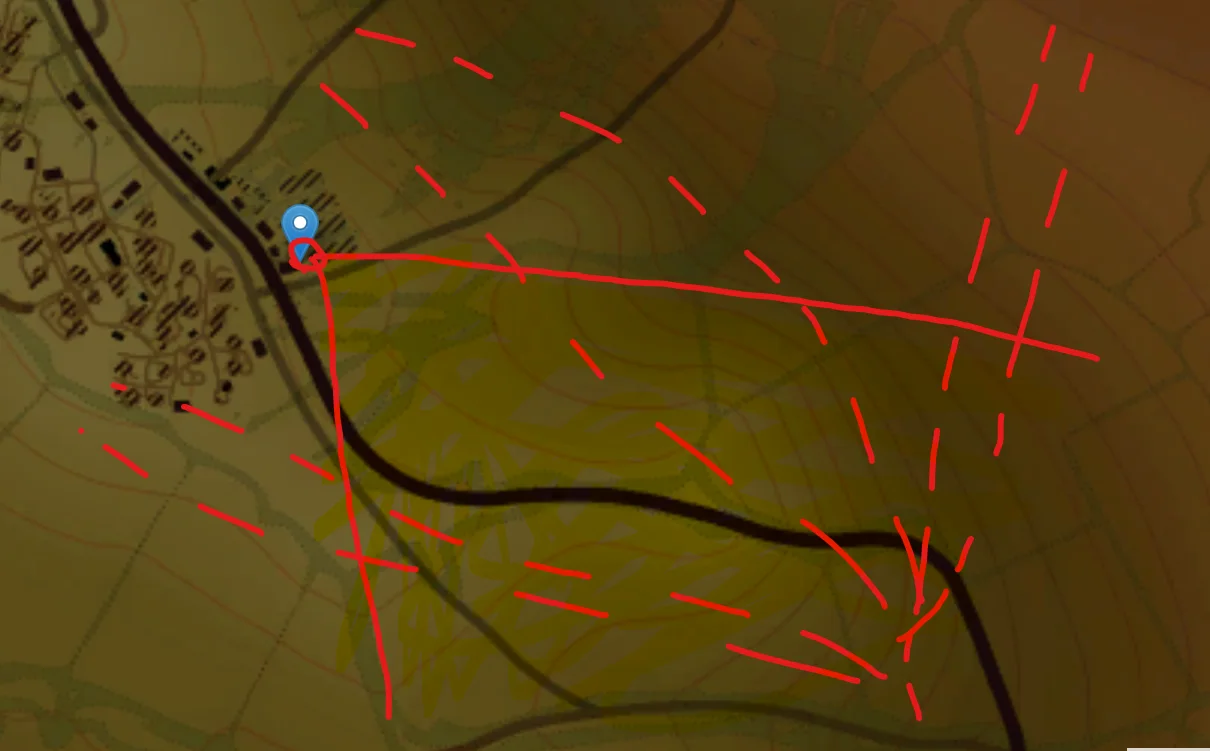
Wide Flank

This route MUST be rushed from this side — drive it flat-out from the match start, no hesitation, no stopping to trade. Done properly it is the best route in the whole game: the line beats the enemy's deployment to a decisive angle, and the run of kills that follows is close to a free nuke. The rush is the entire mechanism — every second of delay lets more of the enemy team spread into positions where the angle stops working. Commit at spawn, hold W, arrive before they are set, and start converting. When the run works, and it usually does from this side, the match is effectively decided in the first minutes.

Map overviewclick to expand
Wide Flank

A good sniping position — honest label: not the best on the map, but a solid one. The flank route in keeps you out of the early chaos, and the end position gives you workable long sightlines over the surrounding ground. Think of it as the reliable second option: when the premier spots are taken or contested, this one is usually free and still productive. It suits patient gunnery — deliberate shots on committed targets, hull-down where the terrain allows. Use it as a rotation stop in your match rather than a permanent home, and it contributes steadily without ever being spectacular.

See it on the map

Open FireArc in the RATLINE tool to view pins, draw routes, and contribute your own intel.

Open RATLINE → All Guides