 click to expand
sit here and snipe people going to the B point
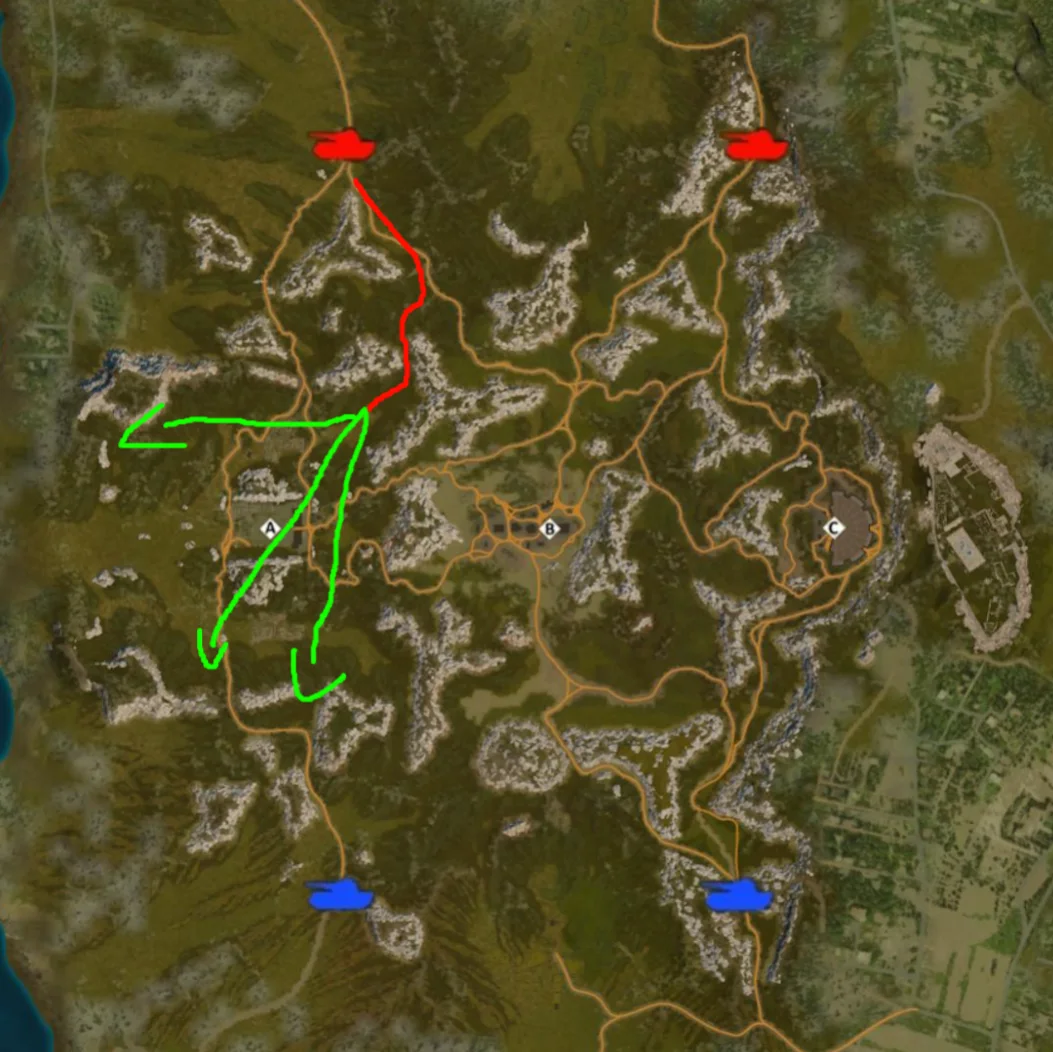
Community-sourced tactical intelligence for Attica. All positions and routes have been reviewed and approved before publication.
Tactical Positions · 5 approved
×
click to expandsit here and snipe people going to the B point
× click to expand
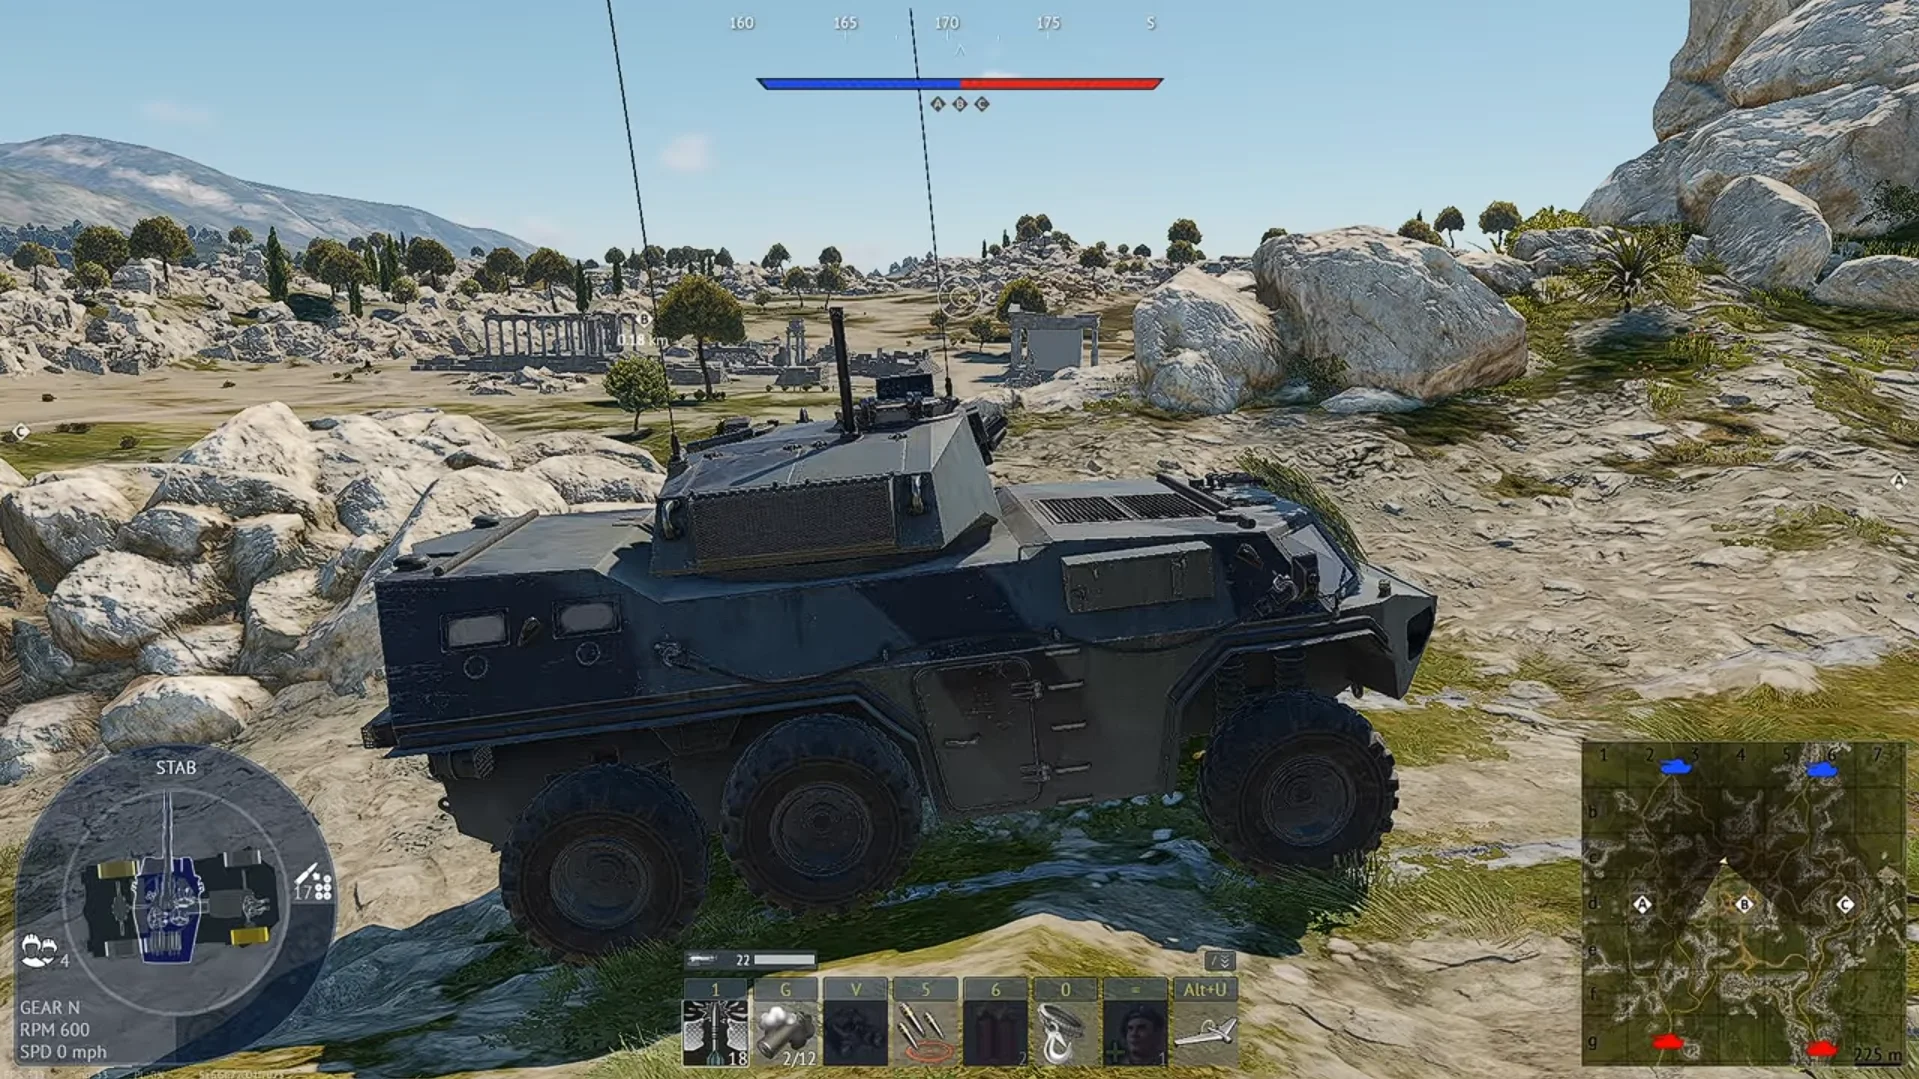
From here you can look over point B while being covered by the rocks. https://www.youtube.com/watch?v=Gg5FptDEdy4
× click to expand
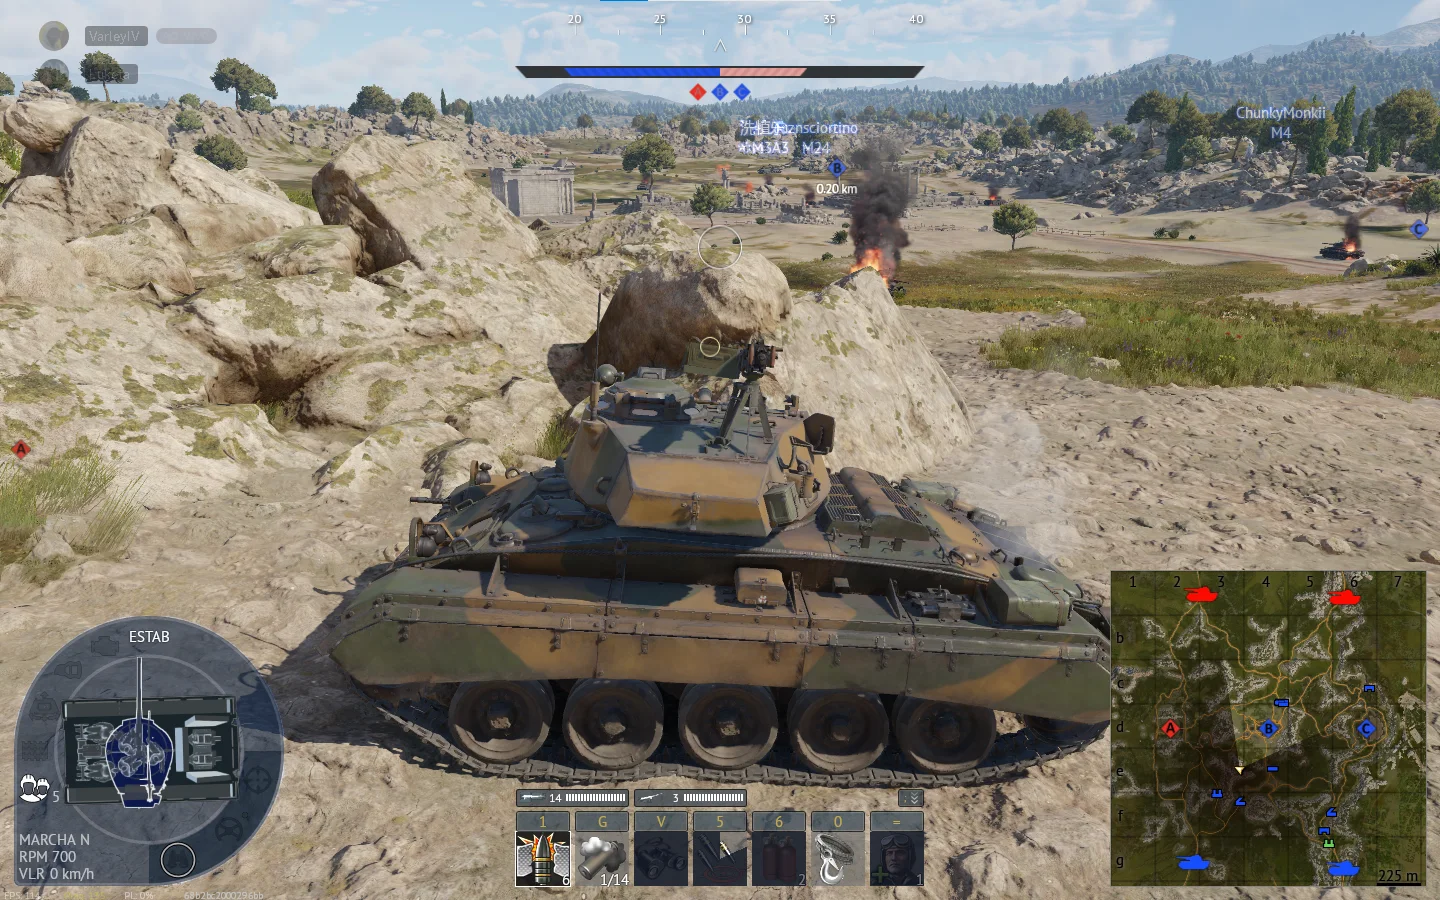
Rush and use binoculars / kills
× click to expand
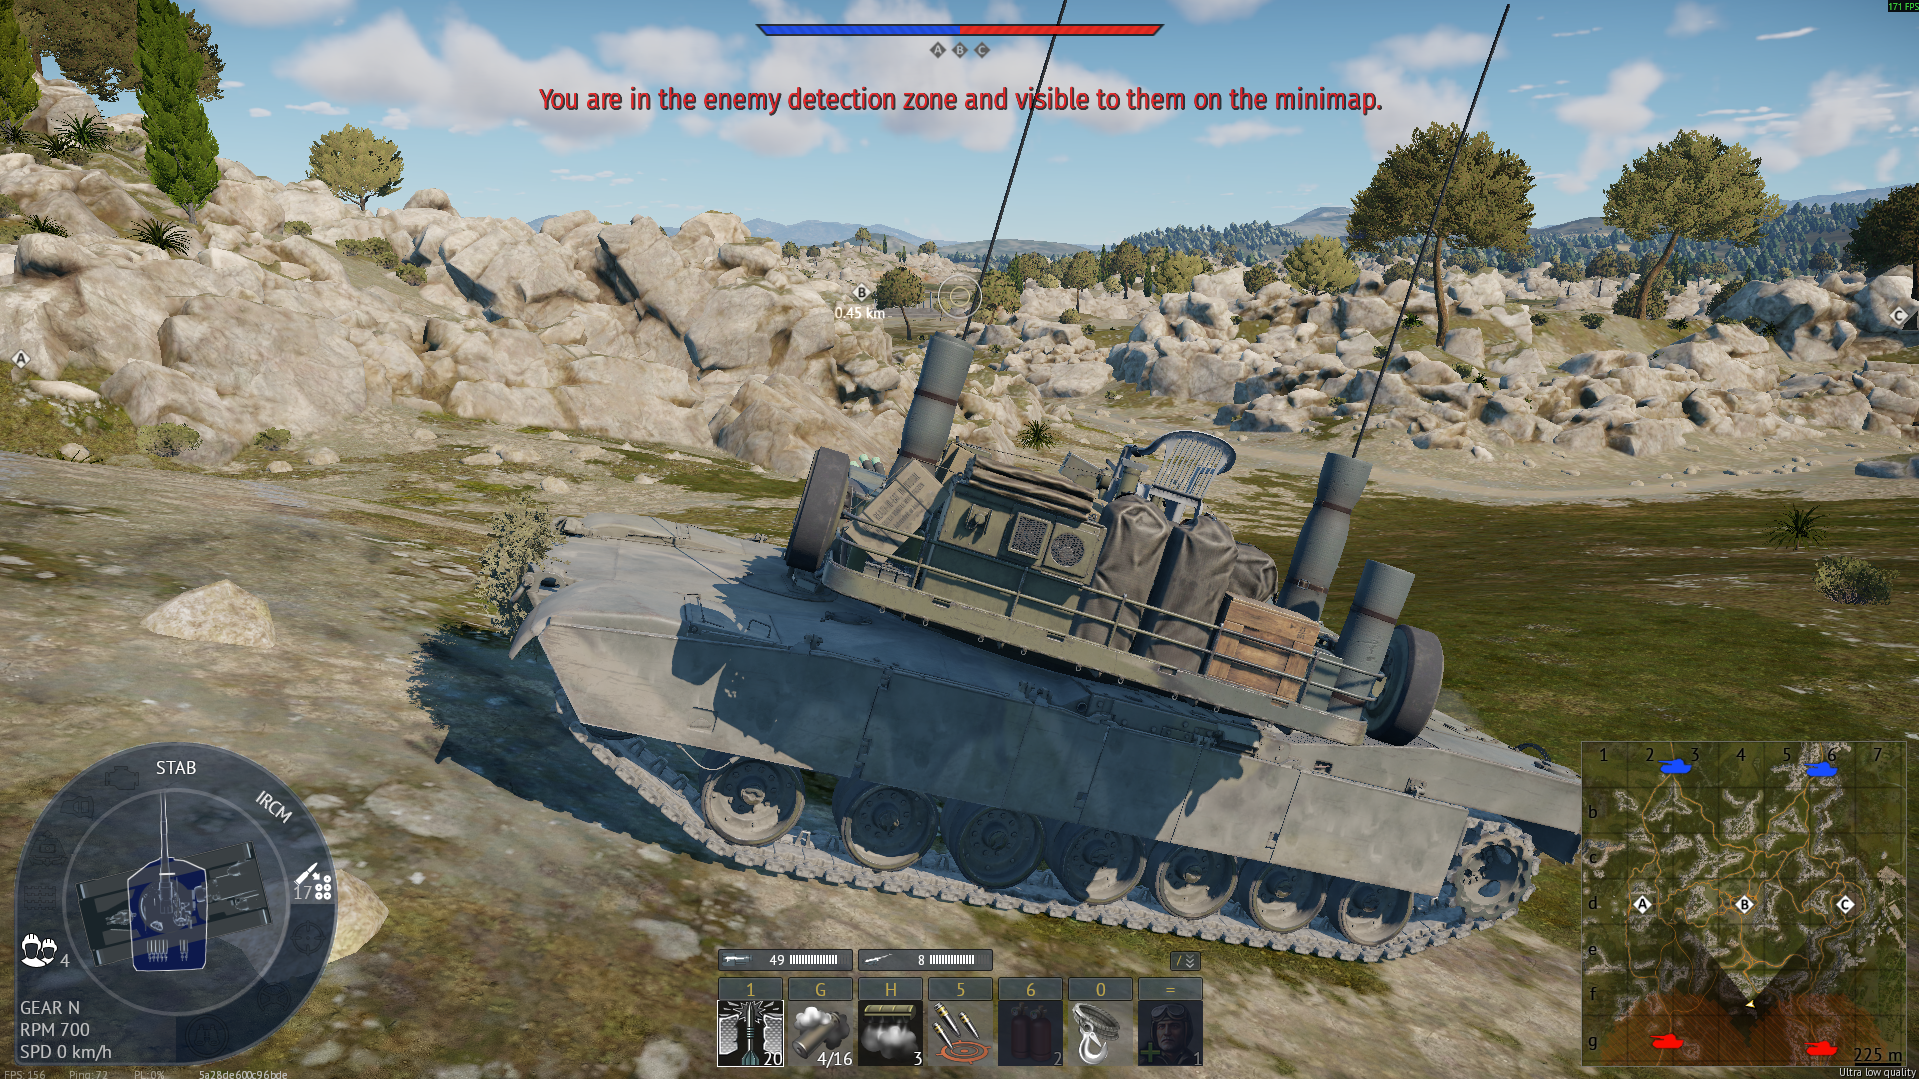
Low Risk - High reward sniping spot, around 600 meters distance to the enemy side of the hill. Covers the enemy hill and some camping spots near your spawn. With a good tank it should guarantee at least 2 kills
× click to expand
Same as the one opposite to it (the other teams) will let you shoot enemies in the back while they are going for b/a while eing covered from behind (CAUTION you will need smh fast (m18,sdkfz234/2,radkampfwagen etc) and are at risk to be shot by other fast tanks)
Strategic Routes · 7 approved
×click to expand×click to expandMeh sniping spot for people going to A
×click to expandFlank here to get all the people in that sniping spot.
×click to expandQuick way to a good spot around the rock that will give you control of A and B
×click to expandA flank route
×click to expandpush past B if B and C is captured on the flank route, careful of hull down tanks, take it slow
×click to expandGain positioning on C, until the point is controlled. Then push to overlook B and the enemy spawn.
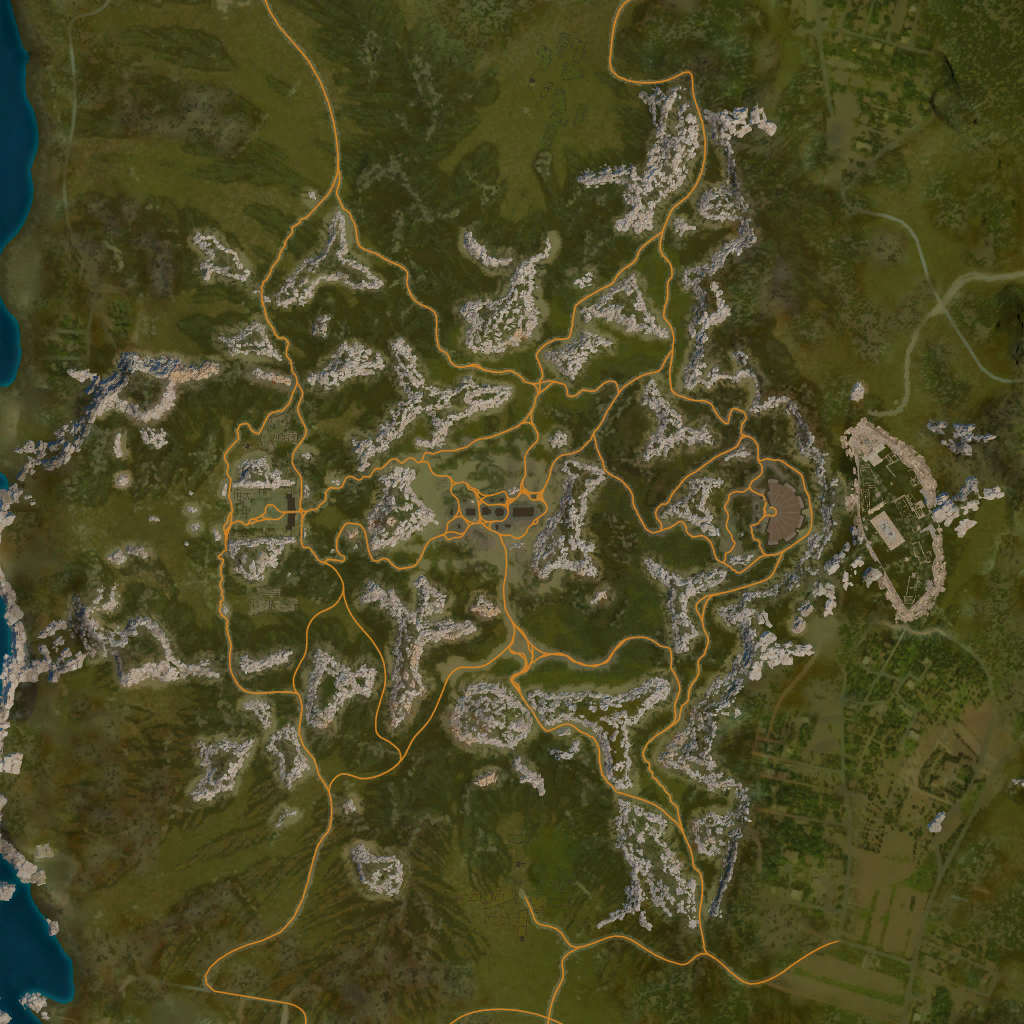
See it on the map
Open Attica in the RATLINE tool to view pins, draw routes, and contribute your own intel.
Open RATLINE → All Guides