Tactical Positions · 7 approved

Tactical position on AbandonedFactory
Map overviewclick to expand

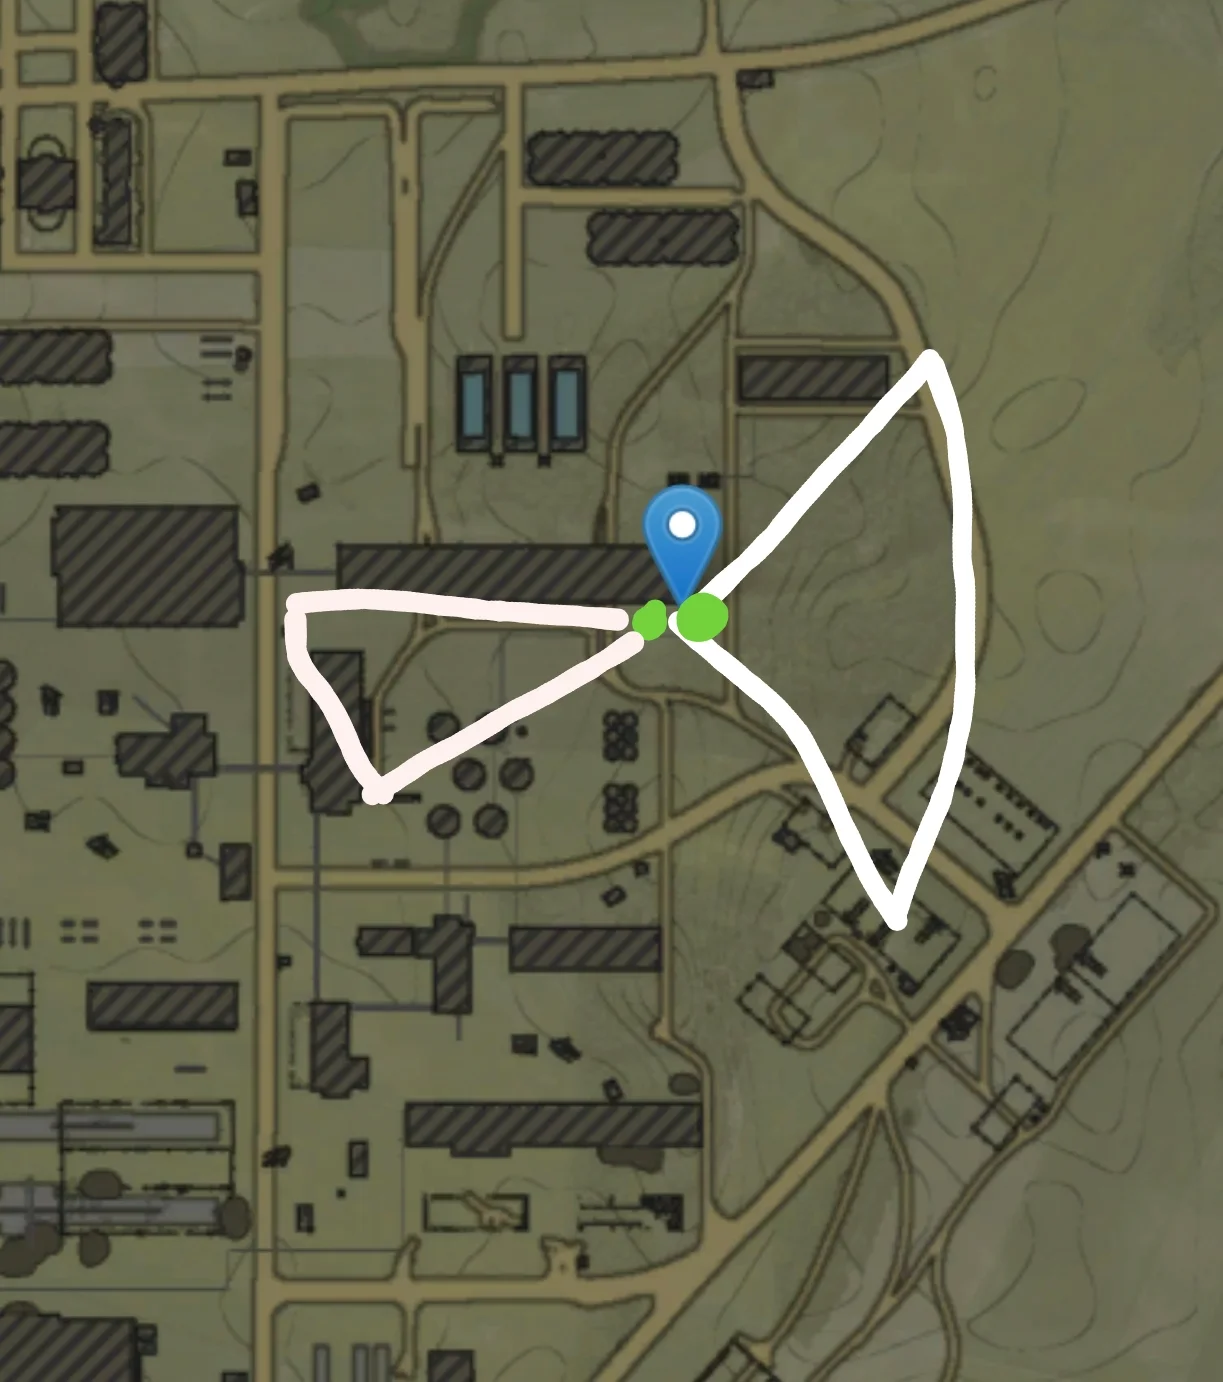
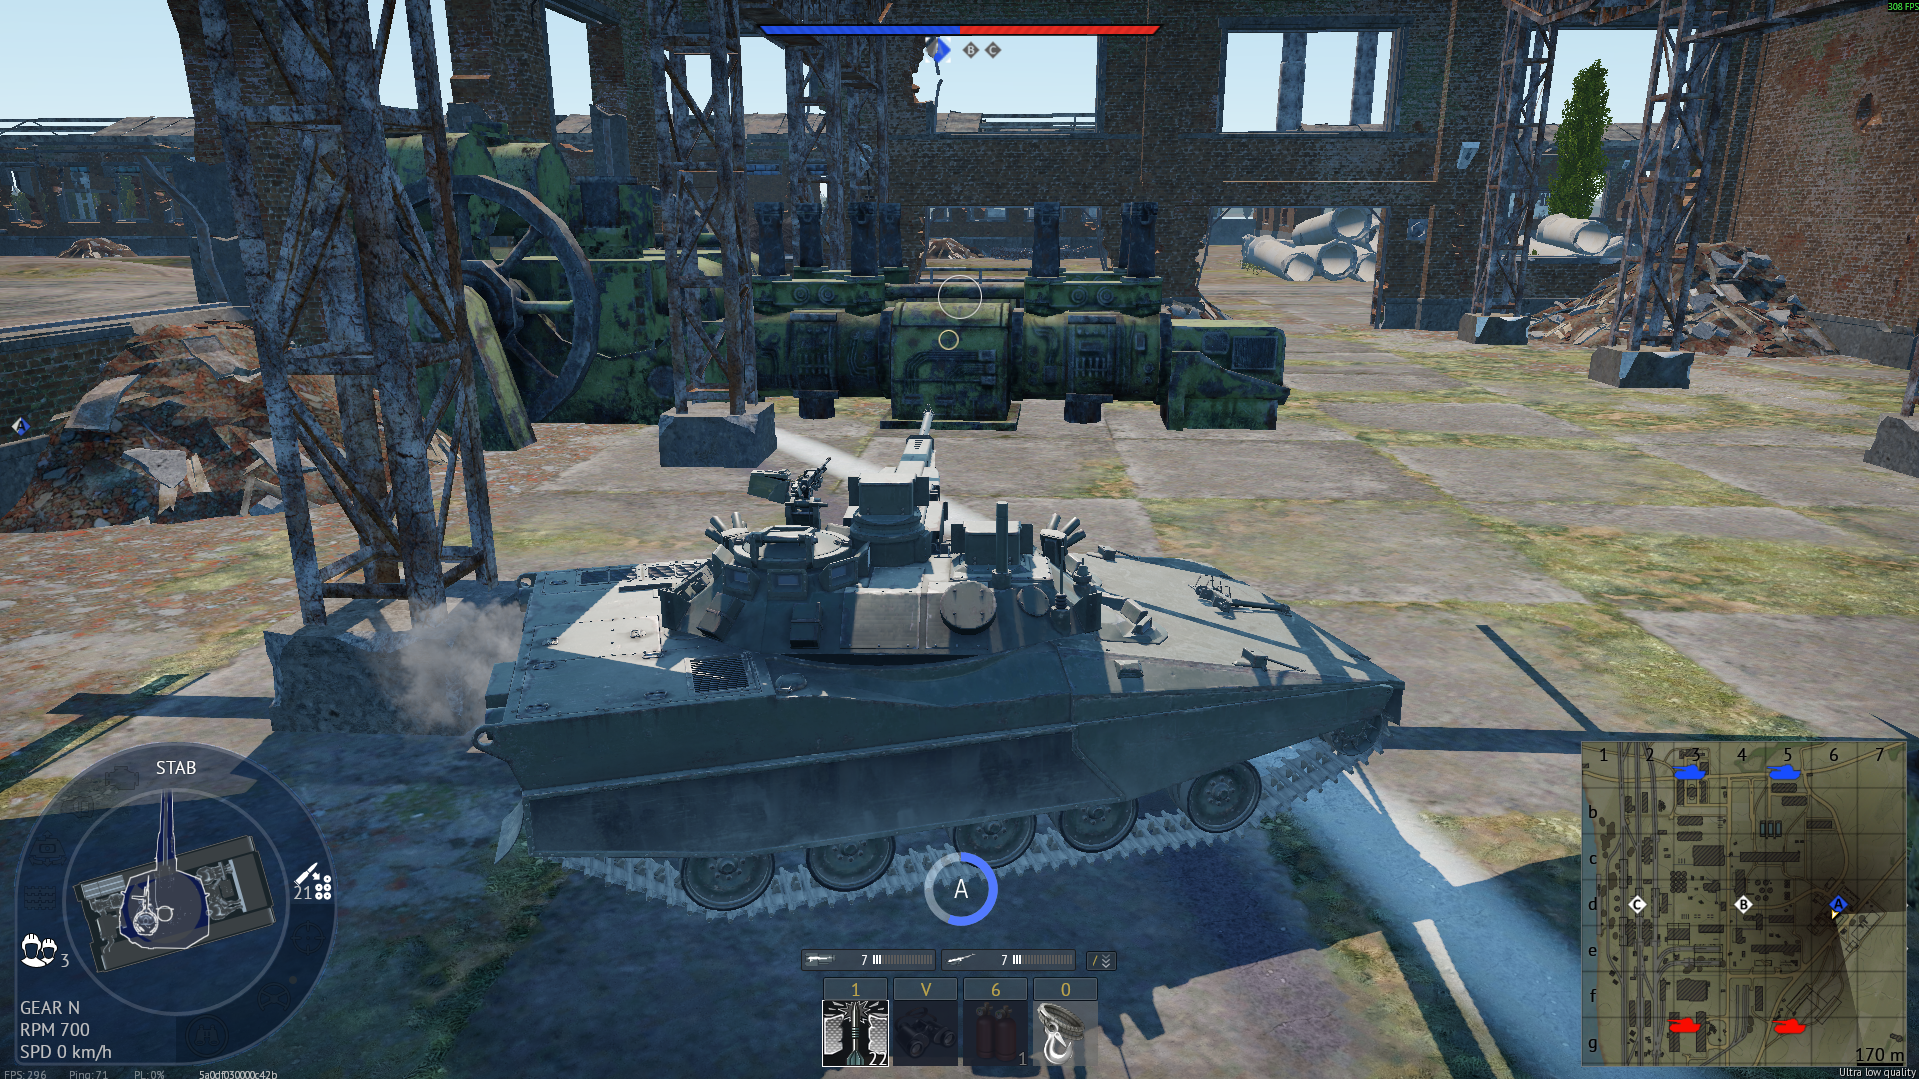
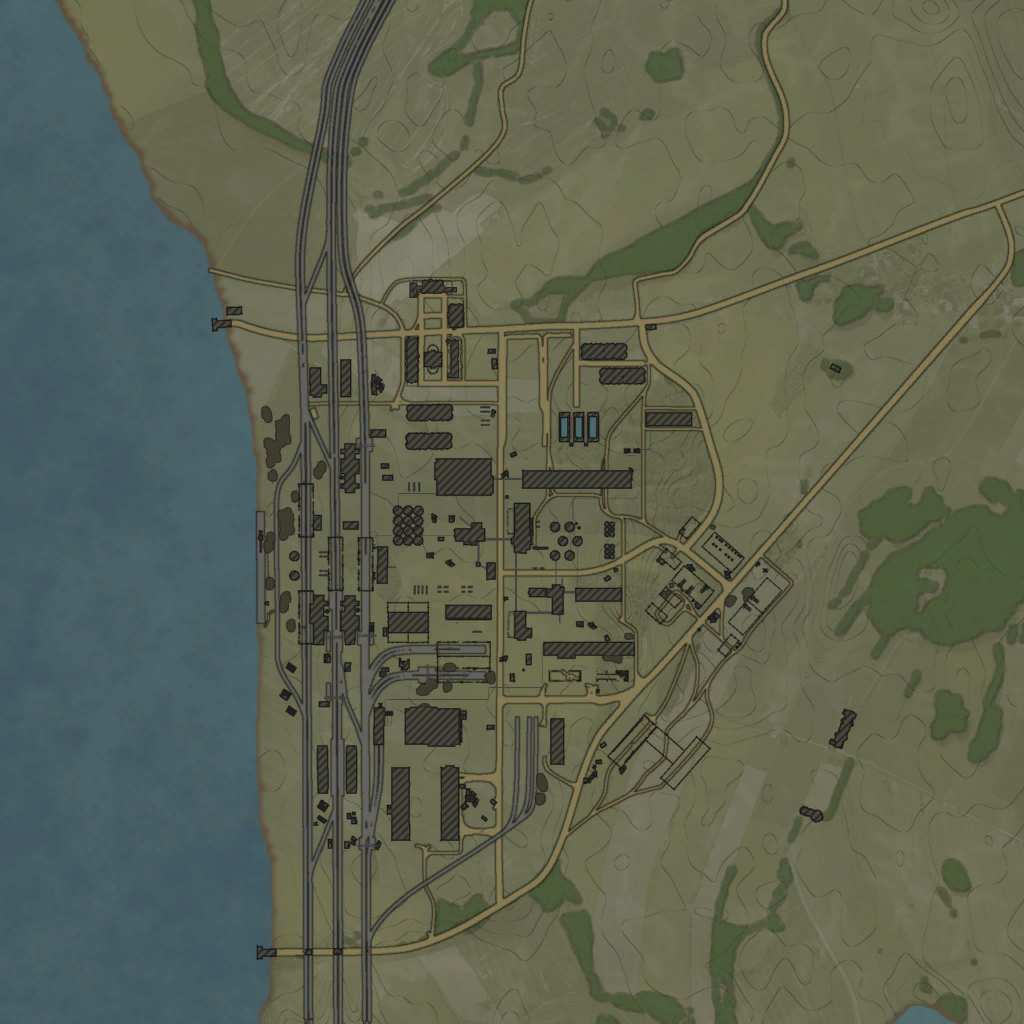
From this position you have control over the A point and over anyone coming out of their spawn — the two sightlines that matter most on this side, held simultaneously. The A coverage keeps the objective honest: nothing caps or defends the circle without offering you a shot. The spawn-exit reach is the multiplier, catching reinforcements in their first vulnerable seconds before they disperse into the map. Together they make this spot the tollbooth for the enemy's entire A-side operation. Establish early, split your attention between the two lanes, and relocate modestly once the kills start being investigated.
Tactical position on AbandonedFactory
Map overviewclick to expand

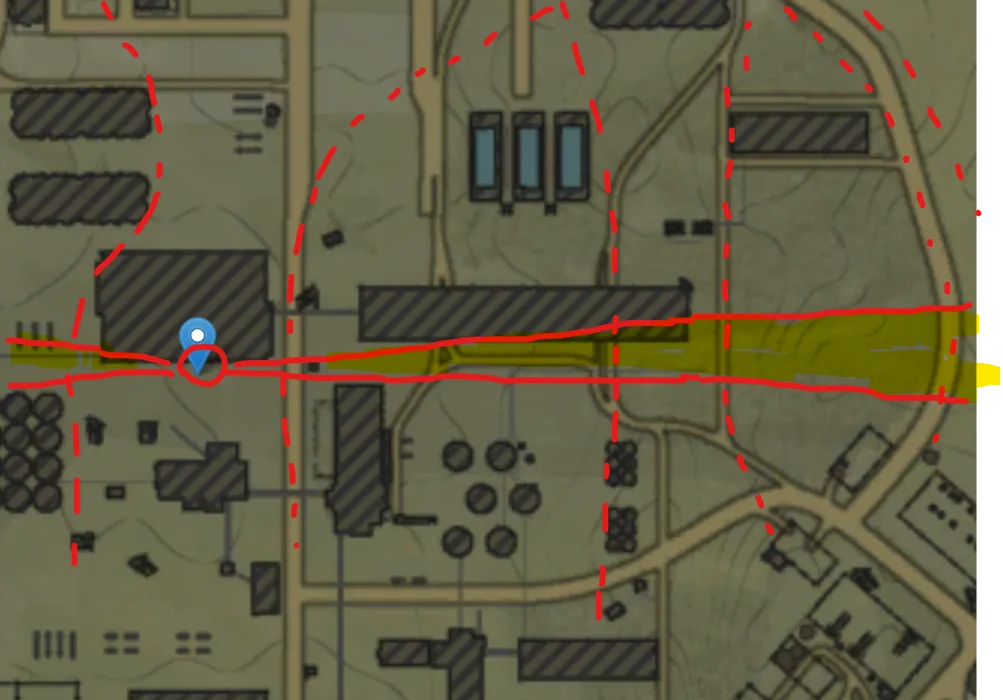
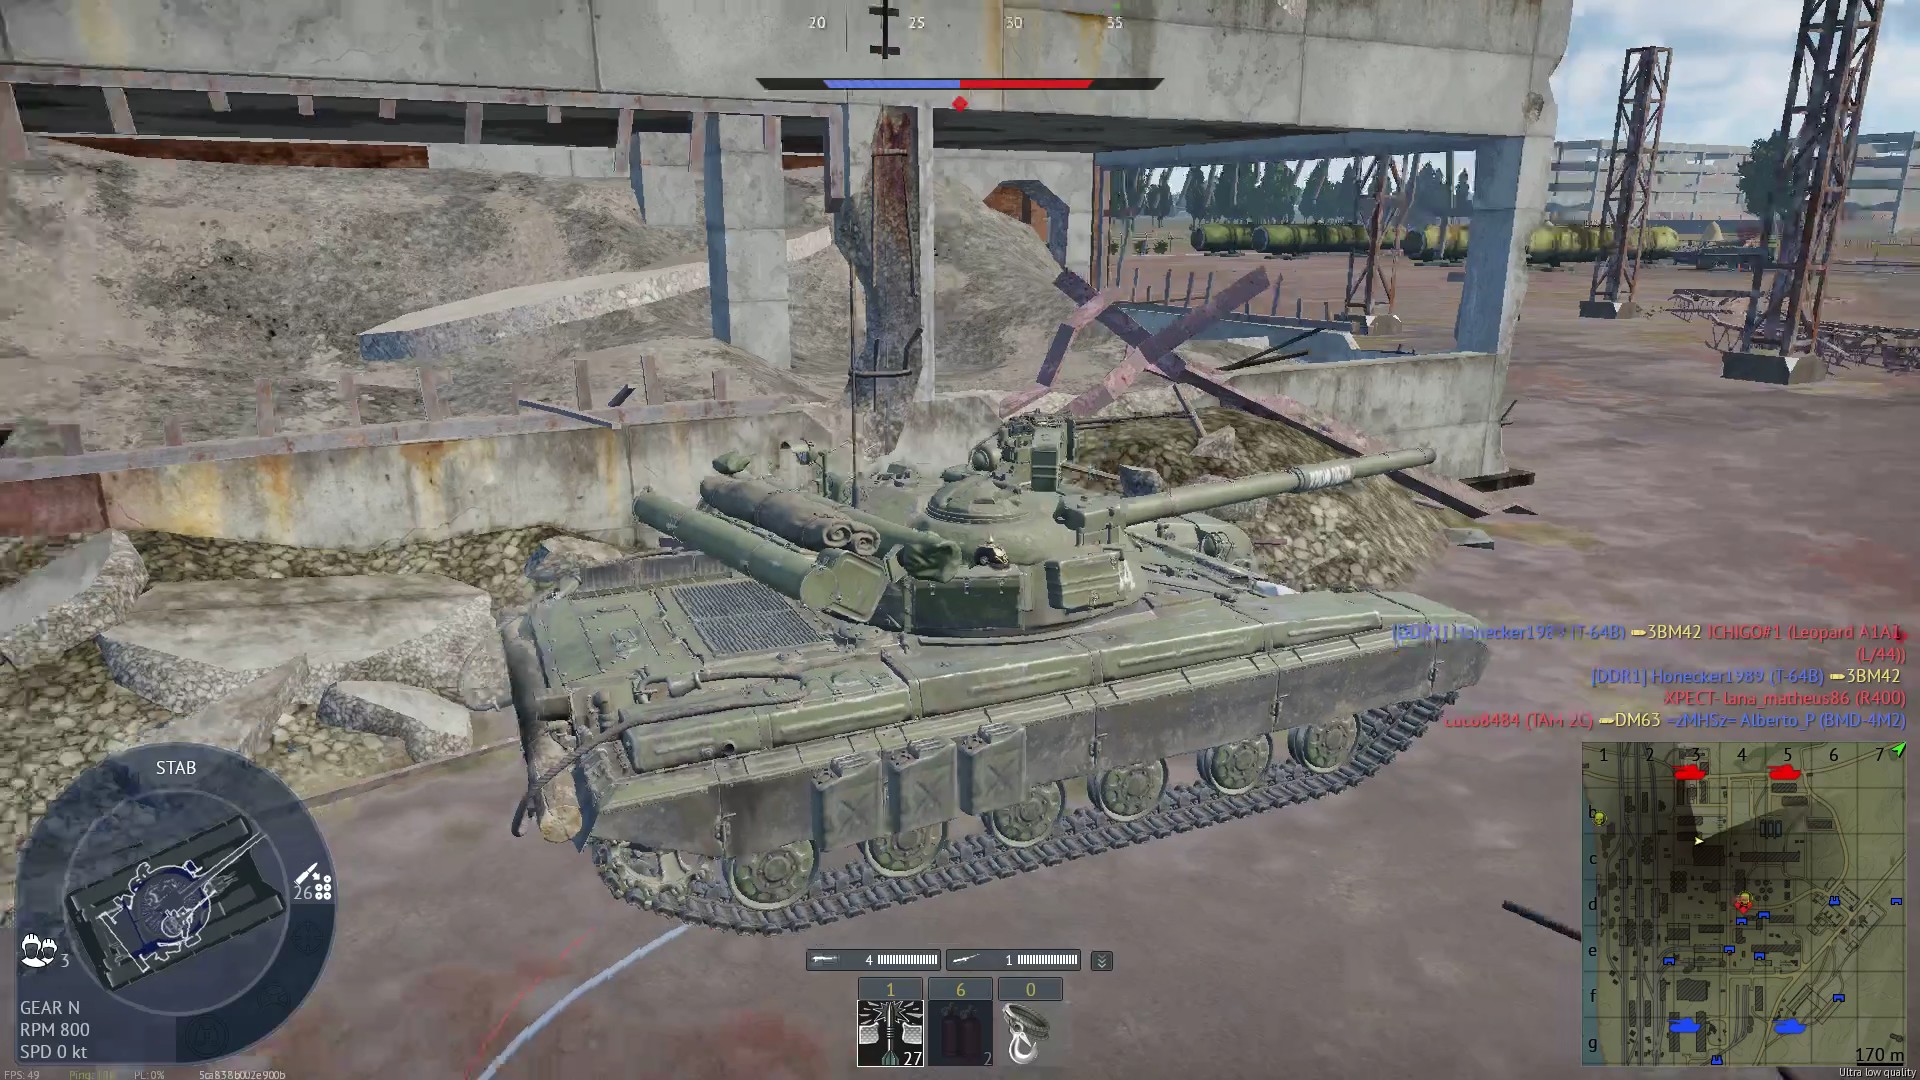
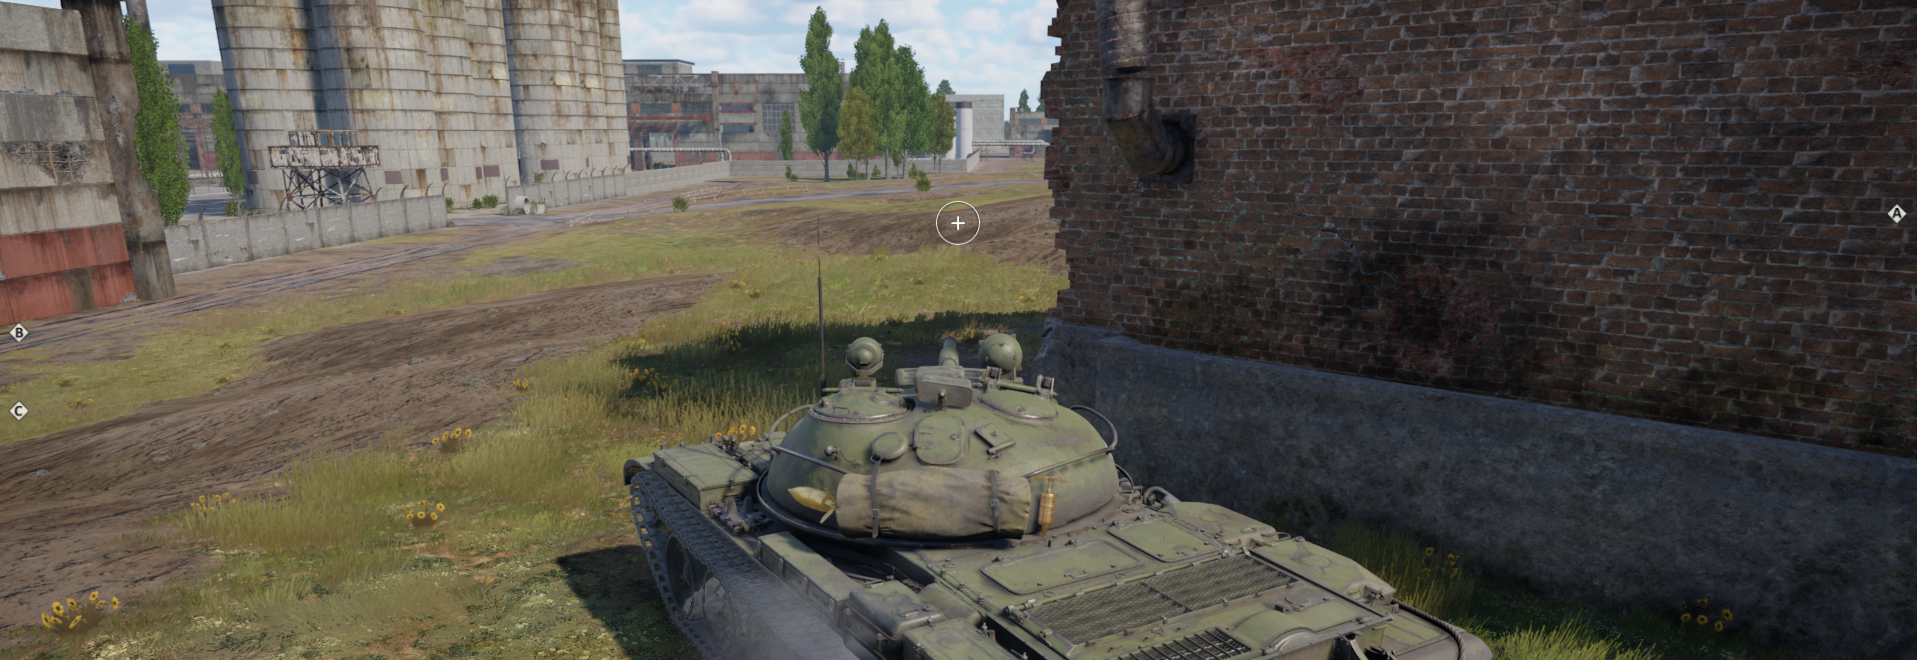
Good for covering the center and the left routes — a two-lane overwatch that keeps you relevant no matter which way the enemy leans. The center lane carries the map's main traffic; the left routes carry its flankers; and this position holds an angle on both, so your gun always has a queue. Positions that watch multiple lanes reward patient scanning: sweep between the two, engage the committed targets first, and resist tunneling on one lane while the other feeds. One disciplined tank here stabilizes half the map for its team — the center push slows and the left sneak dies at the door.

Tactical position on AbandonedFactory
Map overviewclick to expand

This spot gives you a view of one of the enemy's exit points plus the tunnel leading to B — two chokepoints in one field of fire. The exit-point sightline catches vehicles committing into the map; the tunnel angle catches everything that tries the underground route to the point. Both are funnels, and funnels make forgiving targets. The honest limitation: cover here is limited, so you are trading protection for the double angle. Play it accordingly — deliberate shots, brief exposures, and a readiness to displace once the return fire gets organized. Held carefully, the position taxes two lanes for the price of one.

Tactical position on AbandonedFactory
Map overviewclick to expand

A genuinely enjoyable position — players do not look at this spot because they do not realize tanks could already be there, and that disbelief is your armor. It is a light tank position: the speed to arrive impossibly early is the entry fee, and the reward is sitting inside ground the enemy treats as unreachable, with spawn-peek reach, cover, and flanking geometry all around you. Targets operate at close range without a glance your way. Fire deliberately, move minimally, and let their assumptions keep protecting you. When the spot finally burns, your mobility is the exit — until then, farm the impossible angle.

Danger ZoneDefensivePushCoverFlankSpawn Peak
Tactical position on AbandonedFactory
Map overviewclick to expand

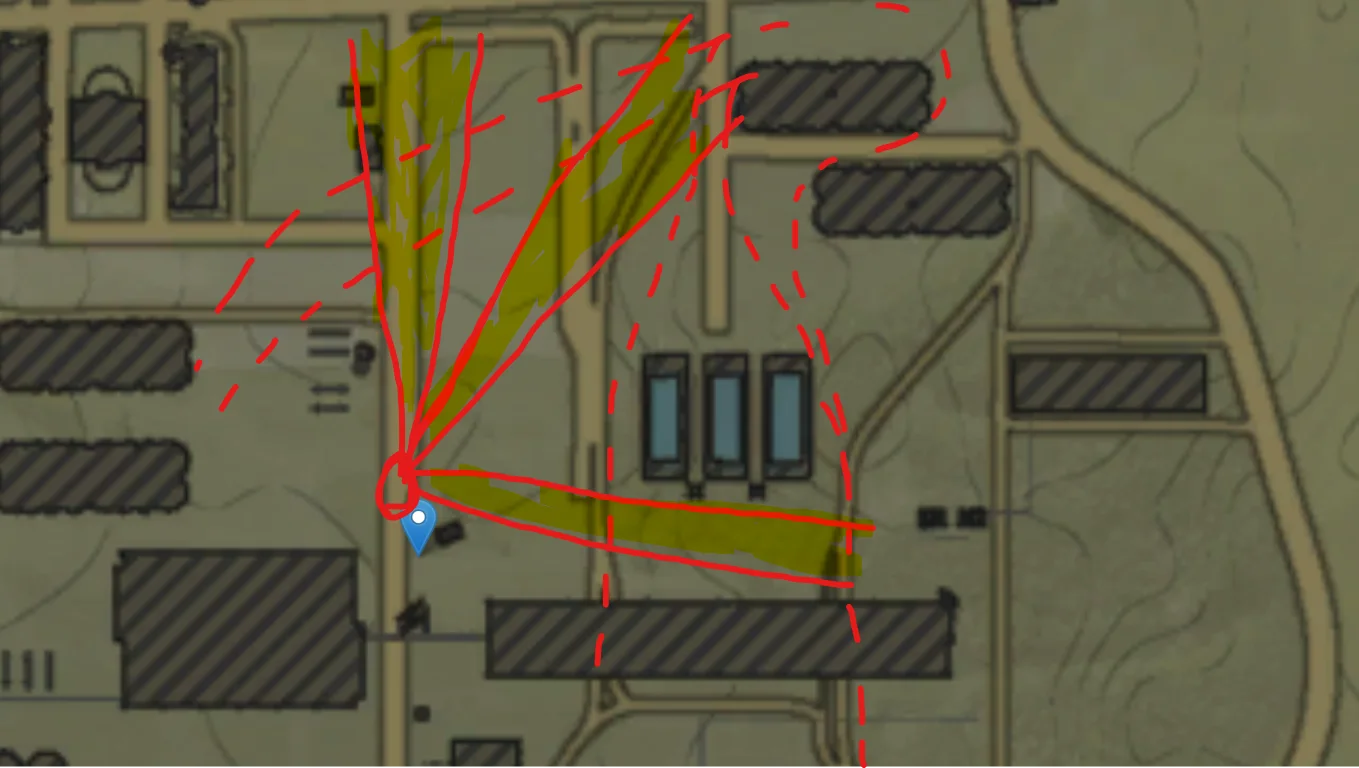
You cover a lot of enemy routes from here — that plural is the position's identity. The angle reaches across multiple lanes the enemy uses to move through this side: their rotations, their flank attempts, their spawn-side traffic, all crossing one field of fire. Multi-route coverage means your target supply does not depend on the enemy making any particular choice — whatever they pick, some of it parades past your gun. The cover lets you work it sustainably. Scan wide, shoot the most committed target available, and shift your spot a little after every couple of kills; a position this productive gets hunted eventually.

FlankSniperSpawn CampCover
Tactical position on AbandonedFactory
Map overviewclick to expand

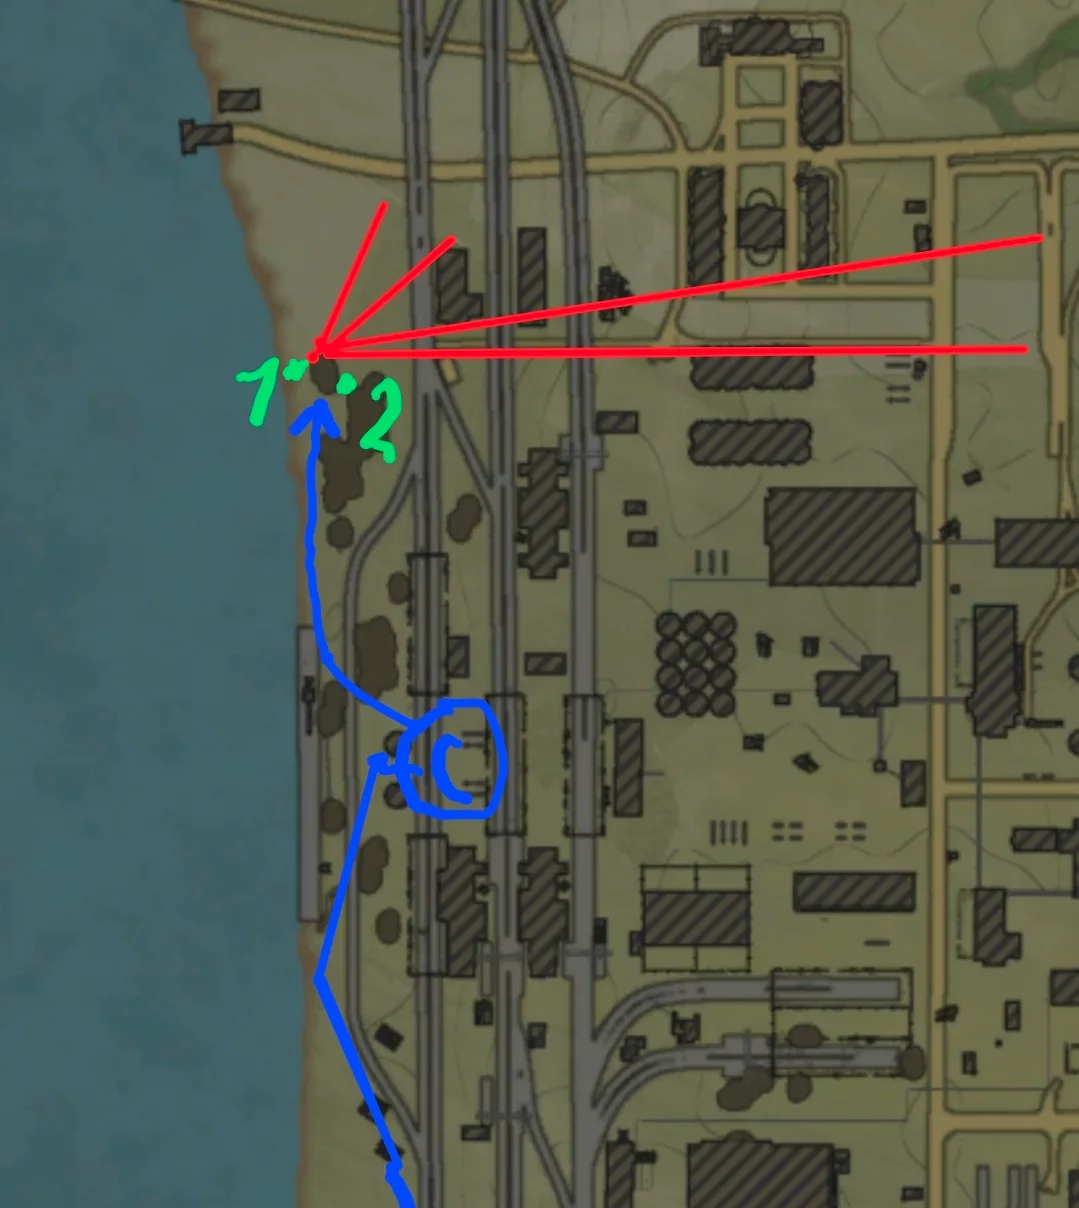
After you capped and fought enemy flankers coming in your way when you follow the blue Route, clear the fences for a better view but do it sneaky so you dont get cought. Bring good ammo and/or aim carefully but when you dont kill the enemys quick they pile up quick. On this point you can flank the whole other team trying to get to the cap points. Important: Listen for engine noises so you dont get overun by the enemys trying to cap C point. (Medium Cover so dont be agressive)

FlankSpawn CampSniperObjectivePush
Tactical position on AbandonedFactory
Map overviewclick to expand

Stay behind the wall — your hull will be protected by the piles of ground in front of it, and that layered cover is the whole position. The wall breaks your silhouette, the earth piles eat the shells that would find your lower plate, and what remains exposed is a turret-sized target working a spawn-peek angle. From there you engage the enemy's deployment traffic in their first careless seconds. The setup forgives extended stays better than most spawn-watching spots because so little of you is ever available to hit. Tuck in properly, work the exits, and let the dirt do the tanking.

Spawn PeakSpawn Camp

Strategic Routes · 16 approved

Map overviewclick to expand
Wide Flank

A good spot for flanking the enemies on A. The route swings you onto the point's shoulder, where the vehicles fighting over the circle expose their sides to an angle they are not defending. A-fighters are ideal flanking victims — committed, oriented frontally, and too busy with the point's main exchange to audit their flanks. Arrive while the point is actually contested, when the targets are dense and distracted, and work through them from the outside of the fight inward. After the sweep, the same position lets you either support the cap or reset for the next wave of contesters.

Map overviewclick to expand
Protected Corridor

A good flanking spot — but the route's real instruction is in the second half: better to stay sneaky. The protected line in is quiet by design, and the position at the end rewards preserving that silence; announce yourself early and the angle collapses into an ordinary, contested corner. Played sneaky, it is a slow-burn farm — you take deliberate, unhurried shots on targets that never localize you, and the position keeps paying for as long as the mystery holds. Resist the urge to fire at everything that moves. Choose the shots that stay anonymous, and the spot works the whole match.

Map overviewclick to expand
Direct Assault

The direct route to A — the straight answer to the objective. It is the fastest way to put tracks on the point, which makes it the opening-minute default and the emergency-retake lane for the rest of the match. Directness is a known quantity on both teams: expect the lane's watchers, pre-aim the established angles, and treat every piece of cover flanking the route as occupied until proven otherwise. Best driven when tempo matters more than stealth — first cap, fast reinforcement, coordinated push. It does exactly what the name promises, in both the good and the bad senses.

Map overviewclick to expand
Wide Flank

If you are fast enough, this is a good way onto the A site — the qualifier is the whole route. Speed converts this line from a gamble into a play: quick vehicles clear its exposed moments before the enemy's early sightlines harden, arriving at the site while the defense is still a rumor. Slow vehicles on the same path arrive into a formed defense and regret it. So gate the decision on your garage — in something brisk, take the line at spawn and be part of A's first fight from a flanking vector; in anything ponderous, give the route away and take the covered options instead.

Map overviewclick to expand
Wide Flank

Light tanks have the advantage on this ground — the route threads spaces where speed and a small silhouette outvalue armor, and the position it reaches rewards exactly those traits. Heavier vehicles can technically follow, but they arrive later, show more of themselves in the gaps, and lose the initiative that makes the spot work. In something light you get there early, tuck into the geometry, and work the angle with the first-move advantage the route was drawn for. It is a class-specific tool: bring the right vehicle and it is a free edge; bring the wrong one and it is just a slow detour.

Map overviewclick to expand
Wide FlankDirect Assault

If you manage to reach this place, an easy five or more frags are waiting — it is a spawn-peeking point, and the traffic it watches never really stops. The 'if you manage' is the honest part: the route mixes direct and flanking legs across ground that punishes the careless, and arriving is the skill being tested. Arrive intact and the position converts the enemy's deployment into a queue: vehicles roll out along the watched lines, fresh and blind, and the frags accumulate at whatever pace you can aim. Farm with discipline, favor the targets that cannot answer, and cash out before the reprisal organizes.

Map overviewclick to expand
Wide FlankDirect Assault

If rushed, this route pays five or more frags on the players rushing A from their spawn — a good position whose value is a race. Their A-rush and your drive both leave at match start; arrive first and their wave crosses your gun in file, committed to the point and blind to the angle. The interception geometry does the aiming: they are moving predictably, you are stationary and prepared. Every second of delay on your end lets more of their wave pass unpunished, so the rush instruction is literal. Commit at spawn, set up on the lane, and turn their opening play into your opening scoreboard.

Map overviewclick to expand
Wide Flank

Optional refinement of the position: stay behind the wall and the piles of trash — they protect your hull completely while you spawn-peek toward A. The debris is the armor; what the enemy can hit is a turret, briefly. The operating pattern is spelled out: if you take a hit, smoke and fall back to the previous position, reset, and return when the smoke has done its work. That escape loop is what makes this an easy five-plus spawn-peek spot rather than a one-and-done gamble — the position regenerates because you always have somewhere to be while the enemy's attention burns out. Trash as cover, smoke as insurance, repeat.

Map overviewclick to expand
Protected CorridorDirect Assault

A strong early-game push that requires a fast vehicle to work — the timing window is the surprise on the enemies rushing the factory, and slow tanks miss it. The protected line carries you in quickly; the payoff begins once you are inside the building. From in there, you look out the other side at the enemies crossing beyond, and the picks are free — they are moving through what they believe is dead ground, and the building's windows disagree. It is a position that converts one sprint into a match-long overwatch. Make the run at spawn, claim the interior, and tax every crossing you can see.

Map overviewclick to expand
Protected Corridor

Good cover for the point — this protected route delivers you to the piece of hard cover that makes holding the objective sustainable. The difference between capping in the open and capping behind this cover is the difference between donating your tank and keeping it: the position eats the sightlines that normally make the circle lethal, letting you hold, defend, and re-cap from behind something solid. Use the route both to take the point and to reinforce it later — the covered approach means your reinforcement actually arrives. Unspectacular, essential, and the reason this point stays holdable at all.

Map overviewclick to expand
Protected Corridor

A genuinely strange and useful trick: with a tall vehicle, you can use your binocular view to see and shoot over the concrete walls — the optics clear what the gun barely does — and the same setup watches over B. In practice you sit behind solid concrete, invisible to everything, while your binoculars run the overwatch; when a target commits, you rise into the firing solution you already built and take it. Height is the entry requirement: short tanks see wall, tall ones see the map. It is niche, it looks absurd, and it produces kills from a position the enemy literally cannot render as a threat.

Map overviewclick to expand
Direct Assault

Cap this point — the route's mission statement, direct and unapologetic. The line is the practical answer to the objective: the shortest reliable path that puts your tracks in the circle and the timer on your side. Points win these matches, and somebody has to actually stand on them; this route is for the player willing to be that somebody. Drive it with the cap as the only goal — no detours, no farming on the way — and let teammates handle the overwatch. Best at match start and at every moment the point flips hostile; the route does not age, because the mission never does.

Map overviewclick to expand
Wide Flank

Camp the enemies going to the cap — the route sets you on the lane they use, where the point-bound traffic delivers itself to your gun. The attached warning deserves respect: many enemies use this lane, so be careful — the same volume that makes the position rich makes it dangerous, and the difference between farming the traffic and being overrun by it is pacing. Engage the targets you can kill cleanly, let the overwhelming waves pass rather than announcing yourself to all of them, and keep your exit honest. Played with judgment, the lane's volume works entirely for you; played greedy, it works entirely against.

Map overviewclick to expand
Protected Corridor

The perfect spot for anti-air — sized, in fact, for more than one vehicle, so bring a friend: a pair of SPAAs here covers the sky properly. The protected route in matters because AA vehicles are soft and this map's transit is unkind; arriving intact is half the position's value. Once set, the spot's sky coverage over the battlefield's active air lanes lets radar and eyes do their work with ground cover keeping the counter-battery honest. CAS decides matches this game, and a manned AA position here quietly deletes that factor. If the enemy is flying, this is where your team's answer parks.

Map overviewclick to expand
Direct Assault

The direct route to A — the straight line, driven for speed. It exists for the moments when arrival time is the whole question: the opening cap race, the urgent retake, the reinforcement that has to be there now. The trade is the usual one for direct lanes — everyone knows where it runs, so the route's watchers are a permanent tax, and your gun should be forward with the known angles pre-aimed the entire drive. Take it when tempo demands and skip it when stealth serves better. It is the simplest tool on the map, and simple tools get used every match.

Map overviewclick to expand
Wide Flank

Best Route for Flanking almost the whole enemy team, ive gotten multiple Nukes using this tactic.

See it on the map

Open AbandonedFactory in the RATLINE tool to view pins, draw routes, and contribute your own intel.

Open RATLINE → All Guides