Tactical Positions · 12 approved

Tactical position on 38thParallel
Map overviewclick to expand

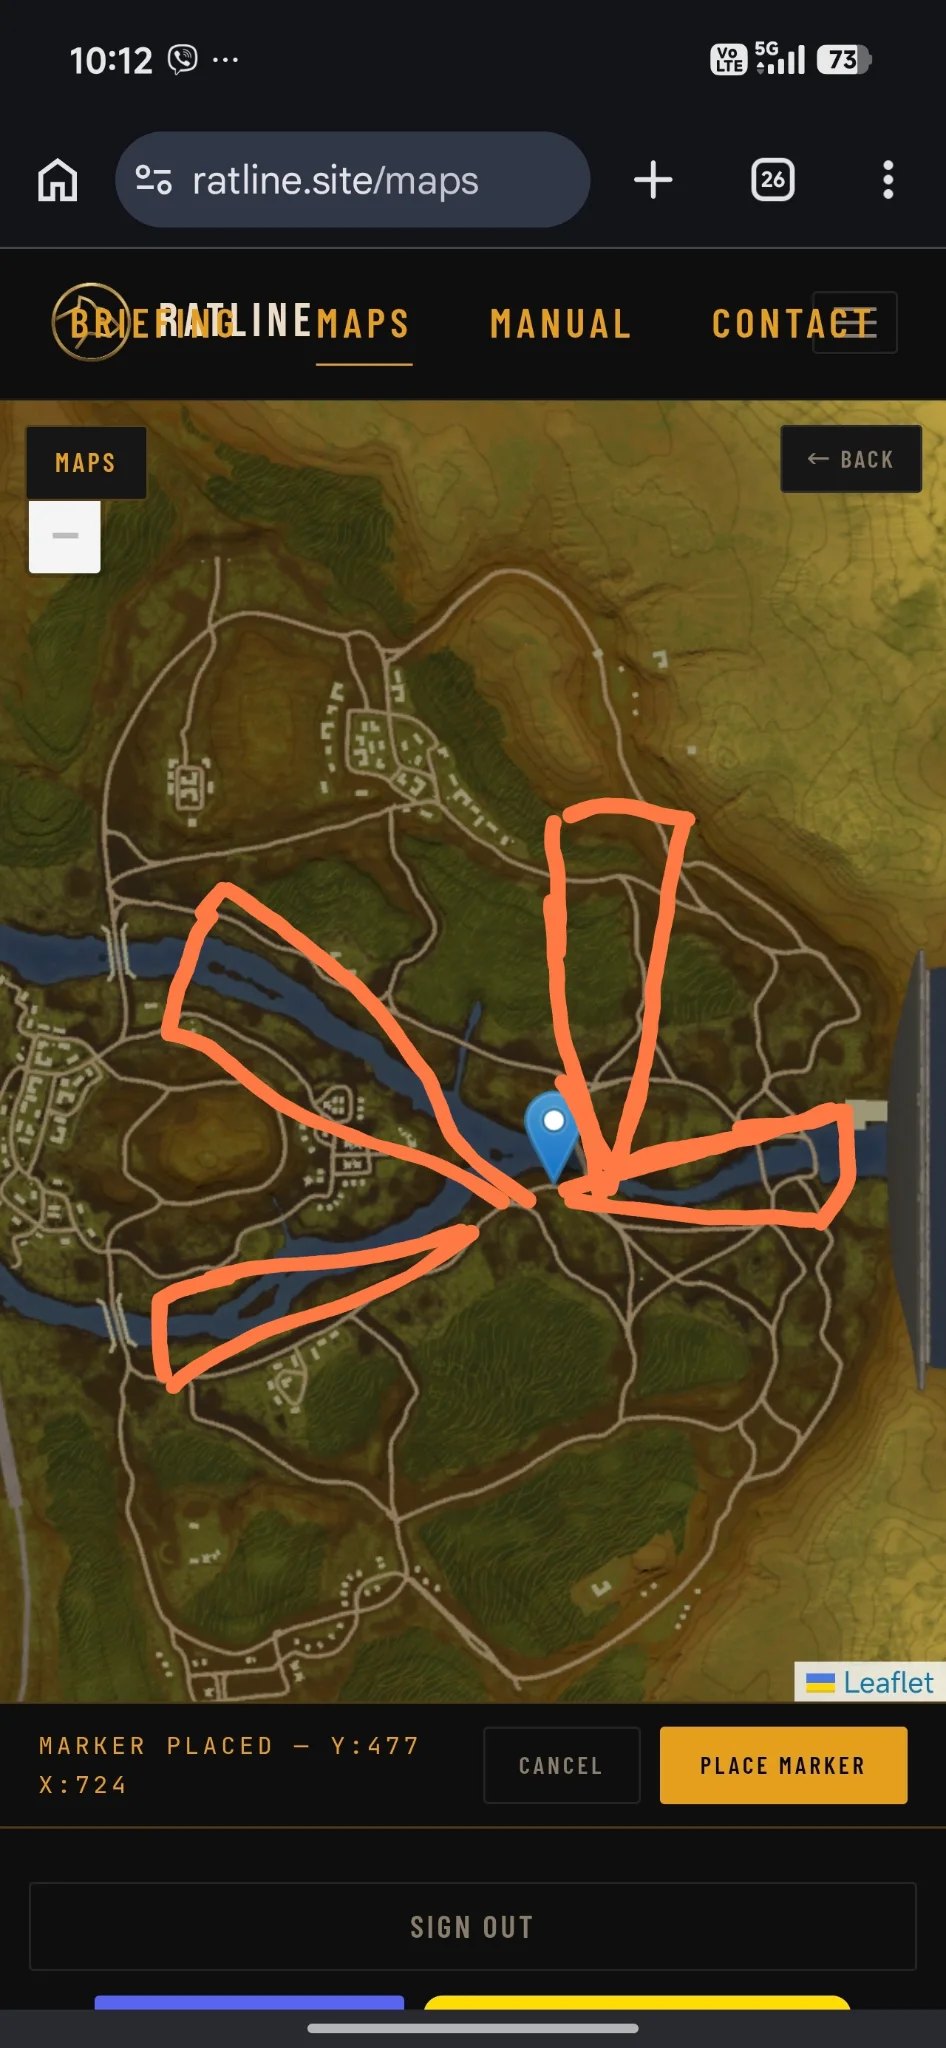
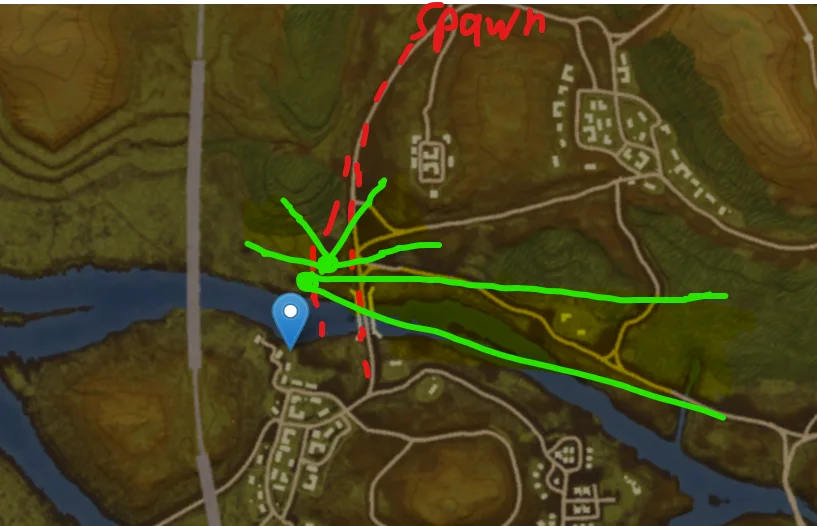
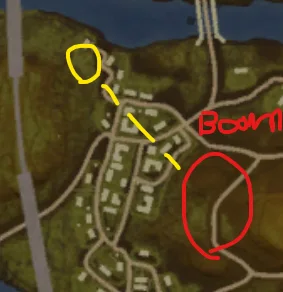
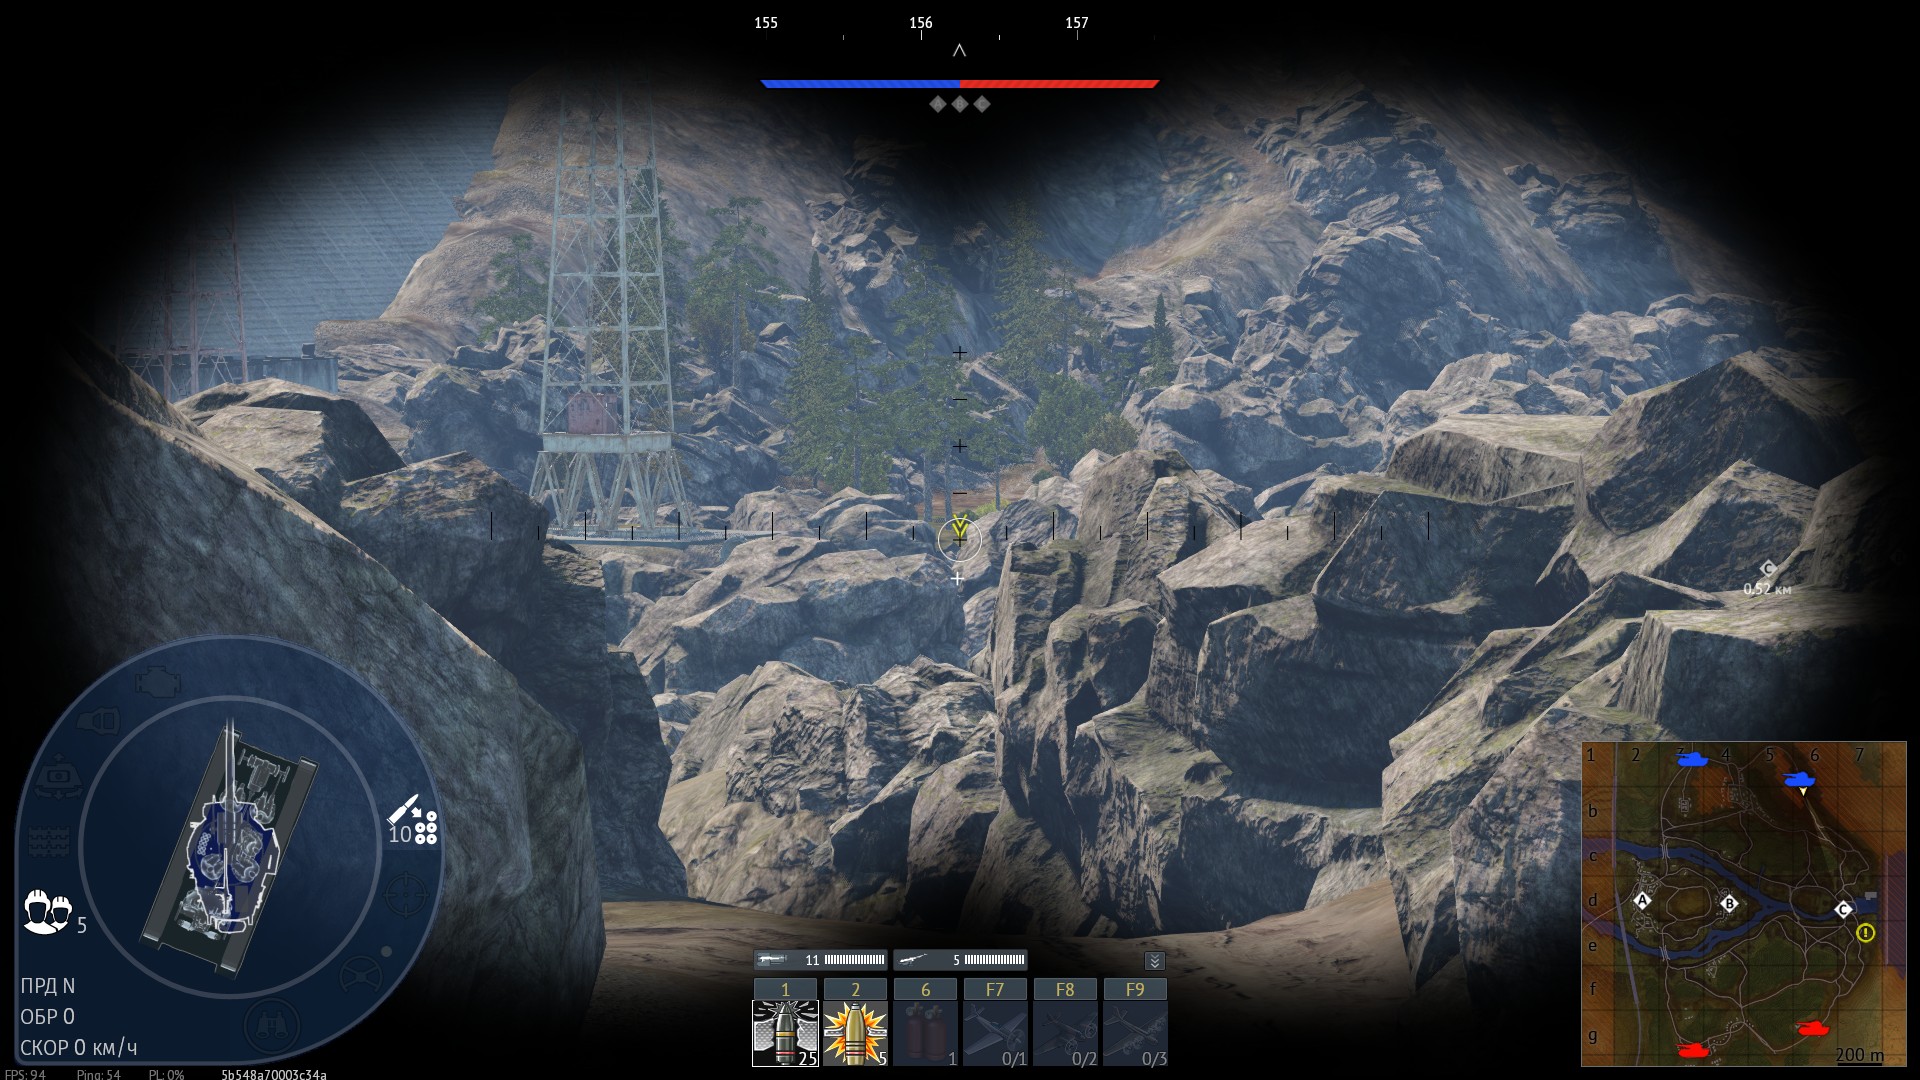
This firing position is ideal for engaging enemy vehicles that rush toward Capture Point C at the start of the match. By aiming at approximately 156°, you gain a clear line of sight to one of the most common approach routes used by aggressive players. Enemies often focus on reaching the objective quickly, leaving them exposed as they cross open ground. Setting up here early allows you to catch these vehicles before they establish positions around the capture point. Keep in mind that once you've fired a few shots, experienced opponents may begin checking this angle, so consider relocating after securing a kill or two to avoid return fire.

Tactical position on 38thParallel
Map overviewclick to expand

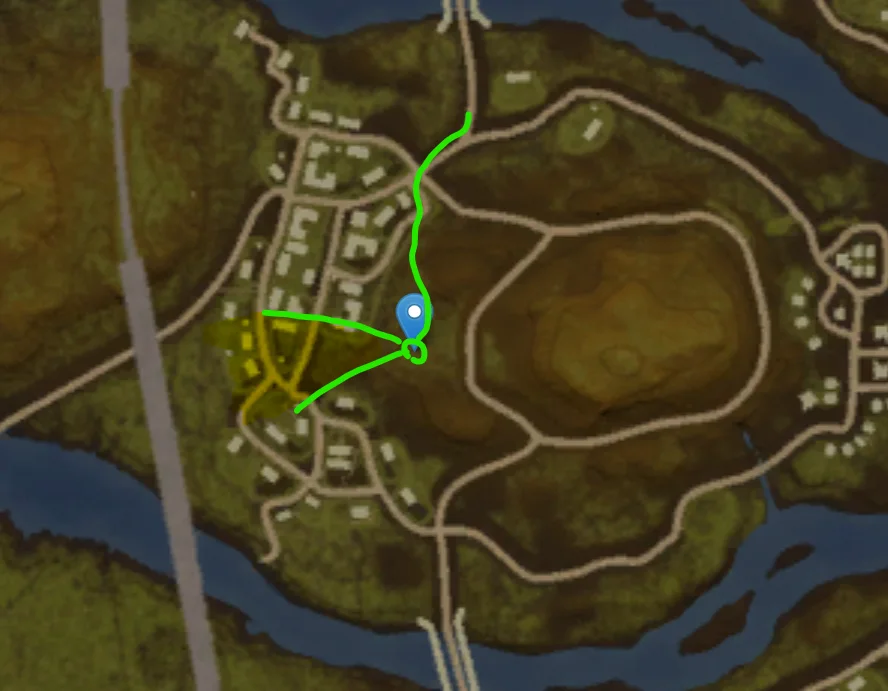
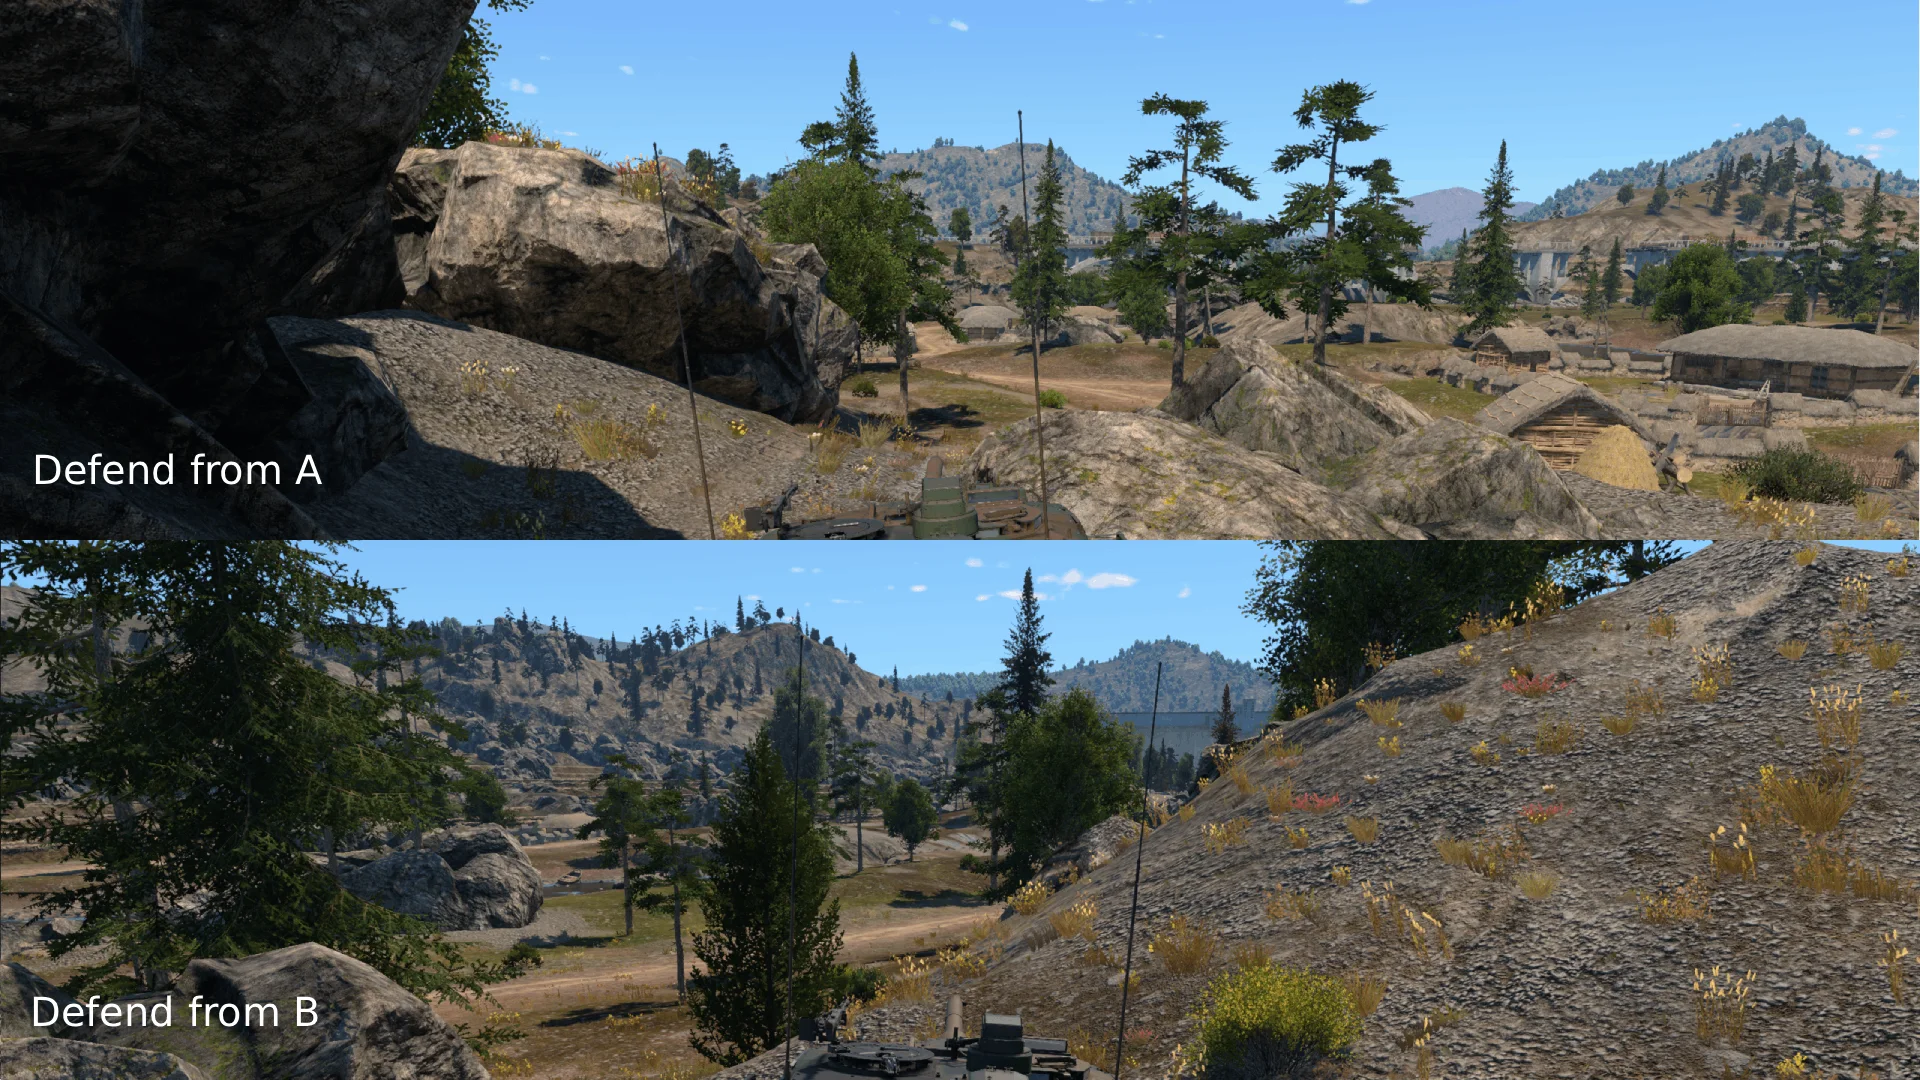
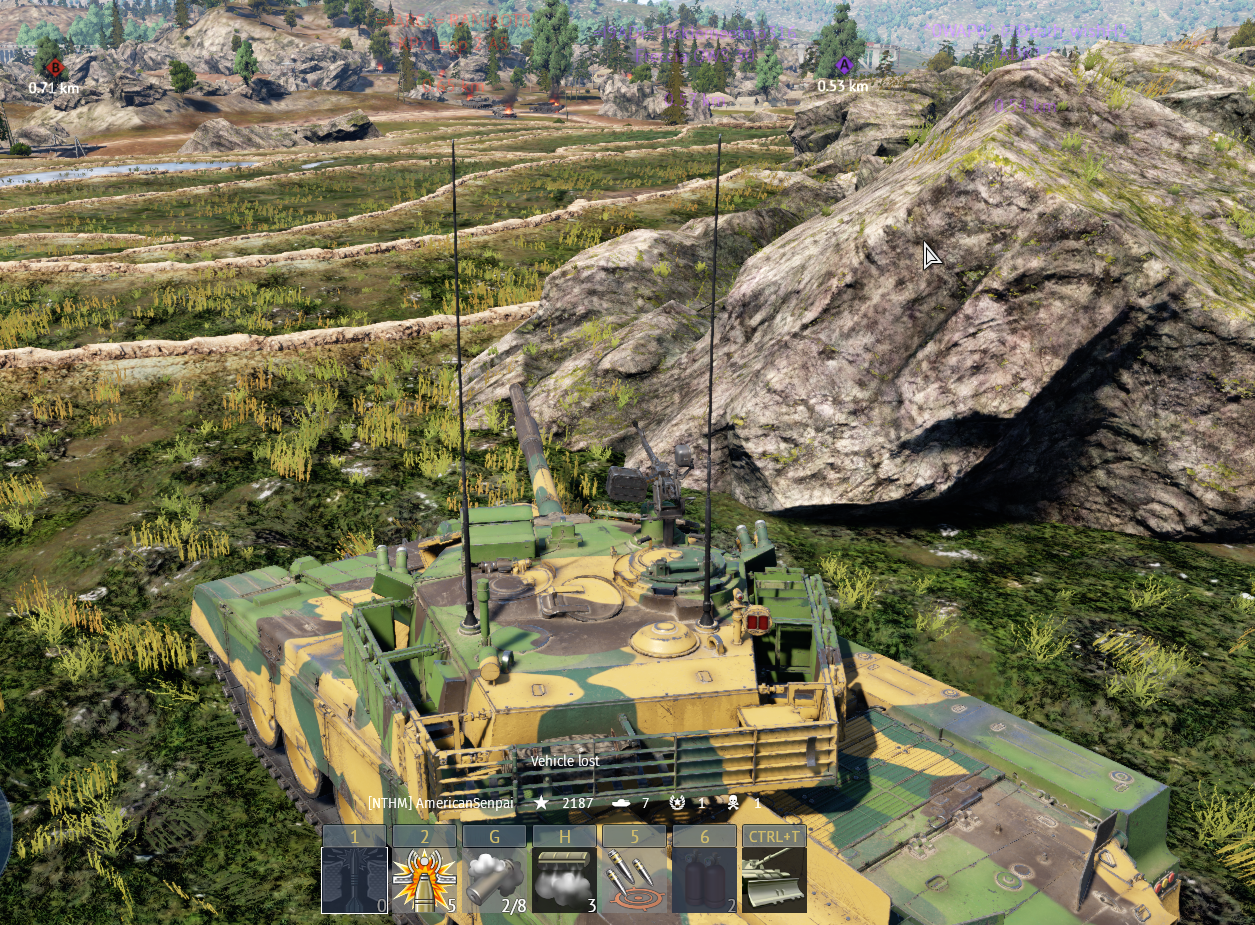
This position is designed for the smaller version of 38th Parallel and provides an excellent concealed overwatch location covering Capture Point B. From here, you can observe vehicles attempting to capture the objective as well as enemies maneuvering around the surrounding roads and terrain. The natural cover makes it easier to remain hidden while waiting for targets, allowing you to engage opponents before they realize where the shots are coming from. This spot is most effective when used patiently—avoid firing at every target immediately, as revealing your position too early can attract return fire. Once the enemy begins searching your location or artillery is called in, repositioning is recommended to maintain the advantage.

Tactical position on 38thParallel
Map overviewclick to expand

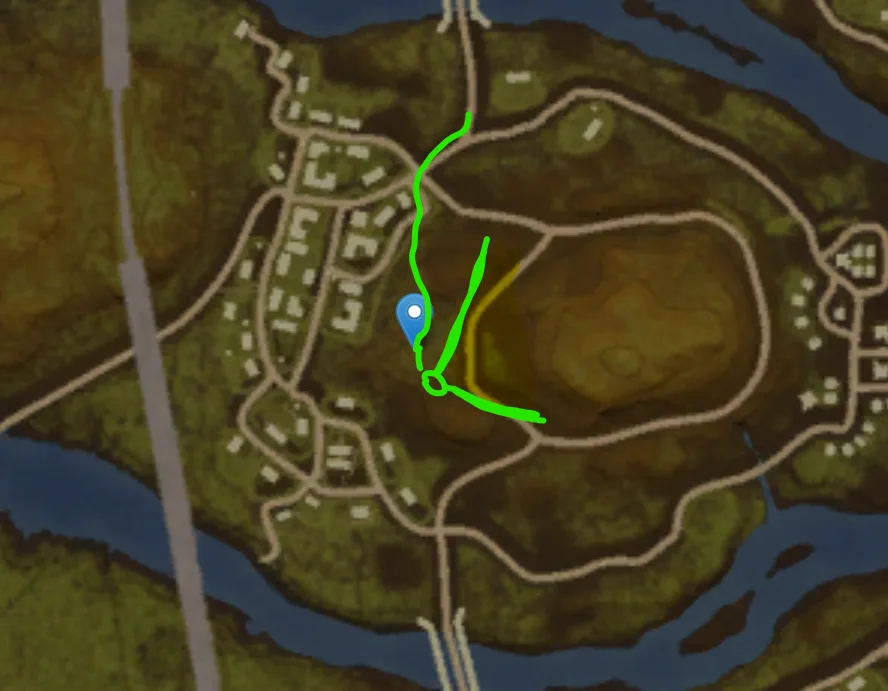
This early-game firing position allows you to engage enemy vehicles almost immediately after spawning. By moving into position as soon as the match begins, you gain a clear line of sight toward common enemy routes, giving you the opportunity to catch opponents before they reach cover or establish their own firing positions. This spot is particularly effective for vehicles with good gun handling and accurate long-range fire. Since enemies may eventually identify where the shots are coming from, avoid staying in the same location for too long. Securing one or two early eliminations before relocating can provide your team with a significant advantage during the opening minutes of the battle

Spawn Peak
Tactical position on 38thParallel
Map overviewclick to expand

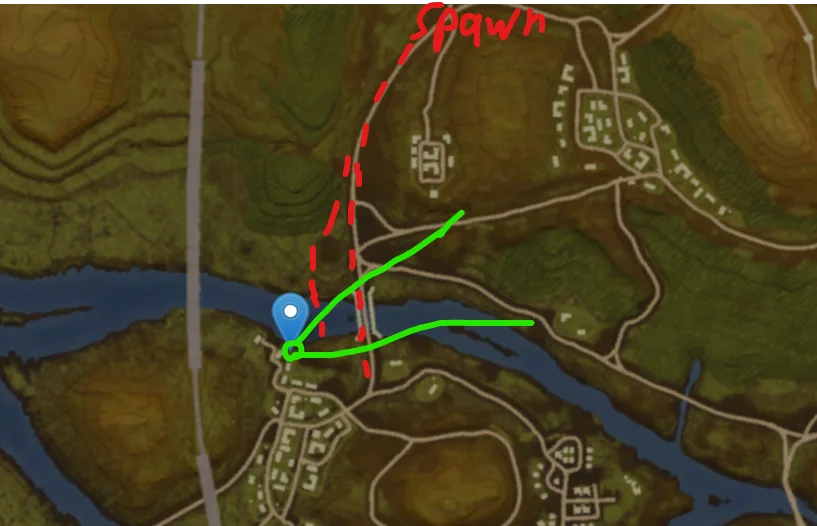
This rocky position provides a strong defensive overlook on 38th Parallel, allowing you to watch multiple important areas of the map from a single location. From behind the rocks, you can cover the right-side objective area while also keeping visibility toward the far-left bridge route, where enemies often rotate or attempt pushes. The natural cover helps protect your vehicle while giving you enough elevation and visibility to engage targets moving through open areas. This spot works best for players who prefer a flexible support role, as you can quickly switch between defending the objective and intercepting enemy movements across the map. Be aware that staying exposed for too long can make you predictable, so use the rocks to reposition between engagements.

SniperDefensiveDanger ZoneCoverHull Down
Tactical position on 38thParallel
Map overviewclick to expand

This position on 38th Parallel uses the natural terrain to keep you completely concealed from enemy sight. The hill provides cover, allowing you to set up an ambush position where opponents are unable to easily locate you while you wait for targets to appear. This makes the spot especially effective for vehicles that rely on surprise attacks, as you can engage enemies while maintaining a low chance of being detected. Use the hill as protection and avoid exposing too much of your vehicle when aiming. This position works best when holding a key route or waiting for enemy movements, giving you the advantage of firing first before opponents know your location.

DefensiveHigh GroundDanger Zone
Tactical position on 38thParallel
Map overviewclick to expand

This position on 38th Parallel allows you to use the hill as cover while gaining enough elevation to engage enemies positioned on higher ground. By climbing slightly up the hill, you can expose your gun and take shots at opponents holding the top areas without fully revealing your vehicle. The terrain provides protection from direct enemy fire, making it a strong option for catching players who are focused on other areas of the battlefield. This spot is especially useful for removing enemy snipers or defensive players before they can control the map. Keep in mind that only a small amount of movement is needed—exposing too much of your vehicle can turn the position from a safe firing angle into an easy target.

High GroundDefensive
Tactical position on 38thParallel
Map overviewclick to expand

This position on 38th Parallel is not intended as a permanent holding spot, but it can be used to secure a few early kills against enemies moving across the bridge. From this angle, you can catch vehicles while they are exposed during their rotation, especially players who are focused on reaching their next position rather than checking for threats. The bridge crossing creates a predictable movement path, making it a good opportunity for quick ambush shots. After taking a few engagements, consider relocating, as enemies will often begin watching the area once they realize where the shots are coming from. Use this spot as a temporary advantage to slow down enemy movement and support your team's push.

Spawn CampPush
Tactical position on 38thParallel
Map overviewclick to expand

This position on 38th Parallel provides a strong spawn camping angle by using the rock as natural cover. Staying behind the rock allows you to remain protected while watching enemy vehicles leaving their spawn area. The cover helps reduce the chance of being spotted immediately, giving you time to line up shots and engage opponents as they move into predictable routes. This spot is most effective when used with patience—wait for enemies to expose themselves instead of pushing into open areas. Be prepared to relocate after getting multiple kills, as experienced players may start checking the angle or using indirect fire to remove you from the position.

Spawn CampSpawn PeakDefensiveCover
Tactical position on 38thParallel
Map overviewclick to expand

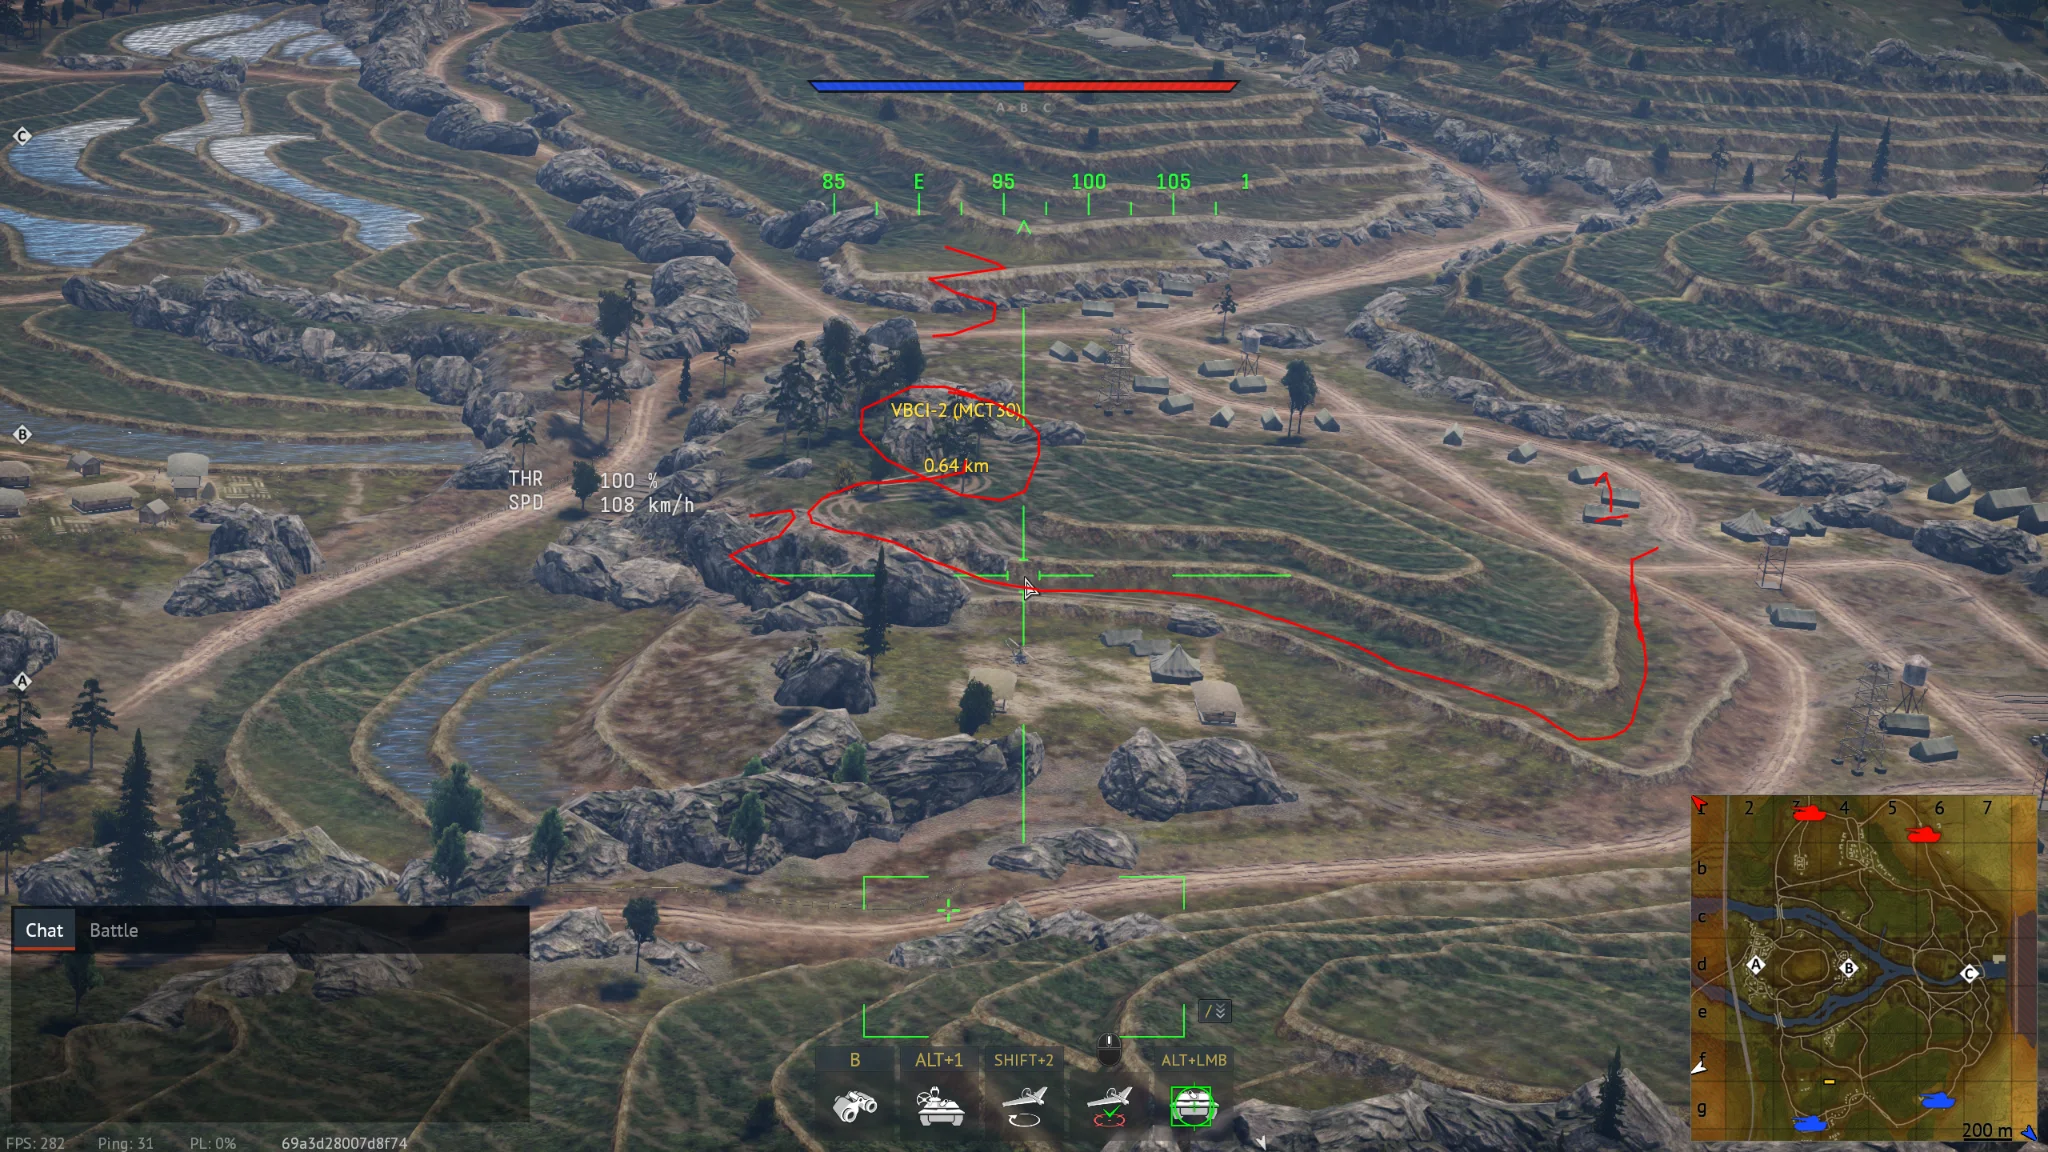
This rat spot has always worked for me but you will need a wheeled vehicle thats somewhat fast, maybe some very quick track vehicles can work though i have not tried. on part 1 you need to be going pretty quick at an angle up the slope. once up you will drive around to part 2, make sure your going a decent speed to get up quick before someone sees you. then there will be a rock to your right, you can use that as cover to watch A and B. you can watch C but be warned there is no cover so if people know your up there you wont last long looking into C.

SniperHigh GroundDefensiveDanger ZoneCover
Tactical position on 38thParallel
Map overviewclick to expand

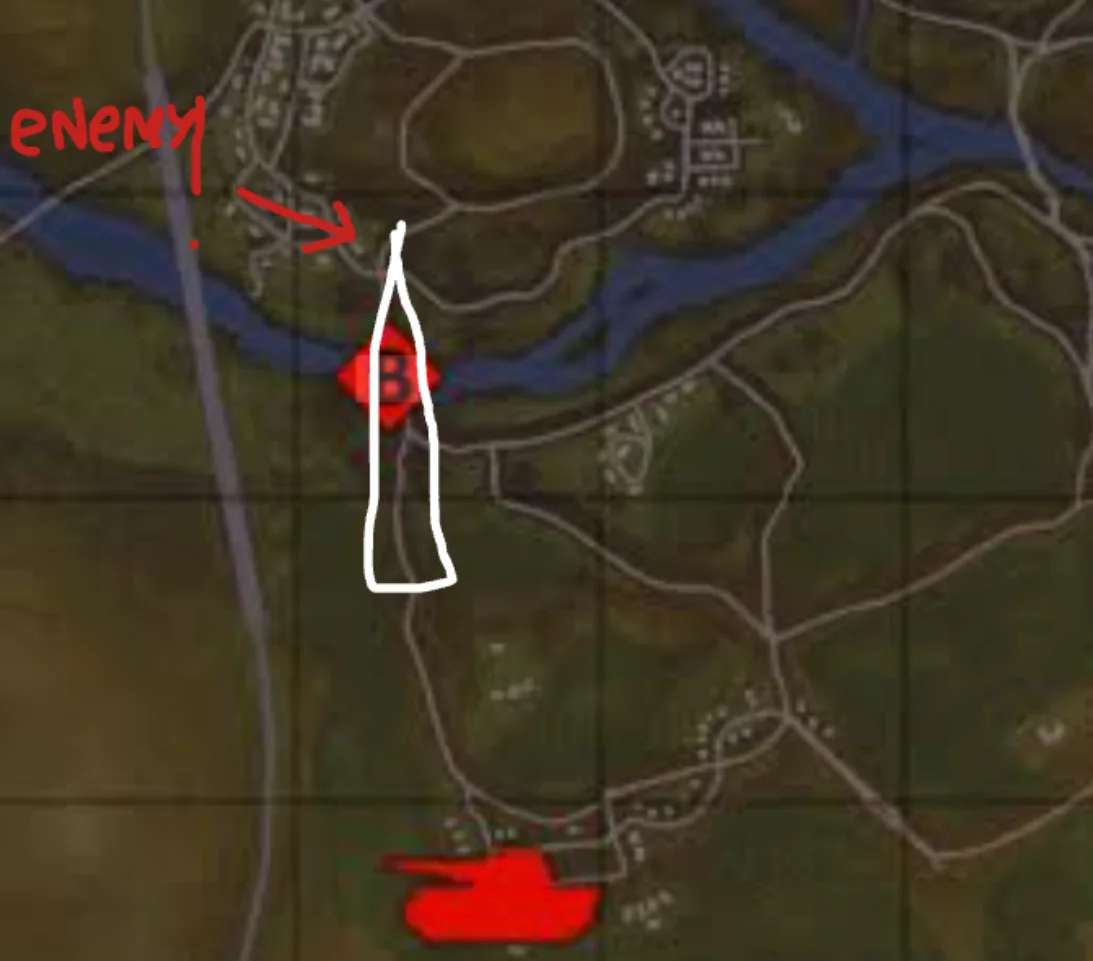
After losing the West, this spot is how you stop the bleeding: it shuts down the inevitable spawn push that follows the collapse. The position's geometry covers the lanes the emboldened enemy uses to press toward your deployment, with high ground, hull-down options, and cover to fight the wave from. It also offers angles on the players pushing through the middle of the map, and it can easily see the ones creeping up the riverbank after capturing B — three pressure directions, one prepared gun. This is the rally-point position: hold it, break the momentum push, and give your team the floor it needs to rebuild the match.

High GroundHull DownDefensiveCover
Tactical position on 38thParallel
Map overviewclick to expand

This position provides a powerful overlook of both the bridge area and the enemy spawn exit. By staying behind the wall, you can position your tank just high enough to achieve a hull-down stance, exposing mainly your turret while keeping your weaker hull protected. This makes the spot especially effective for tanks with strong turret armor, particularly Russian vehicles that can take advantage of their durable turret designs. From this angle, you can engage enemies as they leave spawn or move across the bridge while minimizing your own exposure. Keep the wall between you and the enemy whenever possible, and avoid overextending, as the strength of this position comes from staying protected while controlling important routes.

Spawn PeakSpawn CampSniperCover
Tactical position on 38thParallel
Map overviewclick to expand

Good for fast vehicles, fast reload, and good gun (i.e 48+ km/h top speed, most importantly acceleration. 6s and below reload, Autoloader is optional. Great post pen, 110mm+ penetration, requires at least 45mm of 60 degree pen.) Gremlin spot, I usually see a BMP-2M using this spot, though I suppose; BMP Lineage, BMD-3, CV90 Lineage, US M-Model Lineage, T-34 (and above) Lineage, Waffentrager, M56 Scorpion, and a bunch of rat tanks are definitely possible. After 2 kills, I recommend going to another spot as any competent player will see you

SniperHigh GroundDanger Zone

Strategic Routes · 13 approved

Map overviewclick to expand
Wide Flank

The rushing route to the firing position — relatively safe as sprints go, and it regularly catches people off guard at the far end. The line is the delivery mechanism for the overwatch spot it feeds: driven promptly, it gets you set before the enemy's traffic learns to respect the angle, and the first targets cross your gun genuinely unaware. The relative safety comes from the terrain shielding most of the transit; the surprise comes from how few players expect the position to be manned so early. Run it off spawn, arrive settled, and spend the surprise on the best targets available.

Map overviewclick to expand
Wide Flank

A good route for fast, light vehicles — no one looks up here, and the path provides good cover and firing angles the whole way. The elevation is the secret: the route runs ground that heavier tanks cannot reach and enemies do not scan, so light vehicles get both concealment and geometry for free. From the high line, the angles open onto traffic below that has no habit of checking its ceiling. It is a class-specific privilege — bring the speed to make the climbs and the discipline to use the cover, and the route turns a scout's mobility into a steady stream of unanswered shots.

Map overviewclick to expand
Wide Flank

A good sniping spot at the end of this flank — proven with a Rooikat, and any wheeled vehicle will most likely pay you two to five kills from it. Wheels are the recommendation because the route rewards pace: the faster you establish, the more of the enemy's early movement crosses the position's sightlines. The spot itself offers the long lanes that gun-on-wheels platforms love — targets at range, committed elsewhere, and slow to answer. Roll out at spawn, make the drive in one push, and work the lanes deliberately. The kill estimate is honest, and the Rooikat testimonial is real.

Map overviewclick to expand
Wide Flank

Go here on your first respawn to catch people from their side — the route is timed to the match's second act. By your first respawn, the enemy's attention has hardened toward wherever the fighting settled, which is exactly what this flank exploits: it swings you onto their side of the map behind that attention, where the targets are oriented away and the angles are all yours. First-spawn players cannot run it because the traffic has not committed yet; respawn timing is the feature, not the consolation. Take the line the moment you redeploy, arrive behind their focus, and work the sides they are not using.

Map overviewclick to expand
Wide Flank

Go here to block the enemy respawn — the position sits across the lanes their redeploying vehicles use, and holding it means their reinforcements fight you before they fight your team. Respawn blocking is the logistics half of winning: every vehicle you delay or delete at the source is one that never arrives at the front. The spot's geometry does the funneling; your job is to be established before the wave you intend to block. Take the flank there once the first exchanges are done, set up on the lanes, and turn their respawn point from a resource into a liability.

Map overviewclick to expand
Wide Flank

The next station in the sequence: go here to start spawn camping. This position follows from the blocking spot — once the enemy's respawn lanes are contested, this is where you settle to farm them properly, with your gun over their deployment ground itself. The progression matters: arriving here before the blocking work is done means walking into a live team, while arriving on schedule means presiding over a broken one. Spawn camping's standing rules apply — deliberate shots, priority on anything that can answer, no greed about the exit. Run the sequence in order and the match ends from this spot.

Map overviewclick to expand
Direct Assault

A direct line to a position with a good view over B and over the route running down from the enemy spawn — the objective and its supply line in one field of fire. Watching B alone is productive; watching the lane that feeds B is how you win the point without brawling for it, because the reinforcements die in transit and the circle starves. The direct approach means you can be established early, while the first B wave is still forming. Set up, split your scanning between the point and the feeder route, and prioritize the traffic — every kill on the lane is a kill the point fight never sees.

Map overviewclick to expand
Wide Flank

You will need a fast tank to make this affective early, this can work with slower tanks but you will have to play slower and more carefully to be able to get to the bridge alive. once at the bridge you can shoot people who are unaware in the side at A, do note this spot can be a common place to wacth out for. once past the bridge there will be high ground you can rat in and catch people trying to go back to A from their spawn. you can also see some people at B slightly from this spot but mostly this spot is for watching the road to A

Map overviewclick to expand
Wide Flank
Map overviewclick to expand
Wide Flank

You can get up here with a somewhat fast tracked vehicle — the technique is the price of admission: drive slightly up-angled, then reverse, then forward again, working a zig-zag pattern (like a Z) until the slope yields. It is awkward and it works. From the top, two harvests open up: you can shoot the people coming from the C point, and you can shoot the ones moving between the two spawns up on the hills — both lanes crossing your elevated angle with no expectation of it. The climb filters out nearly everyone, which is why the position stays fresh. Zig-zag up, settle in, and work both lanes.

Map overviewclick to expand
Wide Flank

The priority route — the flank your spawn wave should claim first, before the enemy's mirror move claims it against you. The label is doctrine, not decoration: of this side's options, this line contests the ground that decides how the whole flank plays, and whichever team establishes on it first spends the match collecting the other's mistakes. Treat it as the default opening in every lineup that can make the drive. Commit at spawn, win the race, and the route's angles convert your punctuality into early kills and lasting map control. Arrive second and you will spend the match learning why it is named this.

Map overviewclick to expand
Direct Assault

There are many rocks here to use as cover, and between them you can snipe the players crossing toward B and C — the position is a stone field with firing lanes on the map's busiest commutes. The rocks are the feature: each one is a hull-down station, and the spacing lets you relocate between kills without ever leaving protection. The crossing traffic to the two points renews itself with every respawn wave, so the target supply is structural rather than lucky. Set up behind your first rock, work the crossings deliberately, and migrate through the stones as the return fire maps your last known address.

Map overviewclick to expand
Direct Assault

See it on the map

Open 38thParallel in the RATLINE tool to view pins, draw routes, and contribute your own intel.

Open RATLINE → All Guides